Saturday, September 21, 2013

Skinny Western Omelet Stuffed Breakfast Potatoes

Potato skins for breakfast? Now we're talking! These breakfast stuffed potatoes are not only low in calorie, but they are totally amazingly delicious and you'd never know they were "skinny". Seriously. I don't joke about yummy things that taste like you are being bad. These breakfast potatoes are loaded with healthy egg whites, ham, onion, bell pepper and are covered in a low-fat cheddar cheese melted all over the top. Are you drooling yet? I am. 

These potatoes are super easy to whip up and can even be made the day before you want to cook them up and serve them. I usually make them the day or night before so all I have to do it take them out of the fridge and pop them in the oven to heat through and melt the cheese. The potatoes look fancy and hard to make, but you will fool your friends and family. That I can promise you. To make these yummy breakfast potatoes, you first need to cook the potatoes. You can cook them in the oven, but I like to give them a quick wash, a few pricks with a fork and them pop them in the microwave too cook through. That way you don't have to heat up the whole house. My microwave has a special "potato" cooking option and it cooks them just perfectly. If your microwave doesn't have a "potato" setting, cook your potatoes for five minutes and check them with a knife for doneness. If it's not done, cook on two minutes intervals until the the potatoes are done and a knife goes through the potato clean and easily. If you are cooking them in the oven, it should take about 25 minutes or so to cook them. Once they are slightly cooled, cut the potatoes in half and scoop out the flesh. Make sure to leave about a quarter inch of flesh in there so that the potato skin isn't too flimsy. You don't want all those eggs and goodies to fall out, do you? I don't think so.

Once the potatoes are ready to go, place them on a cookie sheet while you prep the filling. Cook up the onions and bell pepper until they are soft - don't burn them! Add in the ham and warm through, just a few minutes. Then add the eggs and cook until they are soft and ready to go. Once the eggs are cooked, fill each of the potato skins, making sure the eggs are evenly filled in each one. Then top with about a tablespoon of cheese and bake for 10 minutes until the cheese is melted and everything warms together. If you made these the day before, you may need about 20-25 minutes for everything to fully warm up. Check them at about 15 minutes, but they may need a bit more to heat all the way through.

Now here comes the best part and what I know you've been waiting for - these potatoes come in at two potato skins for 305 calories and over 25 grams of protein. Seriously winning! These breakfast potato skins taste like you are being bad, but you are being so so good. Nothing like a yummy, healthy and filling breakfast to keep you going strong all morning long. And these will do just that. They are not just for breakfast though - you can have them morning, noon or night. I often freeze the left over potatoes individually and pull them out for lunch or even dinner (when the captain is away). You'd never know they were frozen! Plus, who doesn't like breakfast for dinner? 

not pictured: potatoes

cooked and cut in half

eggy egg eggs

onions, peppers and hammmm

don't be like me and scoop too much out. oops.

stuffed and topped with yummy yummy cheese

don't drool all over your computer

 Skinny Western Omelet Stuffed Breakfast Potatoes (slightly adapted from Skinny Taste)
 
2 medium russet potatoes
non-stick spray
2 large eggs
3 egg whites
2 tbsp fat free milk
2 thin slices lean ham, chopped
2 tbsp chopped onion
1/2 cup bell pepper, chopped
salt and fresh pepper
4 tbsp reduced fat cheddar cheese

Preheat oven to 425 degrees. Rinse and then pierce potato with a fork a few times all around. Place in microwave and cook about 5-8 minutes per potato (or about 25 minutes in a 350 degree oven). When finished, allow to cool enough to handle. Cut potatoes in half horizontally and scoop out potatoes leaving about 1/4 inch thick wall. Place each potato skin on a cookie sheet while you prepare the filling.


In a large bowl, whisk eggs, milk, salt and pepper. Add onion, pepper and ham into a pan and cook over medium heat until soft and tender.. Spray a medium skillet with non-stick spray and add the eggs to the onion mixture, mixing often. Season each potato skin with salt and pepper and then evenly distribute the egg mixture between the potato skins. Bake for 10 minutes until the cheese is melted and everything is warmed through.


These are perfect for an everyday breakfast or something special to serve for a holiday breakfast. No matter when you make them, you must make them!


Friday, September 13, 2013

Where Have You Been Lately?

Life has been extra very busy the last couple of months. Too busy to blog busy and that's never a good thing.  I figured I owed all my loyal readers and explanation as to why I've been MIA. That's the least I could do. Hopefully you haven't been too worried. I have plenty of recipes to share and catch you up on, but that's for another post. Let me tell you what's been going on the wild wild world of Christina. Are you ready? Buckle up and hold on.

Let's start with the most exciting news first. That only seems fair, right? Well, about two months or so ago the captain and I became homeowners. Yes, you heard me right - homeowners! We looked and looked and looked for month and put in offer after offer only to get rejected one house after another. It was a very stressful and after the third or fourth house, we started to get a little depressed. Okay, maybe it was just me, but we were both rather sad. The captain and I knew that when the time is right it would happen, but it seemed like it never would. One one of our last offers was accepted only to be turned back to us asking for more money. The Sacramento market is on fire and all the houses are going for at least 10% over asking price - there was no way we could give them more money. Nevertheless, that one came and went too. After a couple more offers and a sketchy seller later, we finally changed real estate agents and fell in love with the first house we saw with our new agent. The house needed some work (something I was kinda against before), but there was something special about this house. Maybe it was the big hydrangeas in the front yard. I love love love hydrangeas! It had beautiful brickwork, hardwood floors and it had four rooms instead of three! With the way houses were flying off the market like hot cakes, we thought about it for an hour or two and then put an offer in. The next day, the owners came back accepting our offer! We couldn't believe it - at least I couldn't. With everything we went through with our last agent (I won't even go into details there, just trust me, it wasn't good), it seemed like a dream. After a little negotiation (the roof was old and needed to be replaced), the owners accepted all our suggestions and even helped us cover some of the closing costs! Can you believe it? It was just meant to be. As cheesy as that sounds, it really was. 20 days after we completed all our inspections and signed all the papers (I've never signed my name so much!), the house was ours and the keys were in our hands. We were homeowners!


homeowners!

During the time in which we were buying our first home, I also started my MBA program. I made the crazy decision a year ago that going back to school to get my Masters degree would be a good idea. Maybe I should have thought it through a little bit more. Working full time and going to school is a little crazy and very exhausting, but I know I can do it. This summer, I decided it would be a good idea to start taking classes and get a head jump and a semester ahead of the game. Why not, right? Well, maybe that wasn't the best idea. Between buying a home, class and my sister's wedding (yes, my sister got married this summer too!), I was beyond busy and rather stressed. Too stressed.  I don't think the captain was happy with me. Poor guy puts up a lot with my being a big worry wart, but I couldn't have made it through my first MBA class or my sister's wedding without him. Seriously. No joke. He's really the best boyfriend a girl could ask for. Always there to calm me down. Always there to make me laugh. And most of all, always there to support me in all I do. I know getting through the next 2-3 years of my MBA program won't be easy, but knowing that I have him here by my side makes me that much stronger. Yes, I'm sappy. Sorry. Needless to say, I made it through my first class and am now in the fall semester and taking two more classes. Working full time and going to school is definitely not easy, but I know it will be worth it. Here is what my normal schedule looks like:

Wake up at 5am
Study from 5-6am
Get ready for work and be at the office by 7am
Work until 4:30pm
Head to class and get home around 8pm
Grab a bite to eat and study until 9:30pm
Shower, go to bed and repeat

My hectic schedule doesn't leave me much time to cook, let alone blog, but I promise to try to get in a couple recipes a month. That's the least I can do. You should see my phone  - it's FULL of recipes. Overflowing to be exact. Plus, when the captain and I moved into our house, he came to find out that I own a lot of cookbooks. Apparently too many. So, the captain provided me with a challenge - no more cookbooks until I cook three things from each cookbook. It seemed a bit daunting, but I accepted. It's definitely going to take me longer to get through it than I though, but it's been kinda fun. Don't tell him I said that. The hard part has been avoiding all the new cookbooks out. I have to practically run past the cookbook section at Costco. I'm the crazy lady you see running with my cart. You know you've seen me.

my typical morning before work - a text book and a cup of coffee

With getting our home and starting school, we've also been working on our home. If we didn't' have enough to do already. The house needs a little bit of work and the first thing we did is get a new roof. Who knew they were so expensive! Before our new roof, our house actually had three layers of roof! Yes, three layers! The men who tore it off, did so in just a couple of hours - so fast! For the next week after that our roofers baked in the 100 degree weather (poor guys!) and banged, nailed and stapled our new roof on. It looks great and will keep us dry and safe for the next 30 years. Not that we will be in the house for that long, but you never know.  After the roof went on, we decided it was time to knock down a wall in the living room. It must have been the thing back in 1960's to have a wall that went 3/4 the way across the room. We figured it needed to come out to open the room, so with some help from my Dad, the captain and I went at it with a sledgehammer. The wall took a good day or so worth of work, but it came down. All the way down. It was a little scary with the electrical wire and all those long old nails sticking out, but we knocked that baby down! Then came the nasty stained old carped and the hundreds of staples in the floor under the carpet. My hands hurt so bad from pulling out all those staples. So many! We've taken a break for awhile due to my sister's wedding and traveling for work, but we will be back at it soon. The captain is working on painting our office and getting it ready so I have a better place to study than the kitchen table. I kinda do hog the whole table and don't let the captain watch TV when I need to read. I don't think he likes that so much.

I forgot to tell you that we also ripped out all these old nasty cabinets from the garage!

before and after of the wall!

here is the captain caulking our closet before we painted the whole room. I swear the closet took longer to paint than the whole room.

the roofers are here!

my little sister got married!

we had to add a little DMB to our room. it's a necessity. You don't even want to know how many Dave posters we have.

So between weddings, work, school and working on our house, I've been busier than busy. At least it's all good news though, right? Right! As I said, I promise to not leave you hanging for months again without an update or a great new recipe. Promise! 


Ps. You'll be glad to know I just survived one of hardest midterms I've taken in awhile and got a 94%. Maybe I am made out for this MBA thing after all!


Monday, July 29, 2013

Mint Chocolate Brownie Bites

This will tell you how far behind I am in my posts for you all - I first made these mint chocolate brownie bites back last year during the holidays. I told you it was awhile go, but these mint brownies are well worth the wait. That I can promise you. A chewy slightly minty brownie bite coated in chocolate and crushed Andes candies. Ya, my whole mouth just filled up with saliva. And not to forget, they are great any time of the year - not just the holidays. Just putting that out there. Let's be honest, who can say no to a minty brownie. Not me and I am sure I am not alone here. At least I hope not.

After making oodles and oodles of my salted caramel chocolate chip cookie bars during the holidays, I wanted to switch it up and try something new. When I saw this recipe for mint chocolate brownie bites on one of Pioneer Woman's Saturday airings, I knew I had to make these. For one, I had never made brownie bites and two, brownies with Andes candies? I just had to make them them! There is just something about those minty chocolate little candies that are so so good. Please tell me you've had them before? I sure hope so! If you haven't, the best place to find Andes candies will probably be at your local drug store or Target (don't even get me started on Target - it's a slight addiction!). They are usually readily available and you shouldn't have too hard of a time finding them (they come in a box and you will probably need two of them!). If you do, just ask someone at the store and they should be able to direct you to them or tell you where you can find them. Just try not to eat them all on the way home or before you make the brownies. Those little things are addicting. Just a little warning. And no, I did not eat a whole box on the way home. Okay, maybe half a box. Just kidding. Well, maybe. You'll never know.

These brownie bites are so simple to make that you'll wonder why you never made them before. Seriously. You just throw together butter, sugar, eggs, flour, unsweetened chocolate and a few other minty goodness ingredients and that's it. See, I told you it wasn't all that complicated. The minty flavor of the brownie comes from melted Andes candies and a splash of mint extract. Just be careful when using the extract - a little goes a long way and one trip and extra spill and your brownies could turn into toothpaste brownies. That doesn't sound too good. Once the batter is all made up, you scoop a little bit of dough into a well sprayed mini cupcake pan and bake until they are just cooked. You don't want a dry brownie here! Just when you thought the brownies were done and yummy, we take them to a whole new level - coat and dunk them in bittersweet chocolate. Oh ya, you had me at dunk. If you thought that was good, you then sprinkle them with chopped Andes candies. Just because dunking them wasn't enough. Yes, I so went there and I am totally not sorry. Not in the least bit. These brownies are a little bit minty, a whole lot chocolatey and just the right size. Make them for the holidays or make them just because you want something a little extra special. Just promise me you'll try these. I promise you'll love them!


Christina, please don't eat all the candies before you make the brownies.

where all good things happen - creaming the butter and sugar!

adding in the melted chocolate and candies!

minty brownie batter all ready to go

scooped and ready for baking

cooling brownie bites (and apparently an action shot too)

dunking station

almost to pretty to eat - almost!

Mint Chocolate Brownie Bites (slightly adapted from Pioneer Woman)

50 whole Andes Mints
1 stick 1/2 cup butter, Softened
1 cup sugar
2 ounces, weight unsweetened chocolate
2 eggs
3/4 cups flour
1/4 teaspoon mint extract
1 Tablespoon butter
1 ounce, weight bittersweet chocolate, chopped 


Preheat oven to 325 degrees. Spray mini muffin pan generously with baking spray (don't skip this step or you'll be sorry when they stick all over the pan!)

Melt unsweetened chocolate in a bowl in the microwave. Remove from microwave and stir in 8 Andes mints until all melted. Let cool slightly. In a mixer with the paddle attachment, cream 1 stick of butter and sugar. Beat in eggs one at a time. With the mixer on low, drizzle in the cooled chocolate mixture slowly, mixing until it's combined. Add flour and mix thoroughly. Scrape the sides of the bowl with a rubber spatula, add mint extract, then mix again.  Using a tablespoon or cookie scoop, scoop batter into mini muffin tins. Bake until done, about 13 to 15 minutes. Turn upside down out of pan and allow to cool.

Combine 25 unwrapped Andes mints in a bowl with the tablespoon of butter and chopped bittersweet chocolate. Microwave and stir until melted and smooth. Dip the brownie bites in the chocolate, concentrating on the top "cone" part. Allow to set for a few minutes. Chop the remaining Andes mints and sprinkle them on the top. Set in the freezer for 10 minutes if you need them to set right away. Enjoy!


Just when you thought brownies couldn't get any better.


Monday, July 22, 2013

Skinny Crockpot Turkey Meatballs

I don't know about you all, but I have been pretty much sweating for several weeks straight. With temperatures being well over 100 degrees (most of the time pushing 110!), I have been melting like a popsicle in the Sahara Desert. Seriously. Not to mention, we decided to move into our new house (that's going to take a whole other post to tell you all about!) on the hottest weekend of the year. Go us. This girl can only take that kind of heat for so long, but at least I can't complain too much - our air conditioning works really well and hasn't given out on us yet (thank goodness!). Needless to say, when it's this hot out, the last thing I really want to do is turn on the oven. As much as I want to use our new oven and stock our freezer, I just can't do it - yet. So, when the hot weather comes like this, the best way to make a yummy dinner is in the crockpot.

I am always on the hunt for new and yummy crockpot recipes (ideas are welcome!), and recently came across one for crockpot meatballs. Sounds intriguing, doesn't it? I thought so. For a Sicilian girl, you'd think I'd have the meatball down cold, but that's not necessarily the case. I've tried several recipes over the years and either they are too big, too dry or just lacking in flavor. I'm still not quite sure how the latter occurs considering I use enough garlic to cure a family of the plague. Nevertheless, when I saw this recipe for crockpot meatballs, I had to try it. I was determine to make a fantastic meatball! To be honest, I think my lack of meatball skills was making the captain question my Sicilian heritage! Now we can't have that, now can we? No way jose.

These meatballs are a snap to throw together (you can even make them the day ahead or freeze them for when you are ready to make this fab dish!)- just mix ground turkey breast, bread crumbs, garlic and lots of it, seasonings and fresh parmi. That's it. Simple right? Now comes the fun part. Rolling the meat mixture into balls. Make sure the meat mixture is well mixed, but don't over mix. Am I confusing you now? The only reason I say don't over mix is because it will make your meatballs tough and no one likes a tough meatball. Ones the meatballs are all rolled out, place them in your crockpot with either a quick and easy homemade sauce (recipe is below and you won't believe how easy it is to make!) or your favorite tomato sauce. You can make your own or use your favorite store brand. Whatever you use, just make sure you like it. It's just like cooking with wine - use what you'd drink! Once everything is in the crockpot, go around the pot once (or twice) with a splash of red wine (totally optional!), put the lid on and in 4-6 hours you'll have some of the most tender and yummy meatballs you've ever made. They are perfect just the way they are with a little fresh parmi grated on top and a salad, in a sandwich or even with fresh homemade pasta - yes, I so went there, but don't worry, I'll show you how to make your own pasta soon! Even better these turkey meatballs ring in at 200 calories for four (yes four!) big meatballs. Now that's what I'm talking about!

the line up

everybody into the pool

meatballs rolled and ready to go (you can totally do these ahead of time!)

don't forget the bay leaf

add the meatballs!

toast up a little garlic

dinner is served!
  

Skinny Crockpot Turkey Meatballs  (slightly adapted from Skinny Taste)

For the meatballs (makes 24!)
 
20 oz (1.3 lb) ground turkey breast, lean
1/4 cup seasoned breadcrumbs
1/4 cup Parmi cheese, grated
1/4 cup parsley, finely chopped
1 egg
1 large clove garlic, crushed
1 tsp salt + fresh pepper
1/2 cup red wine, optional

For the sauce (or use two jars of your favorite sauce!):

1 tsp olive oil

4 cloves garlic, smashed
28 oz cans crushed tomatoes
1 bay leaf
salt and fresh pepper to taste
1/4 cup fresh chopped basil or parsley
 
In a large bowl, combine ground turkey, breadcrumbs, egg, parsley, garlic and cheese. Using clean hands, mix all the ingredients and form small meatballs, about 1/8th cup each. In a small saute pan, heat olive oil over medium heat. Add garlic and saute until golden, being careful not to burn.  Pour crushed tomatoes into the crock pot with bay leaf. Add garlic and oil.
 
Drop meatballs into the sauce, add wine (if using) cover and set crock pot to low, 4 to 6 hours. When meatballs are ready, adjust salt and pepper to taste and add fresh chopped basil or parsley. Serve with more parmi, over pasta, enjoy with French bread or even in a sandwich!
 
 
Meatballs aren't so scary anymore!


Sunday, June 16, 2013

Homemade No-Bake Granola Bars

Ever since I made my own cliff bars, I have been on the hunt to try even more homemade granola bar (or granola bar like) recipes. The captain and I both enjoy them (I am totally hooked on the Trader Joes vanilla almond ones right now!) and I am all about trying to remake some of my favorite store bought snacks right at home in my own kitchen. They just somehow taste better too. I am not sure what it is. Maybe it's the extra love that's mixed in? I think so.

One of my favorite bloggers, Christina, over at Dessert for Two (check her blog out, here!) makes these no-bake chocolate chip granola bars for her and her hubby almost every week and recommended that I try them out. If she said they were good, I knew that I had to try them. She's never wrong about a good recipe! Plus, with it getting hotter and hotter (last weekend it was over 110 degrees here in Northern California!), a no-bake recipe is always a winner in my book. The less heating the house, the better. And, these are so fast to make. Like under five minutes fast. Now that's fast! Here's what you need for the basic recipe - a little butter, brown sugar, honey, quick cooking oats, rice cereal, vanilla and chocolate chips. That's it! Just heat up the butter, brown sugar and honey to a good rolling boil and then pour it over all the rest of the ingredients. Just don't mix it with your hands - that would hurt and you'd probably burn yourself pretty badly. Just use a big spoon and mix until it's all combined, press into a sprayed pan and top with the chocolate chips. Bada bing, bada boom. You've got homemade granola bars!

These do need to rest for a couple of hours so they can harden up and cool down, but it's well worth the wait. Once they are cool enough, you can cut them up and enjoy. These granola bars are great for an afternoon snack or even a quick breakfast with some greek yogurt. Or whenever you need a sweet treat. I sometimes need a sweet treat right before bed. I'm strange. These granola bars are a little crunchy, a little sweet and totally delicious. They kind of remind me of those Quaker Chewy Granola bars, but without all those added preservatives and stuff you don't want in your body. For my granola bars, I decided to switch it up and add a few more things. Why not, right? You totally don't' have to add anything more to the base recipe (they are just as good!), but I was feeling coconut, so I added about a 1/2 cup to the oats and rice cereal. Since I had some ground flax seed left over from making cliff bars, I added a couple of tablespoons in as well. Extra fiber and omega-3's in my granola bars is a plus! Again, totally not necessary, but if you are feeling extra wild, you can add whatever you want - almonds, walnuts, raisins, dried cherries or even chia seeds. The flavor possibilities are endless and everyone will love them. In fact, these granola bars may become something you make all the time! I know I will be - the captain gave these two thumbs up and I will most likely be packing these in lunch bag very soon.


love to buy things in bulk so you get the exact amount you need

boil boil boil

adding in a little coconut for fun

a little ground flax seed? why not!

flowing sugar lava

mix everything well, but try not to crush the rice cereal

press into a pan nice and firm

top with chocolate chips!

Homemade No-Bake Granola Bars (from Lauren's Latest)


Makes 10 Bars


1/4 cup butter
1/4 cup honey
1/3 cup packed brown sugar
2 cups quick cooking oats
1 cup crispy rice cereal
1/2 teaspoon vanilla
2 tablespoons mini chocolate chips

My additions: 1/2 cup coconut and 2 tablespoons ground flax seed
Other additions (optional): cinnamon, citrus zest, nuts, dried fruit, etc.

In a large bowl, stir oats and rice cereal together. Set aside. In a small pot, melt butter, honey and brown sugar together over medium high heat until it comes to a bubble. Reduce the heat and cook 2 minutes. Pour in vanilla and stir. Pour over dry ingredients and mix well to moisten all ingredients. Pour into lightly greased 9x13 pan (or a jelly roll pan if you have one) and press out to be about 3/4 inch in thickness. If the pan isn't small enough, just pack it into half or 3/4 of the pan. Really pack down so it all sticks together well. Sprinkle with mini chocolate chips and press down lightly. Cool on a counter top to room temperature for two hours or until the chocolate chips are set before cutting into bars. Wrap in parchment or plastic wrap and store at room temperature.


The next time I make these, I plan to try them with whole almonds and dried cherries for extra crunch and chew!

Sunday, June 9, 2013

Browned Butter Layer Cake - Happy 1st Birthday Lulu!

Today I got to experience one of the sweetest 1st birthday's ever - Miss Lulu. She is such a cutie. In fact, she is one of the cutest baby girls I've seen in awhile. No joke. Most people I show a picture of her say the same thing. That must mean she's really cute! She had such a great party with her family and friends that it practically pooped her out. Poor thing. She made it thought the whole thing without needed a nap! You should have seen her when we she tore into her birthday cupcake though. Not only was it all over, but she ate the whole thing - I couldn't believe it! Who knew such a little itty bitty girl could eat a whole one. I guess it was good!

cupcake all over!
It may seem like a perfect fit for me to blog about the cupcakes I made her today, but I have been saving a very special post for her for awhile now. Well, a little over a year. I wanted to save this special cake post as a little something special for her big o-n-e! Just over a year ago at her baby shower (when she wasn't even around yet), I made her momma a very special brown butter layer cake to celebrate the soon to be Lulu. Yes, you heard me right. Brown butter cake. How good does that sound? Just when you thought cake couldn't get any better, I go and add browned butter. I so went there and am so glad I did. Brown butter is unexplainably (is this even a word?) delicious. What better than to tell you about this fabulous cake then on Lulu's first birthday. It's just perfect.

If you haven't had anything with brown butter, you are missing out. Totally missing out. Brown butter is so nutty and creamy and it's a flavor that is just one of a kind. When Lulu's nana told me about a recipe she saw in Food & Wine magazine for browned butter cake, I had to make it. No questioning at all. I just had to make it. I had never made anything with brown butter at that point and was ready to take on the challenge. Don't worry though - brown butter is not hard to make at all. If you are worried, check out my how to brown butter here. It's not as scary as it sounds, promise! Once you've browned the butter, you are already half way there. Once the butter has cooled a bit, you just simply whip it up and then add eggs, vanilla and then the wet and dry ingredients in stages. If you add all the dry or wet at once, it may lump up on you or get all over you. You don't want either of those things happening, now do you? Once the batter is ready to go (don't try to eat it all with a big spoon - oh boy is it hard not to!), divide the batter evenly into two pans and bake until they are done. You will start to smell the butter as it bakes. No joke. It's heavenly it's own strange way.


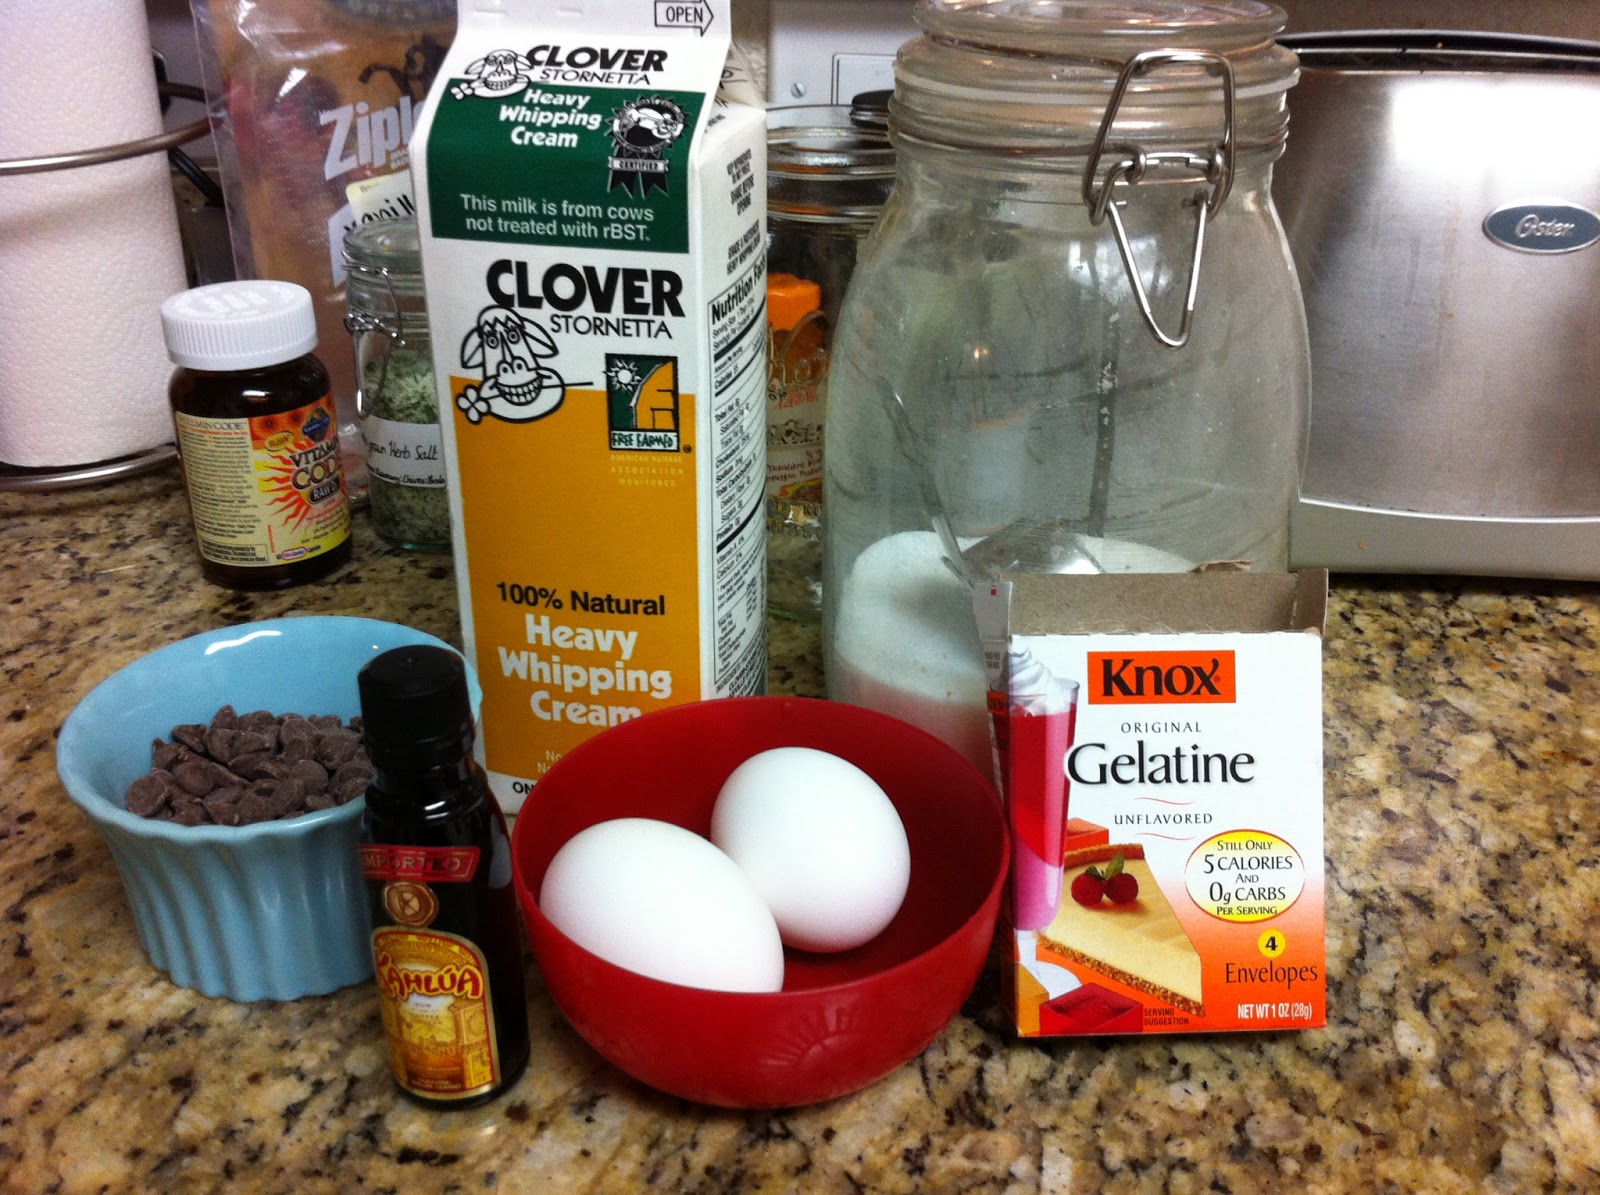
When the cakes are cooling, it's on to making the mousse filling and frosting. For baby Lulu's shower, I decided to go with a milk chocolate mousse filling and a white chocolate (colored pink, of course!) swiss meringue buttercream. Sounds daunting, but it's not. Stay with me. I promise you won't regret it. To make the mousse you start out with gelatin and soften it with some hot water. While that is doing it's thing, whip the egg yolks really well and then pour in the melted chocolate, gelatin, a few other ingredients and mix until combined. Then gently fold in freshly whipped whipped cream to keep it light and fluffy. This is best done the day before since it takes several hours to cool and firm up, but that's your call if you want to do it all in one day. I always like to do things ahead if I can. Especially when it saves me hours of waiting around the next day!

Now, on to the frosting. When I first read the recipe for the frosting, it was not your traditional buttercream as they stated. This frosting is so different, but so delicious. I was a little scared, because it was swiss meringue buttercream, but SMB is not something to be scared about anymore. Let me tell you how to make it. To start, you need to heat egg whites, sugar and salt in a double boiler for about five minutes. Once everything is dissolved, whip the egg mixture with a stand mixer until glossy, about 10 minutes. Once they are ready, you add in the butter a piece at a time and the melted chocolate. It may look curdled at times, but don't give up - that happens. It will all come together. If it looks a bit runny, place the bowl in the freezer for a few minutes and then keep whipping. Once the frosting is ready, you can put it all together! I decorated this cake extra special with fresh roses and a special white chocolate name for baby lulu. I wasn't able to attend the shower, but heard the cake was a hit. I am so glad everyone enjoyed it and am so glad I was able to help Miss Lulu celebrate her 1st birthday today.  Happy happy birthday little one - here's to many more years of memories and fun!

start the mousse first

fold in the whipped cream carefully!

the start of beautiful browned butter

cooling the brown butter. don't skip this step!

swirling brown butter!

now on to the frosting!

start the frosting while the cakes are cooling

whip it good

add in pieces of butter just a few at a time

a little pink color for miss lulu

mousseeeeee

covered in frosting and then set in the fridge to chill

decorated especially for Miss Lulu!

Brown Butter Layer Cake (Food & Wine Magazine)


3 sticks unsalted butter (12 ounces), plus more for greasing the pans
2 1/4 cups all-purpose flour, plus more for dusting
2 1/4 teaspoons baking powder
1 teaspoon salt
1 2/3 cups sugar
1 vanilla bean, split and seeds scraped
3 large egg yolks
2 large eggs
1 1/4 cups milk, at room temperature
Mousse filling and Buttercream frosting (see below)


Preheat the oven to 325°. Butter two 9-inch cake pans and line the bottoms of the pans with parchment paper. Butter the paper and dust the pans with flour, tapping out the excess. In a medium saucepan, melt the 3 sticks of butter. Cook over low heat, stirring occasionally, until foamy, about 5 minutes. Continue to cook, stirring frequently, until the milk solids turn brown and the butter smells nutty, about 4 minutes longer. Scrape the melted butter and browned bits into a large heatproof bowl. Set the bowl in an ice water bath until the butter begins to set around the edge, about 8 minutes. Meanwhile, in a medium bowl, whisk the 2  1/4 cups of all-purpose flour with the baking powder and salt. Remove the bowl from the ice water and scrape up the hardened butter. Transfer the butter to the bowl of a standing electric mixer fitted with the paddle and beat until creamy. Add the sugar and vanilla seeds and beat at medium-high speed until fluffy, about 3 minutes. Beat in the egg yolks followed by the whole eggs. Beat in the dry ingredients and milk in 3 alternating additions, scraping down the side and bottom of the bowl as necessary. Pour the cake batter into the prepared pans and bake in the center of the oven for about 40 minutes, rotating the pans halfway through baking, until the cakes are golden and a toothpick inserted in the centers comes out clean. Cool the cakes in the pans for 20 minutes, then invert them onto a rack to let them cool completely. 

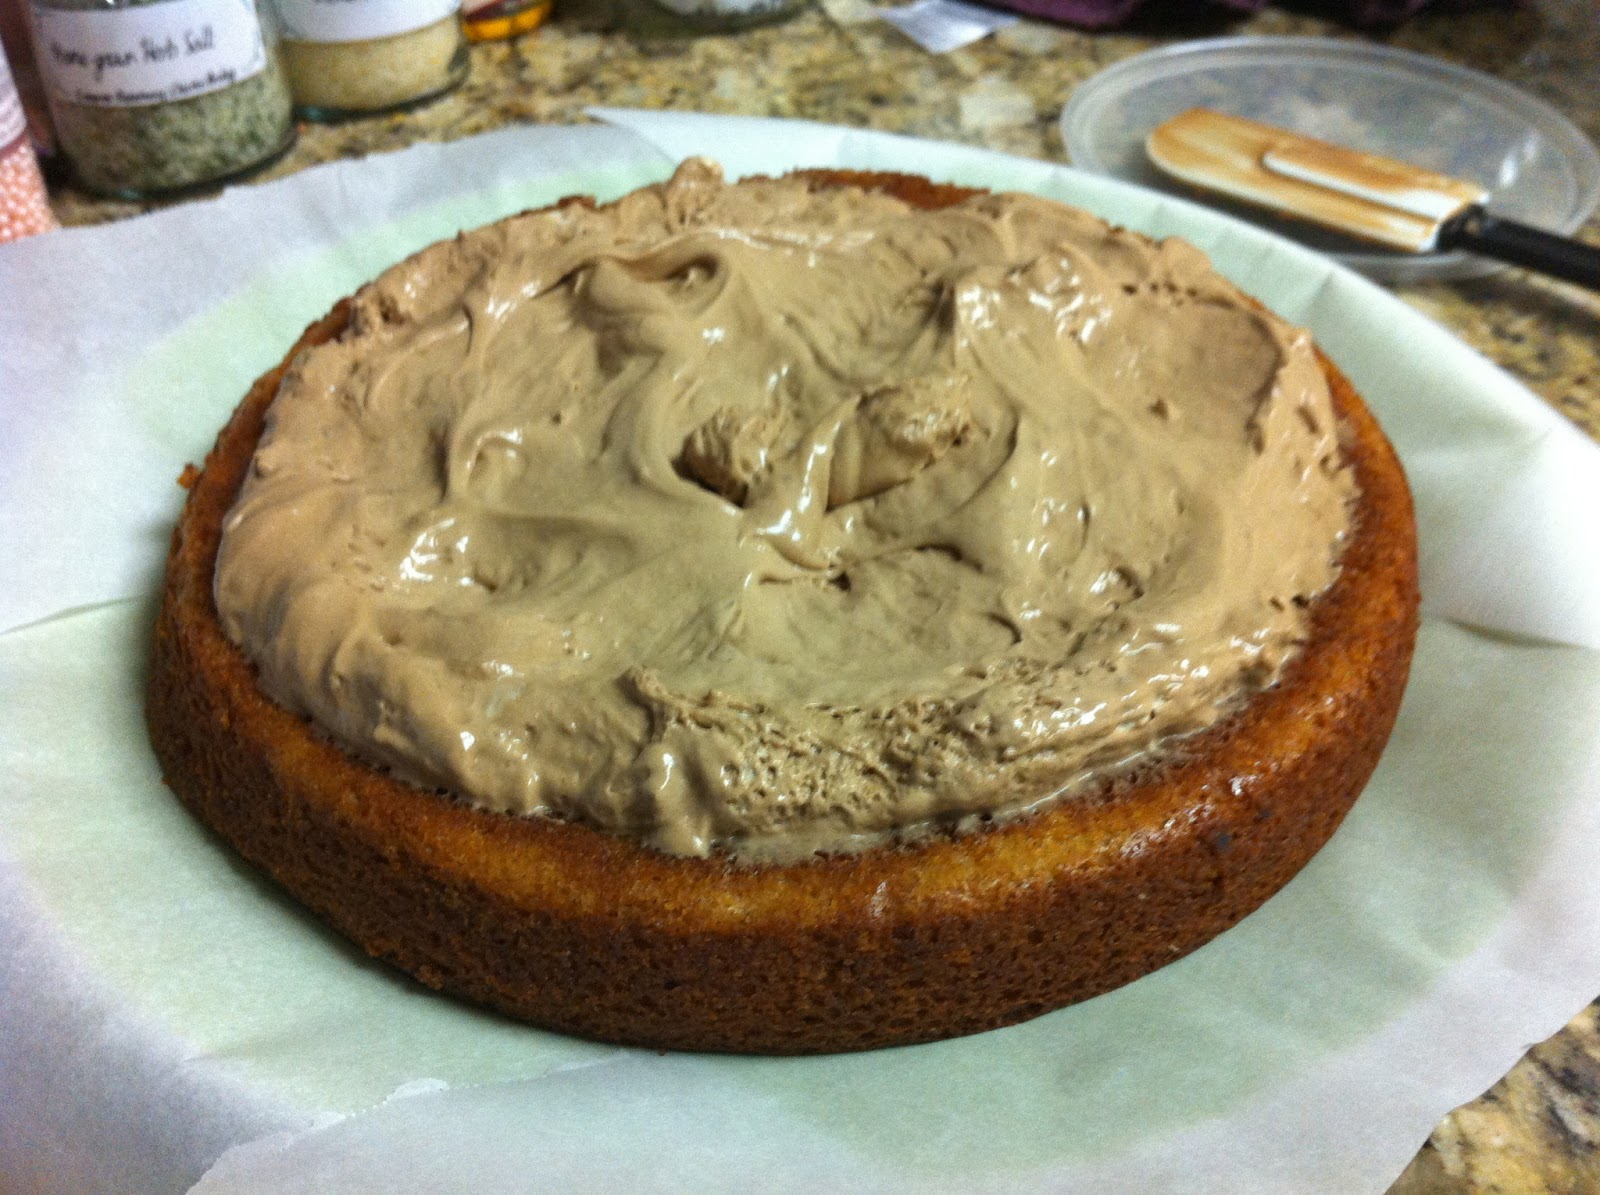
Peel off the parchment paper. Set one cake layer on a platter. Spread the mousse filling on top and cover with the second cake layer. Frost the cake all over with a thin layer of buttercream and refrigerate until set, about 5 minutes. Frost the cake with the remaining buttercream. Refrigerate the cake until the frosting is firm, at least 15 minutes, before serving.  

For the mousse filling:


1/2 teaspoon unflavored gelatin
1/2 tablespoon water
1/2 cup chilled heavy cream
2 tablespoons coffee liqueur
2 large egg yolks
2 tablespoons sugar
Pinch of salt
4 ounces milk chocolate, melted and cooled 
  
In a small bowl, sprinkle the gelatin over the water and let stand until softened. Meanwhile, in a medium bowl, using a handheld electric mixer, beat the cream until softly whipped. Refrigerate until chilled, about 10 minutes. In a small, microwave-safe bowl, heat the coffee liqueur at high power until hot, about 45 seconds. Stir in the softened gelatin until dissolved. In another medium bowl, beat the egg yolks with the sugar and salt at high speed until pale and thickened, about 5 minutes. While beating the yolks, beat in the coffee-gelatin liquid; scrape the side and bottom of the bowl. Beat in the melted chocolate. Using a rubber spatula, fold in the whipped cream in 2 additions. Scrape the mousse into a bowl, cover with plastic wrap and refrigerate until firm, at least 4 hours or overnight. 
 
 For the white chocolate buttercream:

1 cup sugar
3 large egg whites
1/4 teaspoon salt
1/2 teaspoon pure vanilla extract
4 ounces white chocolate, melted and cooled
2 sticks plus 2 tablespoons unsalted butter (9 ounces), cut into tablespoons, at room temperature
 
 
 In a blender or food processor, pulse the sugar until powdery. Transfer the sugar to a medium heatproof bowl and whisk in the egg whites and salt. Set the bowl over a saucepan of simmering water and whisk gently until the sugar is completely dissolved, 5 minutes. Transfer the warm egg-white mixture to the bowl of a standing electric mixer fitted with the whisk. Add the vanilla and beat at medium-high speed until stiff and glossy, about 8 minutes. Beat in the butter a few pieces at a time, making sure it is fully incorporated before adding more. The buttercream should be light and fluffy; if it appears runny at any time, transfer the bowl to the freezer for 5 to 10 minutes, then return it to the mixer and continue. Beat in the melted chocolate until fully incorporated, scraping down the side and bottom of the bowl. Remove the bowl from the mixer and beat with a wooden spoon to remove any air bubbles. 


 Brown butter cake. There's nothing like it!