Monday, April 30, 2012

"Caramel Corn" Chex Mix

Every time I go to a San Francisco Giants game the two things that are a must are 1. getting garlic fries and a beer and 2. making a special baseball treat to take to the game. Oh and don't forget screaming loud for Buster, baby giraffe and Stamos. That's always a must. If you're a true Giants fan, you'll know exactly what I am talking about with the latter two.

For Christmas, my momma, sister and I surprised my dad with tickets to opening weekend. It was the perfect time to cheer on the Giants and to see my dad's brick. After they won the World Series back in 2010, they had a special offer to buy a personalized brick that would be placed around the park - my mom surprised him with his own brick for his 50th birthday last year. Way cool if you ask me! Nevertheless, we all met up in the city (Jeffy and the captain too!) and enjoyed a beautiful day in the bay. It was sunny, warm and although they lost, we had a great time. Here is a view from out seats!

view from the bleachers!

view from my parents weekend condo in the city! helloooo AT&T park.

Last time the captain and I had a weekend in the city and went to the Giants game, I made caramel corn. You can find the recipe here. It was pretty darn good, but it makes a lot of it. Since that was such a hit and a yummy sweet treat after the garlic fries, I thought I'd try to make a variation of it. Earlier in the week I bought a box of chocolate chex on a whim. Well, maybe it wasn't on a whim. I was starving after the gym and well, let's just say going to the store hungry is never a good idea. I snacked on about half of the box during the week and then it came to me - caramel corn chex mix! Sounds good, right? I thought so. On the back of the box there was a link to their website (who knew there were so many varieties of chex mix you could make!), and I found the perfect recipe. Caramel crispy chex. This recipe called for M&M's, but I decided to make it more caramel corny- take out the M&M's and add in peanuts. Too bad I totally forgot to put those in. Oops. At least my addition of Cheerios and pretzels made in it mix. 

The results - it was crunchy, it was sweet, and it was salty. It was the perfect baseball treat! Of course you don't have to wait to go to a ball game to make this. In fact, you shouldn't. It takes less than 10 minutes to make and everyone is sure to love it. I packed individual bags for everyone - one for mom and dad, one for Jess and Jeffy and then one for the captain and I. Everyone woofed their bag faster than I thought they would. Guess I should have packed more!

ingredients

dry ingredients mixed together

butter + brown sugar + all the bad stuff that makes it taste so good

caramel goodness

coating the dry with the wet

coat and cook in microwave for 5 minutes (stirring every minute to prevent burning)

finished and cooling!

 Caramel Corn Chex Mix (slightly adapted from chex.com)

4 cups Rice Chex cereal
4 cups Corn Chex cereal
1cup packed brown sugar
1/2 cup butter or margarine
1/4 cup light corn syrup
1/4 teaspoon baking soda
1 cup cheerios + 1 cup salted pretzels


1. In large microwavable bowl, place cereals and pretzels.

2. In microwave safe bowl, microwave brown sugar, butter and corn syrup uncovered on high about 2 minutes, stirring after 1 minute, until melted and smooth. Stir in baking soda until dissolved. Pour over cereal, stirring until evenly coated.

3. Microwave uncovered on High 5 to 6 minutes, stirring and scraping bowl after every minute, just until cereal begins to brown. Cool 5 minutes; stir in candies. Spread on waxed paper to cool; break into bite-size pieces. Store in airtight container.


 If you remember, make sure to stir in about 1 cup of peanuts before you spread the mixture on the wax paper to cool! It's like cracker jacks, but way more addicting.


Wednesday, April 25, 2012

Best-Ever Crock Pot Barbecued Ribs

Two crock pot recipes in a row? Wow, you're lucky.

I'm going to keep this one short and sweet because it doesn't need much explaining. That and it is easy easy. Before I go any further, I'll be the first to admit, I am not a big rib girl. I am not sure why. Maybe it's because I never really ate them growing up? I love BBQ, so it's rather strange I don't prefer them. Give me a big juicy barbequed hamburger any day and I'm one happy lady. The first time I had these was on a weekend with my mom. My dad was out of town in Vegas with some of his buddies, so I went over to my parents house to hang out with my mom and we decided to try these out for dinner.

These are super easy to throw together - rub the ribs with the spices and place in the crock pot. No liquid at all. Strange right? Just roll with it. Right before the ribs are done,  pull them out and slather on the sauce. Put the saucy ribs back in the crock pot and let them get sticky sweet. That's it. One, two, three, ribs! Now, like I said, I don't really enjoy ribs, but these changed my mind. They are smokey sweet from the smoked paprika (don't skimp on buying this - the spice gives the ribs that BBQ kind of flavor) and these babies are literally FALL OFF THE BONE. My momma and I could not pull these out of the crock pot without the bone just sliding off the meat. If that doesn't say tender, then I don't know what does. Yum! This has quickly become a family favorite - my sister has been known to eat quite a few of these. You might even say she is as addicted to these as I am.

spices + ribs

rubbed and ready for cooking

sauced up and ready for eating!

Best-Ever Barbecued Ribs (from Crock-Pot Slow Cooker Best-Loved Recipes)

1 teaspoon paprika
1 teaspoon salt
1 teaspoon dried thyme
1/4 teaspoon black pepper
1/8 teaspoon ground red pepper
3 to 3-1/2 pounds well trimmed pork baby back ribs, cut into 4-rib pieces
1/4  cup ketchup
2 tablespoons brown sugar
1 tablespoon Worcestershire sauce
1 tablespoon soy sauce

Coat crock pot with cooking spray. Combine paprika, salt, thyme, black pepper and red pepper. Rub mixture onto meaty sides of ribs. Place ribs in crock pot. Cover and cook on low 7-8 hours or on high 3-3 1/2 hours or until ribs are tender.

Combine ketchup, sugar, Worcestershire and soy sauce - mix well. Remove ribs from crock pot and discard cooking liquid. Coat ribs with sauce, return to crock pot and cook on high 30 minutes or until ribs are glazed.

Serve with a big green salad and some corn and you are set. Perfect for any weeknight or weekend.

Tuesday, April 24, 2012

Crockpot Honey Sesame Chicken

I have been eying this recipe for quite some time. I love the crock pot and try to use it anytime I can. It's great for the winter when you want to come home to nice warm stew or soup and it's great for the warmer summer days so you don't have to heat up the whole house with the oven. If you don't have one, go get one. I promise you will use it more than you think you will.

Now, let me tell you where I saw this recipe - Pinterest. I hate to admit it, well, not really. I am totally addicted to Pinterest. If you don't know what that is, let me tell you. Here is what the Pinterest website says and I think they explain it best (although they forget to tell you that you will spend endless hours on the website and get hooked quick!). Pinterest lets you organize and share all the beautiful things you find on the web. People use pinboards to plan their weddings, decorate their homes, and organize their favorite recipes. Best of all, you can browse pinboards created by other people. Browsing pinboards is a fun way to discover new things and get inspiration from people who share your interests. See, doesn't that sound like fun? My biggest board is probably my foodie one, but I have a board for just about everything - food, clothes, dream kitchen, craft ideas, and the list goes on and on. If you want to see my pins and start following me, you can do so here.

I don't remember when I saw this chicken recipe, but I knew when I pinned it, I had to make it. Honey + sesame + chicken. How can it not be good? With just a few simple ingredients such as honey, soy sauce, onion and ketchup, I had the chicken in the crock pot and ready to go in a matter of minutes. All you do is place the chicken breasts (you can use thighs if you want too, but I'm a white meat girl) and then pour the sauce over the top. That's it! The only downside to this crock pot recipe is that it only takes four hours. This is not one to let go all day - for a couple of reasons. 1. The honey will burn and stick to your crock pot and burn like no other and 2. you will have tough, over cooked, rubber band chicken. Burnt rubbery chicken does not sound good to me and I hope that it does not sound good to you. So, when I tell you a few hours, please trust me. I used huge chicken breasts from Costco and they were done in about three and a half.  Once the chicken is cooked, thicken up the sauce, add in the chicken (shredded or chopped - I chopped mine into bite size chunks) and then serve! I served mine over a small scoop of brown rice and a side of veggies. The perfect meal. A little sweet. A little spicy. A little tangy. Thank you Pinterest!

honey sesame love sauce

forgot to take an ingredient shot. here is what was left on the counter when I remembered.

sauce + onions + garlic + chicken

cornstarch slurry

cooked chicken breasts

adding in the cornstarch to thicken up the sauce a bit

yummy in my tummy

Crock Pot Honey Sesame Chicken (slightly adapted from www.sixsistersstuff.com)

4 boneless, skinless chicken breasts (thighs would be fine too)
Salt and pepper
3/4 cup honey
1/2 cup soy sauce
1/2 cup diced onion
1/4 cup ketchup
1 tablespoon olive oil
2 cloves garlic, minced
1/4 teaspoon red pepper flakes (optional)
4 teaspoons cornstarch dissolved in 6 Tablespoons water
Sesame seeds

Directions:

Season both sides of chicken with lightly with salt and pepper, put into crock pot. In a small bowl, combine honey, soy sauce, onion, ketchup, oil, garlic and pepper flakes. Pour over chicken. Cook on low for 3-4 hours or on high 1 1/2 – 2 1/2 hours, or just until chicken is cooked through. Remove chicken from crock pot, leave sauce. Dissolve 4 teaspoons of cornstarch in 6 tablespoons of water and pour into crock pot. Stir to combine with sauce. Replace lid and cook sauce on high for ten more minutes or until slightly thickened. Cut chicken into bite size pieces, then return to pot and toss with sauce before serving. Sprinkle with sesame seeds and serve over rice. 

I cut back on the honey on this sauce, but if you want it a bit sweeter, you can add the full cup the original recipe stated. This one was a winner - quick, easy and delish. Can't wait to try out some of the other recipes I've pinned!


Sunday, April 22, 2012

Salted Hot Fudge Sauce

This is going to be short and sweet. Or I should say short, salty and sweet.

I had never made hot fudge sauce before this and now that I have, I am not quite sure why I never did. It was so quick and easy - they perfect thing to have in the fridge and ready to heat up to make the captain a hot fudge sundae. Ya, I bet he'd like that. If he gives me the cherry on top, I'll make him one. That's a fair deal right? I think so.

All you need for this fudgy deliciousness is a few ingredients. All of which I am willing to bet you have in your kitchen - unsweetened chocolate, butter, salt, vanilla, corn syrup and few other basic items. Melt, boil, boil, boil and you have some delicious sauce to accompany any ice cream. Because this has a very prominent saltiness, it would best be paired with a sweet ice cream. Well, ice cream is always sweet, but you know what I mean. This fudge is totally amazing with the brown butter ice cream I recently made. I totally dipped the freshly churned ice cream into the hot sauce. I was in heaven. So sweet. So salty. So so delicious! Just don't go taking a huge spoonful of hot fudge straight from the pan. You will be sorry. Hot lava fudge on your tongue is not a good thing and might kind of hurt. Just saying. And no, I did not do that (in case you were wondering).

no, there is no pepper in this fudge

corn syrup and sugar

adding in the melted chocolate and butter to the boiling water

whisking, whisking, whisking

boiling sauce. resist the urge to lick the spoon.

Salted Hot Fudge Sauce (slightly adapted from www.alwayswithbutter.blogspot.com)

4 ounces unsweetened chocolate, melted
3 tablespoons butter
2/3 cup water
1/3 cup sugar
6 tablespoons corn syrup
2 teaspoons sea salt
1 tablespoon vanilla extract

Melt the butter and chocolate in the microwave on low power. Cook for a minute, stirring after every minute cooked. Cook until melted (this should take a couple of minutes).

In a small sauce pan bring the water to a boil over medium heat, then whisk in the butter and melted chocolate.  Whisk in sugar, corn syrup and salt. Let mixture come to a boil, stirring occasionally. Let boil for 10 minutes. Remove from heat and let cool. Serve while warm.


This hot fudge sauce can be made ahead of time and kept in the fridge. When you are ready to use, just heat up on the stove or microwave and pour over ice cream or whatever you like. Just be careful not to eat it all straight from the jar! It's addictive sweet & salty.

Brown Butter Ice Cream

This ice cream was kind of a last minute thought, but boy am I glad I made it. I decided to make this ice cream for Nancy, my awesome co-worker and friend who ordered the cake I was telling you about in my how to brown butter post yesterday. Since I was already browning tons of butter for the cake and I had extra cream in my fridge, I thought I'd put both together and make her an extra decadent surprise - brown butter ice cream. I figured either she could serve it with the cake or keep in in her freezer for herself! Part of me hopes she kept this for herself.

This ice cream is so crazy good. I can't even explain it. That and it's pretty easy to make too. At least I think so. The first thing to do is brown the butter so you can let it cool while you are making the rest of the ice cream custard. Then, bring the cream, milk and vanilla to a simmer in a pan while you have the egg yolks and sugar mixing up and getting all fluffy. Then, drizzle in the wonderful cooled butter. Mmm brown butter. Once the milk is warm, slowly (SLOWLY) pour it into the eggs and butter while keeping the mixer running on the lowest setting.  You don't want to be splattered with hot milk. Burns will ruin your day. Trust me. Also, you don't want to just dump the hot milk in there otherwise you'll get scrambled egg ice cream. That's just nasty. That also makes for a bad day.

Once the eggs and hot liquid are combined, pour the mixture back into the pot you used for the milk and cream. Keep on stirring until it becomes thick - this should take about 20 minutes. You'll know when it's done when it coats the back of the spoon. The way to really know is when you put your finger through the custard on the back of a wooden spoon and the line stays. That and the custard will be thick. Don't be scared. You'll know when it's ready. I promise! Once it's thick, pour into a bowl or large tupperware and chill in your fridge for at least six hours or over night. I would recommend overnight just to makes sure it's chilled nice and good before you churn it in your ice cream machine. Please resist taking big spoonfuls of this while it's cooling. I'll admit right now I got so excited and ate like three big spoonfuls. Okay, four, but who's counting.

I am going to tell you right now that the flavor on this ice cream is indescribable. It's sweet. It's nutty. It's caramel-y with a hint of toffee. It's just freaking delicious. I also whipped up a batch of salty hot fudge sauce (SO easy to make - I'll show you!) to top this ice cream - that just put it over the edge and was the perfect combination to the sweet buttery ice cream. Oh man I wish I had made a double batch of this ice cream so I could have a scoop right now!

ingredients

the original recipe called for vanilla bean paste. I didn't have that, so I used one of my new vanilla beans. You can use extract too if you don't have beans or paste.

whipping up the yolks and brown sugar

cooled brown butter

pouring in the butter

SLOWLY adding in the hot cream

don't stop stirring when you are cooking the yolks!

my ice cream tip - always strain your custard base to remove any curdled eggs. it happens. don't cry if it does.

pouring the chilled, thick brown butter custard into my ice cream machine

BROWN BUTTER ICE CREAM GET IN MY BELLY

makes about one quart!

Brown Butter Ice Cream (slightly adapted from www.alwayswithbutter.blogspot.com)

8 tablespoons butter
2 1/2 cups heavy cream
1/2 cup whole milk
6 egg yolks
1 cup brown sugar
1/2 teaspoon salt
1 vanilla bean (seeds scraped out and and place into milk and cream. Or 2 teaspoons vanilla extract)
an ice cream maker

Heat the butter in a skillet until brown bits form on the bottom (it should have a rich, nutty smell). Set aside.

In a saucepan, bring the cream, milk, and vanilla to a simmer. In a mixer, whisk the yolks, brown sugar, and salt until fluffy. Slowly add in the butter. Once combined, gradually and slowly add in the simmering milk mixture (remove the vanilla bean pod at this point and leave the seeds!). Pour all back back in the saucepan and cook over low heat, until thickened (it should coat the back of your spoon). Pour into a container and chill in the refrigerator until completely cold - at least six hours or overnight. Run through your ice cream maker, following the maker’s instructions. This should take about 15 minutes, give or take. Once churned, place in a freezer safe container and freeze for about 4 hours to firm up.


There is not much more to say than get in your kitchen and make this NOW. I was a little weary to the flavor when reading the recipe, but if this ice cream can make me a believer, it will make you one too. You will look at butter in a whole new light!


Saturday, April 21, 2012

How To: Brown Butter

I'll be the first to admit - I don't use a whole lot of butter in my everyday cooking. Paula Deen may be upset with me. Sorry Paula, I still hope you love me anyways. Baking is another story though. Lots of butter there, but that is necessary. At least I think so.

I've never ever ever cooked with, let alone made brown butter. Or as the French say, beurre noisette. Ya, I can't pronounce that. I'm sure it sounds pretty though. Brown butter fell into my lap several weeks ago when one of my co-workers ordered a cake from me for her daughter's baby shower. I am going to keep the kind of cake I made a secret until I reveal the whole recipe, but let me just say it contains brown butter. Lots of rich, dark, nutty brown butter.

I was a little nervous to make brown butter because after all the research I did (I must have studied that darn cake recipe for a week!), everyone said that brown butter turns from beautiful to burnt in a matter of seconds. I was afraid that if I turned around for just a second that I would have a disaster on my hands. Well, lets just say, making brown butter is easy and is not as scary as I thought. All you do is place your butter (as much or as little as you want) in a pan over medium heat and let it do its thing. After all the butter is melted it will start to foam up - this is good. Swirl the butter around a bit to make sure it's browning evenly. Once the foaming begins the butter will start to brown and you should begin to see this on the bottom of the pan. You will also see bits there too. Don't get rid of those bits at the end, save them. That's where all the flavor is! From start to finish, browning butter takes about 15 minutes. Depending on the pan and how high or low your heat is, this could take longer. Just watch it and when it gets deep tan and you can smell it (your nose knows), place it in a small (non metal) bowl to cool.

You can use this amazing butter in baking, in sauces or even in ice cream. Yes, I went there. Ice cream.  Brown butter ice cream. So sinfully delicious it's not even funny. I will show you that recipe soon too.  Brown butter might just be my new favorite thing.

butterrrrrrrr

starting to melt

melted butter

starting to foam!

there is brown butter under there, I swear.

browned butter!


I used a dark non stick pan for this and had no problems knowing when the butter was perfectly brown. Some cookbooks state that using a metal or light bottom pan is best, but as long as you tend to it and don't walk away for long periods of time, you will be fine. I am a strong advocate for using what you have in your kitchen tool stock - no need to get a special pan just for this. Now that's just crazy!

Sunday, April 15, 2012

Maple Pecan Scones

If you didn't know this already, I love maple. I may have a mild obsession with it. If you were to take me to a donut shop, I'd be the crazy lady who picks the maple bar over the the chocolate donut or the one filled with nutella. Ryan got one filled with nutella not too long ago when I was on the whole no chocolate for lent thing. Boy was it hard to not want to totally lick his donut. I do love chocolate, but maple is where my heart is. Sorry. My little tiny donut hole was good, but I was dreaming that it was a big old maple bar the whole time I ate it. Well, the two bites it took to eat it.

I'm off the donut kick now. Back to scones. When I received my new Pioneer Woman cookbooks in the mail, I quickly browsed through them, but immediately stopped on the page with these maple scones. It must have been the word maple that caught my eye. Have I mentioned how much I love maple? Ha. The scones looked easy to make and I already had everything in the pantry and fridge I needed to make these bad boys. This recipe called for maple extract. Did you even know there was such a thing? I sure didn't. I guess I should have known better since there is an extract for most things - even root beer. I wasn't about to go trying to hunt down maple extract, so I decided to just use maple syrup. If you have maple extract, go for it, but I am willing to bet you don't. Maple syrup will work just fine.

These maple pecan scones turned out light, fluffy and had that perfect scone texture. A little crumby, but not dry at all. Some scones can be really dry. No one likes a dry scone! Just remember - when you are rolling the dough, do not over work it. It will make your scones tough! That's a no no. These scones were the perfect complement to the captains and I's omelets (I'll show you how to make them soon. I promise, omelets aren't scary!), but be warned, they are huge scones. I'd say two people could share one. Or, if you are really hungry, or a maple freak like I am, you may eat one to yourself. No, I didn't eat a whole one. I wish I had though. I brought the left overs to work the next day (this is what I usually do so I don't keep them at home and eat them all) and one of my coworkers said this was the best scone she'd ever had. If that doesn't convince you to go make these, I don't know what will. Brew up a pot of your favorite coffee or tea and sit down with one of these scones. You won't regret it.

I accidentally deleted the ingredient picture. oops.

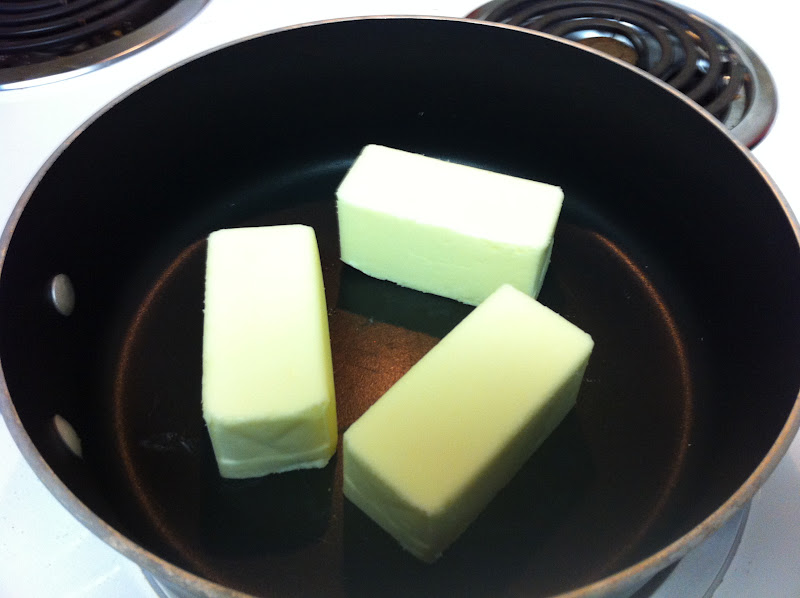
cubed, cold butter. must be really cold!

cutting in the butter. you can also do this with a hand or stand mixer. no need to go buying a pastry cutter just for this.

cut until it resembles pea size crumbs

add in wet ingredients

roll out into a circle

cut into eight pieces

post bake

frosted. mmm!

Maple Pecan Scones (The Pioneer Woman)

3 cups all purpose flour
1/3 cup sugar
5 teaspoon sugar
1 teaspoon salt
2 sticks butter, chilled
¼  cup pecans, plus more for sprinkling
1 large egg
¾ cup heavy cream

Maple Icing
1 lb. powdered sugar
¼ cup milk
4 tablespoons butter, melted
Splash of strongly brewed coffee
Dash of salt
5 tablespoons (or more or less) maple syrup

Preheat the oven to 350 degrees.

Stir together the flour, sugar, baking powder and salt.  Cut the cold butter into the flour mixture until the mixture resembles coarse crumbs. Finely chop the pecans and stir into the flour mixture.  Mix the egg & cream together and stir into the flour mixture until just combined. Turn the mixture onto a cutting board and push it together into a large ball. Don’t knead too much—only until it sticks together. Gently roll the dough into a 10-inch circle and cut the round into eighths.

Transfer your wedges to a baking sheet that has been covered in parchment paper or lightly sprayed and bake for 20 to 25 minutes, or until golden brown. Check at 18 minutes just to be safe. Your oven may run hot. Allow the scones to cool completely.

Meanwhile, mix your glaze together and pour generously over each scone. Sprinkle with chopped pecans!


This scone is a great base to swap out the maple and pecans and say add in orange zest in place of the nuts and orange juice in place of the maple in the frosting. Just think of the possibilities of combinations you can try!