Tuesday, February 21, 2012

40 Days & 40 Nights

Hello readers! I know I've been gone for over month (has it really been that long?), but I am back and ready to blog and give you tons of great recipes to try (and ones I am sure you will love as much as I do)! But, before I get back into the swing of things and dazzling you with photos and laughter of yummy recipes, I want to fill you in on a recent challenge I've decided to take on. 

This time of year brings lent. Most of the people I know are deciding what they are going to give up and go without for the next 40 days. I am not catholic, but have always contemplated, "should I give something up?". As the years have gone by, I never did it, but for some reason, this year, I have decided to challenge myself and step it up a notch.  I thought about all of the things I could give up and boy was it hard to come up with something that was a challenge, but not completely crazy. Well, what I am about to tell you might seem crazy (especially seeing how much I love it), but I know I can be strong and make it through the next 40 days. Before I go telling you what I decided to give up, let me tell you about the few other things that passed through my mind while I was trying to decide:

  1. Caffeine - That wouldn't work considering I don't drink it any more. I stopped drinking coffee almost a year ago and stopped having my monthly diet pepsi last month. I'm trying to drink mostly water and staying away from artificial sweeteners as much as possible. It's not easy, but I'm determined to keep with it.
  2.  Wine - Ya, right. I'm sure I could give it up for a month, but maybe next year.
  3. Facebook - Technology is so addicting, so this one would be really really hard.
  4. Television - I am addicted to a couple of shows (my boyfriend will probably hate my for admitting this on my blog, but my guilty pleasure is Jersey Shore - sorry Ryan!) and look forward to watching them after a long work week. That and I can't miss Top Chef and 2 Broke Girls.
  5. Blogging - Since I already took a month off, I don't think I should take another month off. Most of my readers are already sad I've been gone this long!
A few other things came to mind, but nothing seemed quite right. That is until it was staring me right in the face - CHOCOLATE! 

Yes, you are hearing it right. I've decided to give up anything and everything chocolate for 40 days and 40 nights. I know I am crazy, but seeing as how much I love chocolate and love to bake with it, this is going to be a real test of my willpower and strength. I try not to eat too much chocolate so my booty won't grow, but if you put a piece of yummy chocolate cake in front of me or a big warm chocolate chip cookie, it's really hard for me to walk away. I mean, let's be real here. Who wouldn't have a hard time with that, right? 

I'm sure you'll hear my ranting and raving over the next several weeks about my chocolate withdrawals (Ryan - sorry ahead of time if I get cranky!), but I am feeling good about this choice and know I can stick with it. The best part of this is knowing at the the end, it will be my birthday, and I will be eating a BIG piece of chocolate cake. Or chocolate cheesecake. Or a big ooey gooey brownie. That I can promise you. For now, I am off to enjoy my last night of being able to have chocolate by eating a piece of Ryan's left over chocolate birthday cake. Go big or go home, right?

Now, here is my question to you - what would you be willing to give up?

Wednesday, January 18, 2012

Better Than Brownie Cookies

I know you're already thinking - can these cookies really be better than brownies? And I'm going to tell you right now, they are pretty darn close. My sister doubted me when I brought these over for her and her boyfriend to try, but they ate them up fast and even asked for more. My mom tried to only eat half of her cookie and ended up eating the whole thing. My dad said they were the best cookie he had (maybe he was just saying that to be nice) and were way better than brownies. I gave a whole bunch of them to Ryan too. He thought they were made with pudding because of the dense and most texture. Nope. No pudding here. Although, pudding in cookies - hmm, I may have to experiment with this. I've seen, but never tried, pudding in cakes. But pudding in cookies. You may be on to something here, dear. I even added a little special touch to these that really brings out the chocolaty flavor. Can you guess what it is? Sorry, I'm not going to tell you right now. You'll just have to keep reading to find out what it is!

The whole reason I decided to do this recipe is because I had a TON of bittersweet chocolate chips left over from all my holiday baking. You think I'd be able to resist the 5 pound bag sitting in the pantry and use it for my baking, but nope. I'd take a small handful here and there for dessert. Maybe even eat them with a blob of peanut butter. Ya, I know, bad. But it's so good. Needless to say, I needed to find a way to get rid of those chips and FAST.  I can't resist them. I may have a problem.

maybe I should have removed the kitchen wipes from this photo. oops!

here is my double boiler. you don't need anything fancy, just use what you have in your kitchen. If you use a metal bowl like me, use a pot holder. it gets HOT!

 wet & dry

melted chocolate and the secret ingredient!

adding the dry

baked and cooling. the recipe said it made 24 large cookies, but somehow mine made 28. and that was after eating some of the batter (don't tell!)

close up of the cookies. yum!


Better-than-Brownies Chocolate Cookies (slightly adapted from browneyedbaker.com)
Makes 28 large cookies

2 2/3 cups (about 16 ounces) bittersweet chocolate, chopped ( I used chips, so no need to chop)
4 tablespoons unsalted butter, at room temperature
4 eggs
1 1/3 cups granulated sugar
1 teaspoon vanilla extract
½ cup all-purpose flour
½ teaspoon baking powder
1 cup bittersweet chocolate chips ( I needed to get rid of my chips, so I used more bittersweet here. Ryan mentioned it was a bit bitter, so I will be trying semisweet here next time)
1/2 teaspoon instant espresso powder (optional)


1. Preheat the oven to 350°F. Line two large baking sheets with parchment paper of a silicone baking mat.

2. Put the chocolate and butter in a heatproof bowl and set it over a saucepan of barely simmering water, stirring occasionally, until completely melted and smooth.

3. In the meantime, stir together the eggs, vanilla, sugar and espresso powder (optional) in a medium bowl. Set aside.

4. In a small bowl, sift together the flour and baking powder.

5. Add the melted chocolate mixture to the egg mixture and stir to combine well. Slowly add the dry ingredients, folding them into the batter. Once all of the flour is incorporated, stir in the chocolate chips.

6. Scoop 1½ tablespoons of dough (a medium cookie scoop’s worth) onto prepared baking sheets. 

Bake for 10-12 minutes or until they are firm on the outside. Like brownies, do not over bake! Leave to cool completely on the baking sheets.


These cookies are super easy to make and taste amazingly delicious. If you do not have the tools to make a double boiler (in step 2), you can slowly microwave the butte and chocolate until melted and smooth. Just make sure to use a microwave proof bowl and that you heat it in increments - 2 minutes on power 3 or 4 (stir after every time to ensure that all the chocolate is melting evenly). Every microwave is different, so just keep an eye on the chocolate. If you burn it, you will have to start over again. And no body likes burnt chocolate!


Friday, January 13, 2012

Low Fat Pumpkin Granola

I love, LOVE granola, but why does it have to be so high in calories? Darn you oil! I love to just grab a handful as a snack, have it with a splash of milk or sprinkle it on top of some yogurt. So, the research began. How can I still enjoy granola, but find a low calorie version that doesn't contain oil? Well, let me tell you, I found one and boy was it delicious.

To replace the oil, this granola contains pumpkin, apple sauce and maple syrup. And don't think just because this doesn't have oil that it won't get crunchy and clumpy. Oh, it will. Okay, it doesn't get hard crunchy like normal granola, but just trust me, it's good. Even better it won't break your teeth when you eat it. You know how some granola is super hard? Ya, you don't want to chip a tooth while eating. That just makes for a bad day. If you want your granola a little more clumpy, just use your hand to form them. If you don't like the clumps (who doesn't like the clumps?!), then break them up in the pan. This recipe is easy, simple and makes for the perfect little thing to have in the pantry for a quick breakfast. I bet this would even be great to bring a long on a hike. Just add some more nuts or dried fruit to it (dried cranberries and some pecans - just an idea), to give it more of a energy boost. Yum!


if you can, get your oats and nuts in bulk. It will help you save a few dollars!

mixing the oats with the spices, pumpkin and other delicious stuff

half way through the baking process

stirring in the pepitas (pumpkin seeds) after baking

YUM!


Low-Fat Pumpkin Granola (slightly adapted from www.twopeasandtheirpod.com)


5 cups rolled oats (not quick oats!)
1 teaspoon pumpkin pie spice
1 teaspoon cinnamon
1/4 teaspoon nutmeg
3/4 tsp. salt
1/2 cup brown sugar
1/2 cup pumpkin puree
1/4 cup applesauce (I used unsweetened)
1/4 cup pure maple syrup
1 teaspoon vanilla extract
1/2 cup pepitas (pumpkin seeds)


1. Preheat the oven to 325° F. Line a large baking sheet with parchment paper and set aside.
2. In a large bowl, combine oats, spices, and salt. Mix well.
3. In a medium bowl, whisk together brown sugar, pumpkin puree, applesauce, maple syrup and vanilla extract. Whisk until smooth. Pour wet ingredients into oat mixture and stir until the oats are evenly coated. They will be moist. Evenly spread the mixture onto the prepared baking sheet.
4. Bake for 20 minutes. Remove pan from the oven and stir. Bake for an additional 15-20 minutes or until the granola is golden and crisp. Remove from the oven and stir in pepitas. Let cool completely. Store in an airtight container.


The best part of making this (besides it tasting so good) is that it makes your house smell like a pumpkin candle. A pumpkin candle and pure deliciousness. Once you start making homemade granola, you will never go back to buying it from the store!
 

Thursday, January 12, 2012

Pea Salad

Let my first start off by saying that this is my grandma's recipe. That and I have only met a few people, other than those in our family, that really enjoy this salad. Wait, can we even really call it a salad? It doesn't have lettuce and it's definitely not a healthy selection. Although, it does have peas, so it has to be healthy, right? Sure. I try to tell myself that as I shove a spoonful of this in my mouth.

It's super easy and super simple. It's canned petite peas, real mayo (yes, real. none of that olive oil or light stuff here), green onions and swiss singles cheese. I know what you are thinking, singles cheese? Gross. Ya, it's not the best, but there is some chemical reaction between the mayo and the cheese that over time, creates this gooey sauce. I know you are probably grossed out right now, but please tell me you will try this at your next holiday or family gathering. It's a tradition in my family and it's always at the table during Thanksgiving, Christmas and Easter. My sister has even been known to make it when she is in a funk. This pea salad has magical powers. How could you not love it! 


I've always wanted to submit this to Paula Deen. I think she would love this one. I know it doesn't have butter, but it has mayo. Which I'm pretty sure is her second love.


5 ingredients or less

you must use young small peas!

key step - draining the peas

tower of cheese

my sister took this picture.

add all ingredients and mix. don't mix too hard or you'll squish the peas. no one likes squished peas.

yum!
Pea Salad
3 cans young petite peas, well drained
rounded 1/2 cup of real mayonnaise
1 bunch green onions chopped (whites included)
1 package swiss cheese singles, unwrapped and chopped into cubes

Drain three cans of peas in a colander for about 30 minutes. This is important to not add any extra moisture or liquid to the salad. Unwrap the singles, stack and chop into little cubes. Set aside. Cut up the green onions and set aside. Once the peas are well drained, add them into a large bowl and mix in the mayo, cheese and green onions so everything is well coated. Cover and place in the fridge at least six hours before you want to serve it. Overnight is best.


Easy peasy. Ha, that was funny. Peasy. Peas. Get it? Never mind.

Wednesday, January 4, 2012

Vanilla Chai Cupcakes

This will tell you how far behind I am - I made these cupcakes for my sister's birthday back in November. Yes, you heard me right. November.

I decided to make these cupcakes for my sister because I know how much she loves chai. I would have made her chocolate cupcakes, but I wanted to spice it up and make her something she wouldn't expect. There was this little cafe place next to her apartment in Berkeley that she used to go to get chai when she was an undergrad. Who doesn't love a cup of warm chai during an intense study sesh? I wish I remembered the name of the place, but there was also this fantastic middle eastern restaurant below that had the best naan. The garlic naan was to die for good. Jess, can we go here next time I come to visit?

Okay, back to cupcakes. See how easily I get off track. Yikes. Anyways, these cupcakes are spicy (not hot spicy, just full of warm delicious spices), dense and have the best chai cream cheese frosting you ever put in your mouth. Not joking. It's dense as well, but somehow the cupcake and frosting work perfectly together. You've just got to try them. There is just something about the cardamom that warms you up. It's a spice that you might not think you will ever use again, but trust me, you will. 

It's always nice to spice up (no pun intended) and change up the cupcake recipes you have in your back pocket. You should see the list of cupcake flavors I want to try. I have one with avocado frosting. Strange? Maybe. Delicious. Yes!

spicy spices

spices

butter and sugar!

can you see the swirling spices?

ready to bake

baked and cooled


Vanilla Chai Cupcakes (from http://gimmesomeoven.com/vanilla-chai-cupcakes/)
 
Ingredients:

Cupcake Ingredients:

1/2 cup (1 stick) butter
1 cup sugar
2 tsp. vanilla extract
2 eggs
2 tsp. chai spice mix (recipe below)
1 1/4 cups all-purpose flour, sifted
1/2 cup buttermilk
1/2 tsp. baking soda
1/2 tsp. apple cider vinegar

Chai Spice Mix Ingredients:

1 1/2 tsp. ground cardamom
1 1/2 tsp. ground cinnamon
1/2 tsp. ground ginger
1/4 tsp. ground cloves
1/4 tsp. ground nutmeg

Frosting Ingredients:

1 cup (2 sticks) butter
1 tsp. vanilla extract
2 cups powdered sugar, sifted
remainder of the chai spice mix
1 Tbsp. cold milk, if needed to thin out the buttercream
4oz cream cheese, softened

Cupcake Directions:
Preheat oven to 325 degrees.  Prepare a cupcake pan with liners.
In a small bowl or plastic bag, combine the chai spice mix ingredients.  Set aside. Cream together the butter and sugar. Add the vanilla and beat in one egg at a time. Stir in 2 teaspoons of the chai spice mix. Fold in the flour and buttermilk alternately and stir until combined, don’t over mix. Mix together the baking soda and vinegar in a separate bowl, then add it to the batter and mix until combined. Scoop into prepared cupcake tins until 3/4 full and bake 15-20 minutes or until a toothpick comes out clean.

Frosting Directions:
In a stand mixer, beat the butter and cream cheese until it is creamy. On low, mix in the vanilla and the rest of the chai spice mix. Carefully beat in the powdered sugar about ½ cup at a time.  If the buttercream is too thick add 1-2 tbs of cold milk until the desired consistency is reached. Frost each cupcake with frosting.


If you love chai tea as much as my sister does, try these. I know you will love them. I brought them into work to have them sample the flavors and a whole dozen were gone in under 30 minutes. 12 cupcakes gone in 30 minutes. That means they were good right? Just don't eat the cinnamon stick decoration. I did have someone ask me if they could eat that. Yikes!


Tuesday, January 3, 2012

20 New Year’s Resolutions For 20-Somethings

I thought this was too good not to share! I'm starting with #13 (even though I love brussel sprouts). Which one are you going to start with?

20 New Year’s Resolutions For 20-Somethings

Jan. 2, 2012

  1. Before you status update, Tweet, Tumble or Instagram, pause and say to yourself, “is it entirely necessary that I share this morsel of thought with my entire social network?”and if the answer is not, “yes, I absolutely must,” then step away from the Internet.
  2. Know which candidate you’re going to vote for in the upcoming presidential election, and know why.
  3. Enough with the 14-day juice cleanses. If you want to lose a little weight quickly, eat less and exercise like crazy. If you want to lose a lot of weight slowly, do whatever Jennifer Hudson did.
  4. If you really like the person you’re hooking up with and would like them to be your boyfriend/ girlfriend, find a way to tell them, and hope for the best. If you don’t and wouldn’t, stop.
  5. Find a way to save approximately 300 dollars and spend it on a flight to see a friend or family member who lives far away.
  6. Please stop liking the Kardashians, all of them. It’s not helping anyone, least of all the Kardashians.
  7. Spend less than or equal to the money you earn each month.
  8. Wear clothes that fit you, especially to work.
  9. Call someone on the phone at least once a week, and speak to him or her for at least ten minutes.
  10. Start preparing now to get over the fact that Facebook is probably going to change again in six months. You’re not going to deactivate your account. You don’t know how.
  11. Wait 30 seconds before you look up a fact you can’t remember on your phone, and try to remember it using your brain. This is what the olden days were like.
  12. Replace one terrible reality show you’re currently watching with one wonderful scripted show currently available on television.  Swap suggestion: Real Housewives of Anywhere for HBO’s Enlightened.
  13. Try that food you think you don’t like but have never actually tried, unless it’s brussels sprouts. They really don’t need any more attention.
  14. Cut one person out of your life who you truly do not like and add one person who you truly do. Note: not on Facebook, on Earth.
  15. If you’re still blacking out regularly, you should stop.
  16. Volunteer once over the next 90 days.  You’ll feel really good about it, and probably end up volunteering again over the next 275.
  17.  Tell someone who you love that you love them on a more regular basis. To their face, not in a text.
  18. Back up your entire online life onto an external hard drive, especially your photos.
  19. Crap or get off the pot. This applies to whatever thing you’re not doing that you should just sack up and do already.
  20.  And in the eternal words of Tom Haverford, “TREAT YO SELF!”

Happy 2012 everyone! 

from http://thoughtcatalog.com/2012/20-new-years-resolutions-for-20-somethings/


Thursday, December 29, 2011

Egg Nog Breakfast Bread

Every Christmas for as long as I can remember, my family always had something a little extra special for breakfast. It was one of those things you always remember. You wake up early, open gifts, have cup of cocoa or coffee and then have a warm and delicious breakfast. This year, we did things different - we had breakfast before all the other fun stuff. It was rather nice because after opening gifts and relaxing, who wants to make breakfast. 

One of the other blogs I follow closely posted a recipe for egg nog waffles. Yum, right? They were so good. We served them with parmesan and chive eggs as well as the totally and fabulous chicken breakfast sausage from Trader Joes. Those sausages are great - there are 130 calories for three links and they taste even better than regular breakfast sausage. At least I think so. If you like them, swoop them up while you can and put them in your freezer. I don't see them all the time and when they are out, they go like hot cakes.


Okay, back to what we are here for. Egg nog bread. There is just something out the flavor of egg nog that wins me over. Maybe it's the nutmeg. Since I can't have real egg nog (hello lactose intolerance), I always buy Silk soy egg nog. It tastes just the same and doesn't give me all that tummy trouble. I went to the store to get some to make this fantastic bread and of course they were all out! Since I knew I would not be drinking this, I decided to buy the organic low fat version. You can you use soy, the real deal or any kind of egg nog that you store has.

Since I knew my family would be having something eggnoggy and special for Christmas breakfast, I wanted to make something for Ryan and his mom (she was in town for the holidays - hiiii Kris!) to nibble on when they woke up in the morning. Plus, this was the perfect time to try out a new holiday recipe and switch it up from the plain old banana bread.  Even better, this one has an egg nog glaze that you pour over the top as it's cooling. Who doesn't love a gooey glaze? I know I do.

ingredients - wheaties do not go in the batter :)

dry ingredients

wet ingredients

whip that batter!

before going in the oven

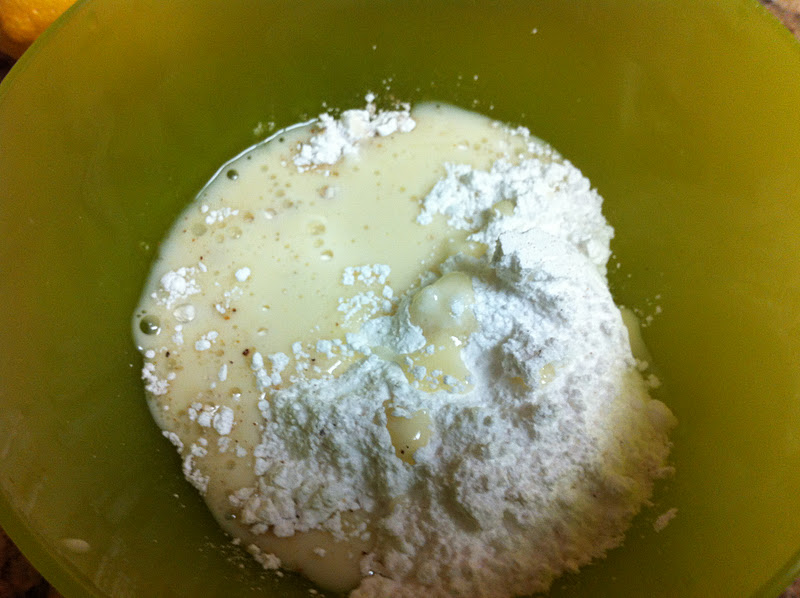
pow sugar + vanilla + egg nog for glaze

cooling and glaze dripping

Egg Nog Breakfast Bread (slighty adapted from http://www.recipegirl.com)
 
2 1/4 cups all-purpose flour
2 teaspoons baking powder
1/2 teaspoon salt
1/4 teaspoon nutmeg
2 large eggs
1 cup granulated white sugar
1 cup eggnog
1/2 cup butter, melted
1 teaspoon vanilla 

Glaze:
1/2 cup powdered sugar
1/4 teaspoon vanilla extract
Dash nutmeg
2 to 3 teaspoons eggnog

1. Preheat the oven to 350 degrees F. Grease the bottom and 1/2 inch up the sides of a 9-by-5-by-3-inch loaf pan.

2. In a large bowl, whisk together flour, baking powder, salt, and nutmeg. Make a well in the center of the flour mixture and set aside.

3. In a medium bowl, combine the eggs, sugar, eggnog, melted butter, and vanilla. Add egg mixture to the flour mixture and stir just until moistened (batter will be lumpy).

4. Spoon batter into the prepared pan. Bake for about 45 to 50 minutes. Check for done-ness by inserting a toothpick into the center of the loaf -- it should come out clean. Cool in the pan on a wire rack for 10 minutes. Remove from pan and cool completely on a rack.

5. For the icing, combine sugar, vanilla, and nutmeg. Stir in enough eggnog to reach drizzling consistency. Drizzle cooled loaf with icing. Grate a little bit of fresh nutmeg over the icing, then let icing set completely before wrapping loaf.


Like I said, I did not try this bread, but Ryan said he ate two pieces on Christmas morning. Couldn't have been that bad, right? Also, if you want to use up your extra holiday egg nog and freeze this bread for another time, follow all the steps, but do not glaze the bread. Once you make and defrost the loaf, then glaze the bread.