Thursday, July 12, 2012

Cake Batter Rice Crispy Treats

Yes, you heard me right. Cake batter rice crispy treats! Can you believe it? I sure couldn't when I first came across this match made in heaven. Rice crispy treats are great, so chewy, crunchy and sweet. Although, I honestly couldn't remember the last time I had a homemade one. I would be willing to bet it's been since I was a little girl. Now that is a long time to go without a rice crispy treat. At least I think so. Everyone needs a little rice crispy in their life, especially if it's shaped like an airplane. Ya, the captain got one of those. I just couldn't resist. Am I good girlfriend or what.

Every month I make some kind of treat for my coworkers who have a birthday that month. I gather their ideas on flavors (what they like and don't like) and try to come up with cupcakes or a cake that would match their preferences - with a twist of course. June was a busy month with moving and we decided to throw in the birthday celebration with our team building event. With limited time to make a big cake or cupcakes, I had to come up with a cute and tasty idea on the fly. Then, I remembered these treats! The perfect flavor and the perfect change up to birthday desserts. Plus, everyone loves a rice crispy treat. Especially one that tastes just like cake batter. Maybe that's just me, but I am willing to bet that once you make these, you may eat half the pan. Don't say I didn't warn you. They are that addicting.

no need to buy actual rice crispies - I bought this huge bag for $3! Check out the bulk cereal section in your store for extra savings!

adding in the cake batter. now this is when it starts to smell yum.

get out those muscles to stir in the crispies.

add in those sprinkles!

cooling and almost ready to eat.

 
Cake Batter Rice Crispy Treats (slightly adapted from How Sweet Eats)

3 Tbsp. butter
1 (10 oz.) bag of mini-marshmallows
1/2 cup yellow cake mix (the dry cake mix, not prepared into a batter!)
6 cups crispy rice cereal
1 (1.75 oz.) container of sprinkles

Melt butter in a large saucepan over low heat and add marshmallows. Stir until they begin to melt, adding in (dry) cake mix one spoonful at a time so its combined. Stir in cereal so it is completely coated with marshmallow mixture. Sprinkle in half of the sprinkles and mix. Press into a baking dish (any size will do, I used a foil 9x13 for easy clean up) and top with remaining sprinkles. Let sit for about 30 minutes before cutting. I find spraying a knife with nonstick spray helps to cut them.


I shouldn't tell you this, or maybe I should, these only take about 10 minutes to make. That's it. Easy peasy. Just wait til I show you my next easy rice crispy treat recipe - brown butter rice crispy treats with a white chocolate drizzle!


Thursday, July 5, 2012

Roasted Cherry Brownies

I'm baaaaaaaaaaaaack. Finally. Things have been so hectic lately (from moving, to traveling on the weekend, to work) that I just haven't been able to find the time or energy to blog. Sad, I know. Good thing it was only temporary though, because I have a ton of great new recipes to share with you. Are you ready? Let's do this!

Cherry + brownies = love. Need I say more? I have a mild serious obsession with cherries. I am not sure where or when it started, but over the past few years, I have fallen deeply and madly in love with cherries. I just wish they were more lady like to eat. Spitting out the seeds is not sexy, but you do what you gotta do to eat such a delicious little fruit. The inspiration for these brownies came when I found out that the captain's friend Andrew had a cherry farm. Well not him, but his family does. You know what I mean. Andrew was sweet enough to bring us a couple of bags of cherries and let me just say, THOSE WERE THE BEST CHERRIES EVER. I had to do everything I could to stop my whole family from eating them. Let's be real, I had to stop myself from eating them all. I tried to tell you I had a cherry obsession. Did you not believe me? Okay, back to brownies. After eating what seems like almost the whole bag, I had a few handfuls left and wanted to make the captain something extra special, but portable, for his drive up to Oregon. Remember when I told you I always bring snacks and/or treats on trips? This is no exception - even if I wasn't joining him. Must fuel the captain! 

These brownies are super easy to make and are a great twist on your normal chocolatey ooey gooey brownie. If you do not have a cherry pitter, not to fret, you can cut into them and pick the pit out, but just be careful. Don't try to slice off your thumb. If you are into cherries as much as I am, then it might be worth it to pick up a cherry pittter. I ordered this one off Amazon. Once all the cherries are pitted, toss with sugar and roast in the oven. I know roasting cherries sounds strange, but just go with me here. While they are roasting (keep a close eye on them!), mix up the batter. When the cherries are done, pour them into the batter (juice and all), gently mix and pour into a lined pan. In under 35 minutes, you have a delicious cherry brownie waiting for you to dig into to.  This brownie is the perfect bite of warm cherry and dark chocolate - all with not being overly sweet. Now that's my kind of brownie. What are you waiting for - grab a bag of cherries and get baking!

no need for a mixer here. just a big bowl!

pitting cherries.

tossed with sugar and about to bake. sorry I forgot to take a post roast photo. I was clearly too cherry happy.

mix in the eggy egg

fold in the roasted cherries - don't forget the juices!

I love instagram
 Roasted Cherry Brownies (slightly adapted from http://annies-eats.com)

2 cups fresh cherries, pitted and halved
1¼ cups plus 2 tbsp. sugar, divided
8 oz. semisweet or bittersweet chocolate, chopped
8 tbsp. unsalted butter, cut into quarters
3 tbsp. cocoa powder
3 large eggs
2 tsp. vanilla extract
½ tsp. salt
1 cup all-purpose flour

Preheat the oven to 450˚ F.  Combine the cherries and 2 tablespoons of the sugar in a small roasting pan and toss well to combine.  Roast the cherries for 10 minutes, or until they begin to release their juices.  Remove the pan from the oven and reduce the oven temperature to 350˚ F.

Line a 9 x 9-inch baking pan with foil or parchment paper and lightly spray with cooking spray.
In a heatproof bowl melt the chocolate and butter in the microwave, stirring occasionally until smooth.  Whisk in the cocoa powder until smooth.  Let cool for several minutes and then combine the eggs, remaining sugar, vanilla and salt into the melted chocolate. Whisk until combined, about 15 seconds.  Then stir in the flour with a wooden spoon until just combined and gently fold in the roasted cherries.  Pour the mixture into the prepared pan and spread with a spatula to make an even layer.  Bake until slightly puffed and a toothpick inserted in the center comes out with a small amount of sticky crumbs clinging to it, about 35 minutes.  Let  brownies cool to room temperature, about 2 hours.


These brownies are great right after they are made and will be good for a few days in an airtight container. That is if they even last that long. Also, if you make a big batch or you are just making these for one or two people, you can individually wrap the brownies and freeze for up to a month or two. Just pop out of the freezer and heat up for  few seconds -just like it's fresh out of the oven. Yum!


Monday, June 18, 2012

Favorite Things

Here are a few of my favorite things from the past couple of weeks:

morning walks along the American River

Grandma Billing's famous lemon meringue pie. So happy I was able to make this with the captain. I hope I made grandma proud!

Giants games with the family.

Cherry season - hello roasted cherry brownies

pool time

BIG cookies

san luis obispo wine love <3

beautiful evening sunsets

pure exhaustion

my ever growing money tree at work.

Ps. If you haven't noticed, I've recently become obsessed with Instagram. If you have an iPhone, this app is a must get. What are you waiting for? Even better, it's totally, 100% FREE! If you want to follow me, just search for stracciatellabella. I can't promise what pictures you will see, but it is sure to be entertaining!

Sunday, June 17, 2012

Pesto Stuffed Chicken

This chicken so much more than pesto + chicken. It's pesto + chicken + roasted red bell pepper + mozzarella cheese. How good does that sound? Plus, you can bake it (which is what I do) or you can grill it (which is how my momma does hers). See, another recipe you can adapt to what you have in the kitchen. I could grill mine seeing as how I have a stove top grill pan, but do I really want to set off the smoke detectors and have the whole building evacuated? No, not really. I'll stick to the oven.

This recipe is one of my mom's originals. I can't remember the first time she made it, but when she did, it was so delicious. I clearly did not forget it and it is now one of my go to, super easy, can prepare ahead of time, pop in the oven when you are ready, recipes. Wow, that was a mouthful, but it's so true. It's five ingredients or less and it takes under 30 minutes to bake (depending on the size of your chicken breasts). To prep and get them ready to cook, you take one of your chicken breasts and slice it in half, well not all the way in half. You will want to create a pocket to hold the pepper and cheese. Don't worry if you are confused, I will show you a picture in a minute and you will see what I am talking about. It's easy. Promise. Would I show you something that was hard and that I couldn't do? No. 

Once you have the chicken breast with a pocket, rub it all over (inside and out with pesto) to coat. Here is a tip - if you have a huge jar of pesto, place some in a bowl so you don't contaminate the other stuff with chicken juice. In fact, before you even start, lay out a station that has your pesto, peppers and cheese ready to go so you don't go all touching everything with you chicken hands. Sorry, I'm a meat juice freak. Once they are rubbed with pesto, place the chicken breasts on a cookie sheet lined with foil. Then layer in the peppers (as much or at little as you like) and then put in a piece of cheese. I prefer to use string cheese because it's the perfect size to fit in the chicken pocket. You can use the whole stick or cut it in half. Once they are stuffed (make sure it's not too full so the cheese doesn't ooze out all over) and them put the chicken flap back on and you are ready to go. You can bake or grill right away for cover with plastic wrap or foil and cook them later (or the next day). Easy peasy and so delicious. I am willing to bet that you may make this for your next weekend dinner party or even your next backyard BBQ.

Not to forget - today is Father's Day! Is this a recipe perfect enough for Dad? It think so! Happy Father's Day to all the amazing dad's out there. I'll be spending the day with mine and you better be too! Love you Dad!

ingredients

coating and stuffing station ready to go. no contamination here!

this is the flap you are looking for.

coated ALL over with pesto. it's the besto!


baked!

ready to enjoy with my fave sides!

Pesto Stuffed Chicken

2 chicken breasts
1 cup pesto (you may use less or more, but start with that and see if what you need)
1 jar roasted red bell peppers , drained
2 pieces of string cheese (or 1/2 cup grated or sliced mozzarella cheese)

Preheat the oven to 350 degrees.

Line a baking sheet with foil and place all ingredients in a row for easy assembling (see picture above). Take your chicken breast and slice a small pocket in each making sure not to cut all the way through, but to leave enough room for the cheese and peppers. Once each chicken breast has been cut, rub each one (all over, inside and out) with pesto. Coat well. Then stuff each chicken breast with the peppers and the cheese. Place the top flap of the chicken breast back on the top and make sure you have not filled it too full. You do not want everything sliding out when you're cooking it.

 If you are grilling, you can close it shut with a skewer or toothpick, but it may not be necessary. This is up to you. If you are grilling, cook until the chicken is cooked through (my guess is about 20 minutes, but I don't know for certain since I have never grilled this). If you are baking, bake for about 20-25 minutes or until the juices run clear. Once baked and ready to go, cover with foil and let sit for five minutes, then enjoy!

*Note - This recipe is totally adaptable to a large group of people, just make sure you have enough of all ingredients!*


My favorite way to enjoy this chicken is with a big scoop of garlic and parmesan risotto and green beans with shallots (another mom recipe). So good and so easy - just cook up some shallots with olive oil until soft and tender. Season with salt and pepper and then toss in your cooked green beans. I love the ones from the frozen section at Trader Joes (just heat and heat!), but use fresh or whatever you like. The perfect side dish!

Friday, June 15, 2012

Flourless Double Chocolate Pecan Cookies

These are seriously the ultimate chocolate cookie. They are slightly crunchy on the outside, gooey and soft the inside and oh so ooberly chocolatey. Plus, they are gluten free! The perfect cookie for those with celiac disease or with a wheat allergy. BONUS!


I decided to make these when the captain and our friends Matt and Lauren took a trip down to Monterey and the Central Coast for Memorial Day weekend. I always, always, bring a sweet treat (it's just something I do and now can't not do it!) when we drive and since Lauren is watching the gluten in her diet, I knew these would be the perfect thing to make. There are only six ingredients (pow sugar, cocoa powder, salt, bittersweet chocolate, pecans and egg whites) and it takes only a few minutes to whip up. Get your muscles ready though, this dough is thick and takes big muscles to mix up. That and I would recommend using a big bowl so you can really get in there and mix it up. I used a medium sized one and let me say, mixing was kinda tough. I got pow sugar and cocoa powder all over me and the floor. I eventually got it all mixed, but I think a bigger bowl would have been better. Bigger is always better, right?


This recipe makes 12 really big cookies. My best way of telling you how big these are is that they are about the size of your hand. That's big. Some people may say that is the best size for a cookie, but I think they are best to share. Or you can have one to yourself. You may just go into a chocolate coma if you eat a whole one though. Or get chocolate sweats. The captain gets those. It must mean the cookies are good. At least that's what I tell myself.


These cookies are perfect cure all - PMS, the hangries (hungry + angry), broken hearts, bad days, or just to cure that chocolate craving.


the yummy line up


chopped chocolate


dry ingredients +  chocolate + pecans


egg whites


use those muscles to mix it up!


the cookies will grow, so spread them out with enough room!


baked and smelling so delish!


 Flourless Double Chocolate Pecan Cookies (A Martha Stewart Recpie)


3 cups powdered sugar
3/4 cup cocoa powder
1/2 teaspoon coarse salt
5 ounces bittersweet chocolate, chopped
1 1/2 cups chopped pecans (or other type of nut)
4 large egg whites, room temperature


 Preheat oven to 325 degrees.


In a large bowl, whisk together sugar, cocoa, and salt. Stir in chocolate and pecans. Add egg whites and stir just until incorporated (do not overmix). Drop dough by 1/4 cupfuls, 3 inches apart, onto two parchment-lined rimmed baking sheets. Bake until cookie tops are dry and crackled, about 25 minutes, rotating sheets halfway through. Transfer sheets to wire racks and let cookies cool completely. (To store, keep in an airtight container, up to 3 days.)


Just like most cookies, these are great frozen. Just freeze and then when you're ready, take one out and heat up in the microwave for a just few seconds to warm it through. It's just like they are hot out of the oven - warm and gooey. YUM!


Cowgirl Quiche

Do real men eat quiche? Mine does. In fact, he ate this one and it's called cowgirl quiche. Perhaps if I told him the name, he wouldn't. That will be my little secret. Well, I guess it's not so much of a secret since I am sure the captain will read this and see it. Sorry dear.

Quiche is great and so, so versatile. Add what you like, take away what you don't. I know I say that a lot, but I love recipes that you can adapt to your liking. Not everyone likes every single ingredient in a recipe and if you can take it out or add something you like in its place, even better. Quiche starts with two main components - crust and eggs. For the bestest crust in the whole wide word (and I'm not just saying that), use this one! So quick, so easy, and so perfect to keep in your freezer for when a quiche is calling your name. Once you have the crust, then you need your egg base. Eggs + a good guzzle of milk + salt and pepper. That's it. Of course you can use cream or half and half if you are feeling naughty, but I usually use unsweetened soy or almond milk. Use what you have though. Once you have those two things, then comes the fun part - the fillings! One of my all time favorites is one of my momma's specialties - broccoli and cheddar. No matter how many times I make it, her's always turns out better. I guess that's just a mom's touch. Or ham, green onions and swiss cheese. That's another one she makes too. Those two are so yummy, but this time around, I wanted to step it up a notch and go cowgirl on this quiche. Nothing says cowgirl more than bacon, onions, mushrooms, and artichoke hearts. A classy cowgirl that is.

I know the flavor combination sounds a little odd, but just go with me here. I promise it's good. Plus remember, the captain ate it and he doesn't like artichokes. Well, this may again be a place where I didn't tell him it was in there. I'm bad. So so bad. I also decided to use peppered bacon to add that extra little spicy kick. Why not, right? It was on sale. Cook the bacon until slightly chewy, remove from pan and then cook the rest of the ingredients until soft and tender. Mix everything together with a little of your favorite cheese (okay A LOT of cheese) and place into the pie crust. Pour over your eggy mixture and you are ready to bake. In about 45 minutes to an hour, you will have a golden brown and delicious quiche waiting for you. Just remember to put your quiche on a foil lined baking sheet before you fill it with the egg mixture. This will help you transport it to the oven without the pie plate or tin bending and so if the egg mixture spills over during baking, it doesn't make a mess in your oven. I speak from experience. Trust me on this one. It's not fun to have your head in the oven cleaning it.

Get ready to enjoy one fabulous quiche that everyone will love. -not just cowgirls and not just real men. You can serve it for breakfast (my favorite way to enjoy it, especially with some fresh fruit!) or you can even serve it for dinner with a light salad and some sliced tomatoes. I'm getting hungry, are you? 

why is bacon so delicious?

cooking those onions

add in the chopped artichoke hearts and mushrooms

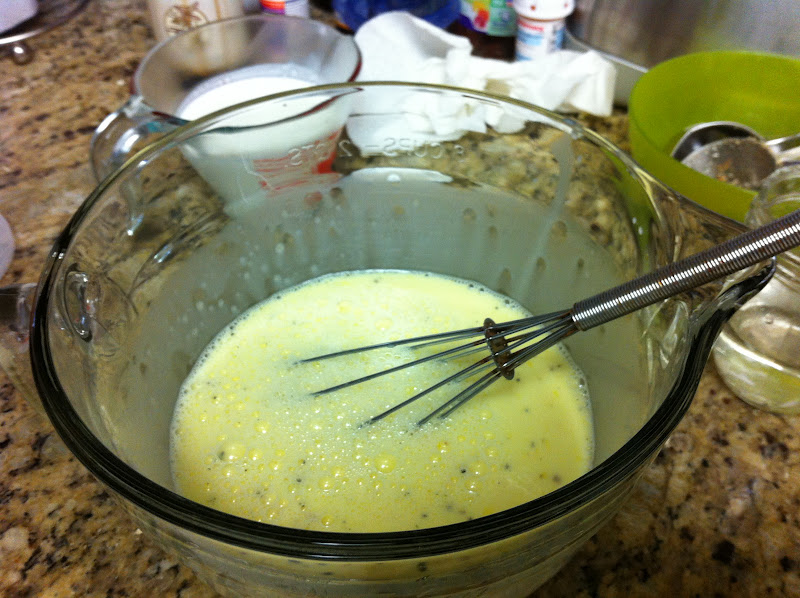
whisking the eggs and milk

add the filling ingredients to the crust

add the egg mixture. if you have too much don't pour it all in

see what happens when you pour too much eggs in - they spill out. This is why you use a pan lined with foil!

quiche is done and cooling!

Cowgirl Quiche (adapted from Pioneer Woman's newest cookbook)

about 1/2 pound bacon, cooked until chewy
1/2 - 1 whole onion thinly sliced
1 cup sliced mushrooms
1 can (14 Oz.) Quartered Artichoke Hearts
1 pie crust (homemade or store bought)
5 whole Eggs
1 cup milk (soy, almond, regular, heavy cream - whatever you have)
1 (or up to 1 1/2) cups grated cheese (I used swiss since I had it in the fridge, but use what you have)
Salt And Pepper, to taste

Preheat oven to 350 degrees.

In a skillet, fry bacon until crisp. Crumble and set aside. Pour out excess grease and wipe the pan (you can leave a little bacon fat in if you like, but I just poured in a splash of olive oil)
In the same skillet, add the onions and cook for a few minutes. Add mushrooms and artichokes and cook for a few more minutes. Salt mixture to taste. Remove from heat and allow to cool for about 20 minutes. While that is cooling, roll out pie crust and press into a pie plate (I used a 9'' foil pie pan - makes for easy disposal!).  Put this plate on a foil lined baking sheet!

In a large bowl, beat eggs with the milk . Add salt and peper and any other spices you may like (chives or even a pinch of cayenne). After the mushroom mixture has cooled, toss in your cheese and bacon and then place the mixture into the pie pan. If it all doesn't fit that's okay, just get as much as you can in there. Then pour of the egg mixture to cover - if that all doesn't fit, make scrambled eggs with the extras!

Bake at 350 degrees for about 45-1 hour. You can bake for slightly longer if quiche is overly jiggly. Check the quiche at about 30 minutes and if it's getting overly brown, place a piece of foil over the top for the rest of the cooking process.  Once the quiche is done, remove from oven and allow to set for ten minutes before serving. .You can eat this right away, or let it cool completely and store in the fridge until ready to eat.


Now, doesn't that sounds delish? Best thing about quiche is that you can make it ahead of time or eat it the same day. If you make it ahead for eating tomorrow, just cool competently after baking and then cover with foil and place in the fridge. When you want a slice, just cut and heat up in the microwave. If you make this and then want to freeze it, bake, cool and then wrap and freeze. When you are ready to eat it, just take it out and let it defrost. Then you can heat it up slowly in the oven or slice and heat in the microwave. How easy is that?!

Thursday, June 14, 2012

French Style Vanilla Bean Ice Cream

Nothing says classic ice cream flavor like vanilla. It goes with just about everything - brownies, pie, for ice cream sandwiches, topped with fresh berries or just by itself. You really can't go wrong with vanilla and everyone should have a pint of this in there freezer for a quick dessert. Do you already have some in your freezer? Go run and check. Hurry, go!

Making homemade ice cream is not as daunting as it seems. In fact, it's really easy. Although, once you start having homemade ice cream, you may not go back to buying it at the store (sorry Ben and Jerry's). Plus, the fun part of making your own is trying out new flavors and experimenting with what you like. You can add in fruit, chocolate, your favorite candies (chopped up of course) and even nuts. I bet you are already writing down all the flavor combinations you want to try, right? It's okay, you can admit it. I've already realized that this ice cream would be great with a peanut butter swirl and shaved chocolate and some salted peanuts. How good does that sound? I could so go for a scoop of that right now, it's so hot outside!

There are two main types of ice cream - French style and traditional. French style is an egg yolk and custard base while traditional is simply milk and cream. Both are fabulous, but I seem to favor the French style. There is just something about having that custard base that makes it so much more creamy. If you are scared of cooking the custard base (or scrambling the eggs), don't be. You just have to cook it low and slow and just keep stirring. Even if you get a few lumps, not to worry. Just strain it. It's happened to me before and as long as you run it through a fine mesh strainer, you will be just fine. No one will ever know. Unless you tell them like I just did. Oops.

Here is fun factoid - July is national ice cream month. Did you know that? I sure didn't. You don't have to wait until July to make this though. If you wait that long, I might hurt you. 

ingredients

steeping the vanilla in the milk and cream mixture. can you see the bean peeking out?

yolky yolk yolks

whisk the yolks until smooth

add in the warmed and steeped milk mixture to the eggs

get your cream and straining station ready

just keep stirring, just keep stirring!

churn in your ice cream maker until firm - about 20 minutes

these containers are great for ice cream and you get 3/$1 at the dollar store!


French Style Vanilla Bean Ice Cream (www.annies-eats.com)

1 cup whole milk
¾ cup sugar
2 cups heavy cream, divided
Pinch of salt
1 vanilla bean, split lengthwise
6 large egg yolks
1 teaspoon vanilla extract

Combine the milk, sugar, 1 cup of the cream, and the salt in a medium saucepan.  Scrape the seeds from the vanilla bean into the pan and drop in the vanilla pod.  Heat over medium-high, stirring occasionally, until the mixture is warmed through.  Remove the pan from the heat, cover, and let the mixture steep for 30 minutes.

Pour the remaining cup of cream into a bowl and set a fine mesh sieve over the top.  In a separate medium bowl, whisk the egg yolks until smooth. Slowly pour the warm milk mixture into the bowl with the egg yolks, whisking constantly.  Return the entire mixture to the saucepan and place over medium heat.  Cook, stirring constantly and scraping the bottom of the pan, until the mixture thickens slightly and coats the back of a spoon (about 170˚-175˚ F).  Pour the custard through the mesh strainer into the bowl with the cream.  Stir in the vanilla.  Let cool slightly, then cover and refrigerate until completely chilled.  Remove the vanilla bean before churning. Freeze in an ice cream maker according to the manufacturer’s instructions (about 15-20 minutes or until firm).


This ice cream is a great base for other flavors too. If you want to make a fruity ice cream, you can remove the vanilla bean (just use the extract) and then once the custard has cooled, add in your fruit puree. If you want to also fold in fruit, just make sure to do it after the ice cream is churned so you don't crush them all. Ta da, fresh ice cream!