Thursday, April 12, 2012

Homemade Vanilla Extract

I know what you are thinking - is she really making vanilla extract? Does she know she can go to the store and get it for like a whopping $5? Yes, yes, I know. I'm crazy, but you should know this by now. I've been wanting to try this for so long and am now just getting around to it. That seems to be the way most things go around here these days.

You only need two things to make your own vanilla extract - vanilla beans and vodka. That's it. Well, that and patience. You'll have to wait about 6-8 weeks for this to be ready to go. The longer you let it sit, the deeper the flavor you'll get. Several years ago I bought I huge bottle of vodka at Costco and recently found a big mason jar of it hidden underneath everything in my freezer. I guess I should clean out my freezer more often. Who knows what else could be in there! It was perfect timing for me to find it since earlier this week I received an order of vanilla beans in the mail. If you go to your local grocery store you can probably find two dinky beans in jar for about $10. Super expensive, right? They are totally worth it, but I wanted to get more bang for my buck. I love LOVE amazon (you can get great deals on anything!), so I did some research and ordered me some beans - 16 bourbon madagascar vanilla beans for $10. What a deal! I originally ordered these beans to try to replicate Starbucks' petite vanilla scones, but I haven't gotten around to making those just yet. Give me a few weeks. So many recipes to try, so little time. So, my recommendation is that if you want to try to make this extract, make vanilla bean ice cream or need to stock up on vanilla beans, order them online. That's just my two cents though.

Before you go ordering them, here is a little helpful information. Did you know there are several types of vanilla beans? I sure didn't. Maybe I'm just behind the times. Or maybe it's just because I don't use vanilla beans that often.

Madagascar - the strongest, most intense vanilla flavor, with full a body
Bourbon - notes of berry and ripe fruit
Mexican - sweet and smooth, mellow and spicy 
Tahitian - delicate, exotic, floral
Tonga - rich, full flavored
Indonesian - sweet and woody
India - higher percentage of seeds, sweet, woody, spicy

Use what you like or what you can find. It's totally up to you and whatever you decide, it will make your extract unique! 

here are the beans I bought.

split the beans before putting them in the vodka. Look at that vanilla caviar. YUM!

beans + vodka. see you in two months!


Homemade Vanilla Extract  

1 cup vodka
3 vanilla beans, split down the middle

In a mason jar (or any jar you have), place one cup of vodka and three split vanilla beans. Place lid on top and give it a good shake. Store jar in a dark, cool place. Every few days, give the jar a quick shake. In about 6-8 weeks, you will have vanilla extract. 

You can change up the flavors and make this extract special - cloves, cinnamon or even a splash of rum to give it a kick. Even better, this makes a great gift and people will be surprised how easy it was to make and how good it really is!


Tuesday, April 10, 2012

Crock Pot Ham & Bean Soup

This soup is the perfect way to use up your left over Easter ham. It couldn't be easier either. Of course you can do this in a big pot in your stove, but that would require attention. I don't know about you, but I don't want to have to watch a big pot of soup for hours on end. That's just me though. Some people like to stir it. I guess it's therapeutic. I only do that with homemade sugu (spaghetti sauce). There is just something about tending to that sauce all that day that makes me feel like an 80 year old Italian lady.

Okay, back to soup. This soup is really super easy and it's so so good. It's also super filling and comforting all at the same time. All you need is ham hock, beans, garlic, onion, carrot and chopped ham (this is optional, but I say it's a must for that meaty bite that makes the soup that much better). The first and most important step of this soup is soaking the beans. Soaking the beans helps speed up the cooking time, but it also helps keep all the vitamins and nutrients where they should be - in the bean. Not to mention, the soaking also helps break down all the sugars that cause the unfortunate side effect of beans, gas. Sorry, I had to mention it. We all know it happens. 

The night before you want to put this soup in the crock pot, soak the beans in a big bowl with enough water to cover. Add a few extra inches of water just to be safe. When you wake up in the morning, you'll be surprised how much water those beans absorb. They will be plump and ready for cooking. Once they are ready, drain and pour the beans into your crock pot. Add in the ham hock, chopped onions, carrot and garlic. Cover with water - enough to cover the beans. You don't want to put too much water because during the cooking process because the condensation from the lid will fall into the beans and create more liquid. About half way through the cooking process, give the beans an stir and add in your chopped meat. Cook for about another 4 or 5 hours until the beans are tender and the mixture is looking soupy. I know you might not know what I mean by soupy, but trust me. You will know when you see it. About 8-9 hours in the crockpot and you should have the perfect soupy consistency. This soup is perfect and filling on it's own, but even better with a skinny cheesy cornbread muffin. Don't worry, I'll eventually show you how to make those too.

since I didn't have ham for Easter, I was used ham hocks from the grocery store and a big piece of thickly sliced ham (from the deli counter).

soaking beans

drained beans and ham bones

diced up ham added in about half way through

also add a big dash of pepper!
I totally forgot to take a picture of the finished soup. Just close your eyes and imagine bean soupy goodness.

Crock Pot Ham & Bean Soup 

3 carrots, peeled and chopped
1 large onion, chopped
3 garlic cloves, chopped
1 bag of bean soup mix, beans soaked over night (adding in the ham flavor packet, optional)
ham hock 
2 cups diced ham
salt and pepper (to taste)
water

Soak beans over night (at least 8 hours, more if possible) in a large bowl with at least three inches of water covering the beans. After beans have soaked, drain and place into crock pot along with the ham hock, diced carrots, onion and garlic. Cover with water just to the top of the beans. Cook for 4 hours on low. Add in the diced ham and a pinch of pepper after four hours and cook for an additional 4-5 hours or until beans are tender. 

When looking for the beans, most of the packages will have a ham seasoning packet. I don't add this because it contains MSG, but with all the other ham, who needs the artificial seasonings! Even if you don't have a ham hock or can't find them in the store, plenty of diced ham will do the trick to give this soup the meatiness you want.


Monday, April 9, 2012

Birthday Weekend Extravaganza

Some of you may or may not know that this past Friday was my birthday. This old lady officially turned 27! I can't believe I am only a few more years away until the big 3-0. When I was in high school, 30 seemed so far away and I always thought I'd be married and have my first kid by then. Crazy to think that it's only three years away and it could possibly happen. Scary! Well, not really. But kinda. Married and kids? Yikes. I am getting ahead of my self though. Slow the roll Christina!

Enough of that talk, let's get to the celebration! Let me be the first to say that I had a fantastic day and weekend. My sister came home for my birthday and Easter so we had a super fun sister day on Friday - we went out to breakfast, we went shopping (and I tried on some horrible, but totally awesome leopard heels), we got pedicures, made lunch together and then met up with my parents for a birthday dinner at this kinda sorta new Mexican place in town. I've been wanting to try it out for awhile, and they said it was killer, so we went. Boy were they right. It was SO good. Once dinner was over, I made the drive out to watch the captain at his indoor soccer game - they didn't win, but he scored a goal for me. Woo! On the way back home, I decided to meet up with one of my girlfriends and some other friends out at one of the local bars for a celebratory birthday drink. I ended up staying out much later than I planned, but it was fun to act young again. The whole staying out until 2am and then my body naturally waking up at 6am was not cool! I was a wee bit tired the next day. Some may even say I was a little (or a lot) cranky. Whoops.

my sis took me out to a birthday breakfast - we shared eggs with bacon, green chilies and cream cheese. sounds weird, but it's SO good.

guess we didn't like it

don't worry, I didn't buy these. they were just fun to try on. I was like 6'5 with these babies on.

Pedicure!

sister also bought me this funfetti cupcake from one of my favorite cupcake places in town. She said these were better than Sprinkles. whoa.

we also made lunch together - skinny coconut shrimp and toasted sesame snow peas.

my mom made me a quilt for my birthday!!

Oh, we are not done yet! Hold on tight, we still got more to go! The next day the birthday celebration continued. Ryan came over and surprised me with a birthday cheesecake. He seriously makes the best cheesecake ever. Last year he made me a white chocolate cheesecake for my birthday. Talk about heaven in your mouth. This year, he surprised me with an orange cheesecake. It was light, fluffy and sprinkled with orange zest. So yummy. There was so much left over (us two barely put a dent in it), so I froze a few slices for another day and brought the rest to work. As much as I wanted to eat it for breakfast, lunch and dinner for the next three days, I knew I had to share it so I wouldn't gain 20 pounds from that crazy deliciousness. Let's just say, that baby was gone in a hot second after I told me coworkers it was in the fridge. I should have known since it was so good. All of my co-workers said this was the best cheesecake they'd ever had! They even suggested that Ryan and I should go into business making and selling our desserts. Hmmm, what do you think captain?  We could deliver our goods via plane!

since it was still lent, my momma made a lent approved bday dessert - tropical upside down pineapple cake. YUM!

can't wait to try out some of the recipes in this book - thanks Andrea!

side note - my sister brought me bear poop from her recent trip to Yosemite. Who knew bear poop was white. Haha.
my friend Lauren made me these totally awesome flavored salts! What a fabulous idea. Can't wait to use them!

my boyfriend is awesome. just saying.

ORANGEY DELICIOUS CHEESECAKE. Look at that thick later of cheeeeesecakkkeeeee.

my mom made this fruit tart for Easter dessert. So yummy. Maybe she'll share the recipe with me someday

we got to finally dye eggs! my mom never let us to do this when we were kids - too messy. Or so she says. Mine was the pink one with glitter!


Wow, that was a lot of pictures.

 
From my birthday to Easter celebrations, I must say, this weekend was pretty darn good. I guess 27 won't be so bad after all!


Sunday, April 8, 2012

Italian Easter Cookies

First of all - HAPPY EASTER everyone! Now, I know that lent is over and that I can officially have chocolate again, so you may be asking, why are you not sharing something ooberly chocolate with us today? Well, these cookies have a special place in my heart. I can't remember the first time I made these, but I do know that my sister and I try to make these every year - whether it be for Easter or any holiday. There is just something about these little Italian cookies. I can't explain it. Maybe it's the almond. I do have mild obsession with almond flavored things. I could eat a whole stick of marzipan, no problem. I also love amaretto. The first time I ever ordered it at a bar was back in college. The bartender looked at me and asked "what are you, 80 years old?'. I told him I was at heart and to serve it on the rocks. No I am not 80, but I do enjoy a nice Italian liqueur. I am an old lady at heart though.

Okay, back to cookies. These cookies are perfect for any holiday, but always scream Easter to me. Those bright sprinkles make everything better! That and I am almost willing to bet you have everything you need in your pantry and fridge to make these by dinner time.  They are super easy to whip up and shape. They are even more fun to dunk them in almond icing. I would love to roll around in that stuff. See, I told you I was obsessed with almond things. These cookies bake up in no time, but just make sure that they are completely cooled before you go dunking them in the icing. If you don't, all the icing will slide off and the Easter bunny will be sad. He likes lots of gooey frosting. Once they are done, you can eat them right away, or let them set for about an hour to make sure the frosting doesn't smoosh when you are transporting them. Just be warned, you won't be able to eat just one. I know I can't. This recipe makes quite a few cookies, so if they all don't get gobbled up, you can keep them in the freezer and pull them out a few hours before you want to serve them. They even ship great too if you want to send a little special surprise to someone. Everyone loves cookies in the mail from the Easter bunny.


ingredients

add in eggs one at a time

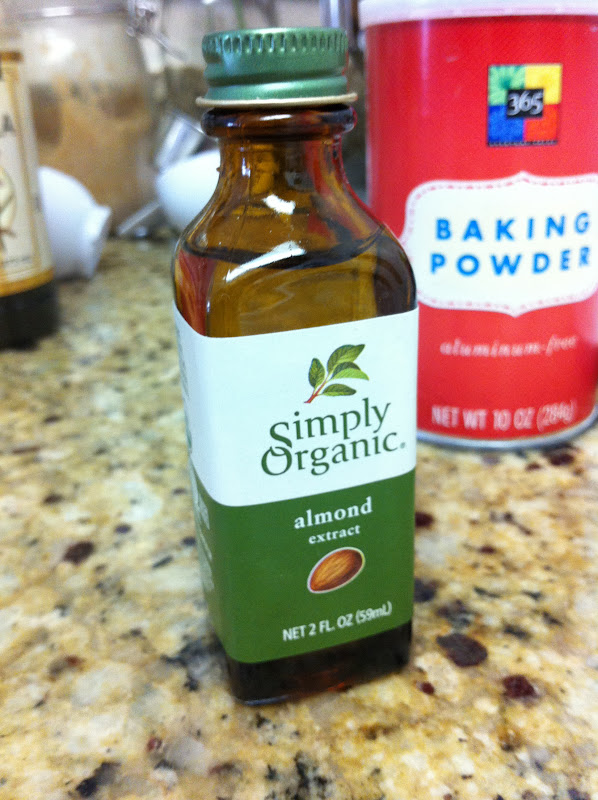
almond extract!

dough

I did some in rings and some in balls. For rings, roll into ball, then into a long snake like piece of dough, then pinch ends together to form a ring!

while cookies are baking, make the icing.

cookies are baking!

once cookies are cooled, dunk in icing.

sprinkles!

rings!

Italian Easter Cookies (www.allrecipes.com)

1/2 cup butter
3/4 cup white sugar
3 eggs
1 teaspoon vanilla extract
1 teaspoon almond extract
1/4 cup milk
1/4 cup vegetable oil
3 3/4 cups all-purpose flour
5 teaspoons baking powder
colored sprinkles for decorating

For Icing:
4 cups confectioners' sugar
1/2 cup butter, softened
1 teaspoon vanilla extract
3 teaspoons almond extract
5 tablespoons milk

Preheat oven to 350 degrees. Spray cookie sheets with non-stick spray.

In a large bowl, cream together 1/2 cup butter and white sugar until light and fluffy. Beat in the eggs one at a time, then stir in 1 teaspoon vanilla and 1 teaspoon almond extract, 1/4 cup milk and oil. Combine the flour and baking powder, stir into the wet mixture. Roll dough into 1 inch balls or shape into rings (see picture above).

Bake for 5 minutes on the bottom shelf and 5 minutes on the top shelf of the preheated oven, until the bottoms of the cookies are golden brown. When cookies are cool, dip them into the icing. 
 
To make the icing, cream together the confectioners' sugar, 1/2 cup butter, and 1 teaspoon vanilla and 3 teaspoon almond extracts. Beat in 3 tablespoons milk, one tablespoon at a time, adding more as needed for desired consistency.


Happy Easter everyone! I sure hope that you are spending time with your family and loved ones and that the Easter Bunny is treating you well today - and that he brought you lots of treats! In my family he brings eggs filled with lotto scratchers. Not sure when that started, but it's lots of fun sitting around the kitchen table scratching them all to see if we hit the jackpot. It hasn't happened yet though. Someday!


Wednesday, April 4, 2012

Pumpkin Scones With Cranberry Butter

These are hands down the BEST SCONES EVER. I am not just saying this because this is my mom's recipe. I am saying this because they are literally the best scones ever. I brought these into the office and one of my coworkers told me these were the best they ever had. Even one of my mom's coworkers gets his own batch of these when she brings them to her office because he loves them so much. I think he may even start asking her about these in August. No joke! Do you believe me now that these are the best ever? Well, if you don't, I'm sorry. You may not want to keep reading because I might make you want to try these and you may change your mind. Don't say I didn't warn you.

My mom always makes these right around the Thanksgiving holiday. It's always the best to go over to my parents after my sister and I finish the Run to Feed the Hungry Thanksgiving morning and come home to freshly baked scones. It's seriously the best post race snack. Who needs bananas and Gatorade. Give me a scone! Since I love these scones so much, I started bringing these into the office to share with my lovely coworkers. I think they may love them as much as I do and now expect them around the holidays. I don't blame them though. These scones are pumpkiny (but not too much), cinnamony and moist. Most scones you get at the store or even make at home are dry and crumbly. These are melt in your mouth delicious. And if the scones weren't enough, the butter will just put it over the top. This butter is sweet and tangy and is the perfect compliment to the scones. One of my co-workers thought this was frosting and put a ton of if on his scone. You should have seen his face when I told him it was butter. Classic. I'm pretty sure he ate it anyways. He may have even had two. They are that addicting. Especially right out of the oven.

These scones are not just for the holidays though. Pumpkin is great year round! Even better, pumpkin is low in calories, has lots of fiber and is loaded with vitamin A. With all the great things pumpkin has to offer, I will warn you about the butter though. After you add in the powdered sugar and dried cranberries, you won't think it's butter anymore. I hate to admit this, but you can eat a spoonful and not even think it's butter. I don't advise doing that, but you probably will anyways now that I told you about that. I really want a scone now. I think I may even have a can of pumpkin in my pantry. Uh oh, this could be trouble...

ingredients

adding in the cold, cubed butter

adding in the wet ingredients. see the pumpkin swirl?

form dough into a circle

cut into 12 wedges
place on baking sheet
butter ingredients - butter, pow sugar, dried cranberries


chopping the dried cranberries!


all combined - so good!

packaged up and ready to deliver to work!


Pumpkin Scones with Cranberry Butter  

2 1/4 cups all-purpose flour
1/4 cup packed brown sugar
2 teaspoons baking powder
1 1/2 teaspoons pumpkin pie spice
1/4 teaspoon salt
1/4 teaspoon baking soda
1/2 cup cold, cubed butter
1 egg
1/2 cup canned pumpkin
1/3 cup milk

Combine flour, brown sugar, baking powder, pumpkin pie spice, baking soda, and salt in a mixing bowl.  Cut in butter with a pastry blender (or using a stand mixer with the paddle attachment) till mixture resembles coarse crumbs.  Combine egg, pumpkin, and milk in another bowl.  Add egg mixture all at once to dry mixture.  Stir just till moistened. Turn out dough onto a lightly floured surface.  Quickly knead dough by folding and pressing gently for 10 to 12 strokes or till nearly smooth.  Pat dough into an 8-inch circle.  Cut into 12 wedges.

Place wedges 1 inch apart on an ungreased baking sheet.  If desired, brush tops with additional milk.  Bake in a 400o oven for 12 to 15 minutes or till golden.  Remove scones from baking sheet, and cool on a wire rack for 5 minutes.  Serve warm with Berry Butter.  Makes 12

Berry Butter:  Finely chop 5 tablespoons of dried cranberries (more if you like it more berry-y) using a mini food processor or knife. In a separate bowl, stir together 1/2 cup of room temperature butter and 5 tablespoons powdered sugar (more if you like it sweeter). Once the sugar and butter are combined, add in chopped cranberries. Cover and let chill at least 1 hour before serving to allow flavors to blend.  

Once you start making these, I am willing to bet that you will become addicted as much as I am. There is just something about these scones that can't make you just eat one.
 

Tuesday, April 3, 2012

Skinny Coconut Shrimp

Have you ever had coconut shrimp before? Well, if not, you are so missing out. There is just something about that little shrimp that is covered in coconut and then dunked in a spicy apricot sauce. The bad part is though, that they are usually fried. Deep fried. Not that frying is bad and I do indulge in the fried food every once in awhile, but with these, before you know it you've eaten 1,000 calories in just a few fried shrimp. And who can just have one? I know I can't.

These shrimpys (yes, I said shrimpys) are loaded with that crunchy coconut flavor, but cut waaaaaaaay back on the fat and calories. Just because they are low in calories and fat, don't let that fool you. These are totally delicious and will be eaten up in a flash. Trust me on this one. The first time I made these was during football season when the Niners were in the playoffs and my dad had a bunch of his buddies over to watch the game. I am still upset they didn't go to the Superbowl this year, but let's not go there. I may start crying. Just kidding. Well, not really. For some crazy reason I decided to forgo wine tasting with my mom and sister to stay home and watch football with the boys. What can I say, I love sports. Anyways, back to shrimp. Since inviting my dad's friends over was kind of a last minute thing, I had to think quick and plan a menu that would be tasty, but not overly bad for us all. Then I remembered I had this recipe tucked away for a special day - and that day was the day.

Let me just say, I could not serve these shrimps fast enough! They were going like hot cakes. Or should I say hot shrimp. Wait, no. That sounds funny. They are super easy to toss together and pop in the oven. While the shrimp are baking you can whip up the dipping sauce and when the shrimp are cooked, you are ready to go! I will say that the best thing to do is coat and then bake right away. I did two trays of shrimp so I wouldn't have to make a second mess with coating and dropping coconut all over. The first tray was amazing - golden, crunchy and just right. The second tray was almost as good, but since the shrimp were coated and waiting in the fridge, the coating got a bit soggy. Not bad, just made it come off a bit when flipping half way through cooking. Even though football season as come and gone, I these would be a great treat to make for a yummy snack to have while watching baseball on a nice weekend afternoon.  I can not wait for baseball season to start in a week.  Let's go Giants! I bet Buster Posey would like these shrimp.

sauce ingredients - apricot preserves, rice wine vinegar and red pepper flakes. I got too excited for these shrimp and totally forgot to take a picture of everything else. Oops.

breading station - coconut, eggs, flour, shrimp

coated shrimp

baked! how good do those look?!

This plate was full 10 seconds before I took this. The boys woofed these too fast.

Skinny Coconut Shrimp (www.skinnytaste.com)

1 lb (24) large shrimp, peeled and deviened (the best deal for these is at Costco. They are in the frozen section. Just defrost and then use!)
1/2 cup + 1 tbsp shredded sweetened coconut
1/2 cup + 1 tbsp panko crumbs
2 tbsp all purpose flour (you will only use 1 tbsp)
1 large egg
pinch salt
non-stick spray

For the Sweet and Spicy Dipping Sauce:

1/2 cup apricot preserves

1 tbsp rice wine vinegar
3/4 tsp crushed red pepper flakes


Preheat oven to 425°. Spray a non-stick baking sheet with cooking spray.


Combine coconut flakes, panko crumbs and salt in a bowl. Place the flour on a small dish. Whisk egg in another bowl. Lightly season shrimp with salt. Dip the shrimp in the flour, shaking off excess, then into the egg, then in the coconut crumb mixture.

Lay shrimp on the cookie sheet then spray the top of the shrimp with more cooking spray; bake in the middle rack for about 10 minutes. Turn shrimp over then cook another 6-7 minutes or until cooked though. Remove from oven and serve with dipping sauce.

For the sauce, combine all the ingredients and place in a small bowl and dip the shrimp!


I bet you are all wondering about the calories now that I told you how good they are. You get three large shrimp and one tablespoon of sauce for about 160 calories and only 3.5 grams of fat! Just make sure to enjoy these hot out of the oven. They are best when fresh!
 

Monday, April 2, 2012

Chicken Tortilla Soup

I don't know where my love for chicken tortilla soup started, but boy is it delicious. Maybe it's my love of Mexican food that hooked me in, but one will never be sure. Maybe it's just that I love soup. I really do love soup. I've tried and made many varieties of this delicious soup (even one in the crock pot) and I must say that this one is the best one yet. Thank you Pioneer Woman. Your new cookbook is totally addictive and I'm pretty sure I am going to try like 99% of the recipes in it.

I decided to make this soup last week after a long and rainy day at work. I picked up everything I would need the night before, because let's be honest, who wants to go grocery shopping in the pouring rain? Not me. A soggy cook is a sad cook. Since I knew it would be a long day at work, I decided to cook the chicken and prep all the veggies the night before. I often do this to save time the next day and it's also a good way for me to relax after a long day. Some people get stressed out about cooking. I'm not one of them. It really is relaxing. Well, I do get stressed out when things don't turn out right. You don't want to be around me when that happens. Ryan's witnessed that - it's not pretty and I'm sure he would agree.

Don't worry, this soup won't stress you out at all. Even if you do it all in one day. This soup will make you feel warm, spicy and want to shout ole! You can have it on it's own, or be like me and serve with with a few slices of ooey gooey quesadillas on the side. Go big or go home, right? I fill two whole wheat tortillas with extra sliced chicken, green chilies, corn, olives and monterey jack cheese. Perfect for dipping in the soup. I love dipping things in my soup. Soup is made to be dipped in. If you don't like dipping (what's wrong with you?!), you can whip up some of my homemade corn tortilla chips. Simply cut up corn tortillas in strips or chips, spray with non-stick spray and bake in the oven at 400 degrees for about 10 minutes. Keep an eye on them so they don't burn though! You can see just how to do them here. Crumble them on top of the soup for an added crunch. Or to dunk in. There I go with dipping and dunking again.


not pictured - chicken. I won't dare touch the chicken and then touch my camera. I am kind of a raw meat germ crazy lady.

chicken before baking. I decided to do an extra chicken breast for the quesadillas or for a salad the next day!

cooked chicken. bet you wish you had smell-o-vision

cooked veggies + seasoning mixture

shredded chicken. that was a real close up wasn't it?

add chicken broth to chicken and veggies. don't forget the tomato paste!

mmm soup!

to add just the right about of thickening, add a little corn meal + water. it sounds strange, I know. it really does thicken it up!
please forgive the sloshed soup. top your soup with whatever you like -onions, radishes, lime, cilantro, salsa, guacamole and more cheese!


Chicken Tortilla Soup (slightly adapted from www.thepioneerwoman.com)

2 Boneless, Skinless Chicken Breasts
1 Tablespoon Olive Oil
1-1/2 teaspoon Cumin
1 teaspoon Chili Powder
1/2 teaspoon Garlic Powder
1/2 teaspoon Salt
1 Tablespoon Olive Oil
1 cup Diced Onion
1 Diced Green Bell Pepper
1 Red Bell Pepper
3 cloves Garlic, Minced
1 can (10 Oz. Can) Rotel Tomatoes And Green Chilies
32 ounces,  Low Sodium Chicken Stock
3 Tablespoons Tomato Paste
4 cups Hot Water
2 cans (15 Oz. Can) Black Beans, Drained
3 Tablespoons Cornmeal


Preheat oven to 375 degrees. Mix cumin, chili pepper, garlic powder, and salt. Drizzle 1 tablespoon olive oil on chicken breasts, then sprinkle a small amount of spice mix on both sides. Set aside the rest of the spice mix.

Place chicken breasts on a baking sheet. Bake for 20 to 25 minutes, or until chicken is done. Use two forks to shred chicken. Set aside.

Heat 1 tablespoon olive oil in a pot over medium high heat. Add onions, red pepper, green pepper, and minced garlic. Stir and begin cooking, then add the rest of the spice mix. Stir to combine, then add shredded chicken and stir. Pour in Rotel, chicken stock, tomato paste, water, and black beans. Bring to a boil, then reduce heat to a simmer. Simmer for 45 minutes, uncovered. Mix cornmeal with a small amount of water. Pour into the soup, then simmer for an additional 30 minutes. Check seasonings, adding more if needed---add more chili powder if it needs more spice, and be sure not to under salt. Turn off heat and allow to sit for 15 to 20 minutes before serving. 

Ladle into bowls, then top with sour cream, onion, diced avocado, pico de gallo, homemade chips, and grated cheese, if you have it!


Don't forget to serve this with your favorite guacamole. You can find my all time favorite recipe here - the best guac EVER! It's seriously so addictive. I could totally eat the whole bowl for dinner (if that was acceptable). Perfect to top your soup or dunk your chips or quesadilla in.