Thursday, December 12, 2013

Chocolate Chip Cookie Dough Billionaire Bars

I can't believe that this time of the year is here again - food blogger cookie swap cookie time! This is the third year I have participated in The Great Food Blogger Cookie Swap and it's a great way to not only get cookies, but to find out about new food bloggers and of course, new cookie recipes! Now who wouldn't love that? For those who don't know, here is how it works - I send out one dozen cookies to three food bloggers and then I get one dozen cookies from three different food bloggers. Totally amazing, right? I think so. I get my cookies delivered to work so not only can I share all the fabulous cookies with my coworkers, but that also means I won't eat them all. Because I totally would and who can just eat one cookie. Let's be real. Cookies are addicting!

The first year I participated in this cookie swap I made red velvet shortbread cookies dipped in white chocolate. The second year I made salted caramel chocolate chip cookie bars. This year, I knew I had to step it up. Like way up. To be honest, I had a recipe all ready to go and tested weeks before my cookies were due to ship out. I had spent a Saturday afternoon testing out pecan pie filled thumbprint cookies with a caramel drizzle. Sounds good, right? They were totally delicious and everyone at work gobbled them up fast, but they just didn't scream food blogger cookie swap cookie. I am not sure why, but they just didn't. So, I was on a mission - find a cookie that would be bigger and better than last year. I searched and searched and searched some more through my cookbooks, but again, nothing jumped out at me. I just couldn't do a plain 'ol chocolate chip cookie (as good as they are). I grabbed a couple more cookbooks and then I saw the recipe that would be the cookie of the year - chocolate chip cookie dough billionaire bars! 

These cookie bars are the best combination of everything they say they are. These cookies start with a shortbread crust, then covered with a layer of ooey gooey caramel, then topped with a thick layer of eggless cookie dough and all covered with chocolate. These bars are the perfect amount of sweet without being too sweet. Does that make sense? If not, just trust me. There is something about this combination that when you take a bite, you taste every layer separately and then everything all together. I am not quite sure how that works, but it just does. As the captain said when he first tried these, "they are do die for!". I am not even kidding. Those were the exact words out of his mouth! Whether you are a cookie dough lover or a cookie bar lover, this recipe is for you. Just be careful, they are totally addicting and even more so when they are warmed up just a bit. Don't say I didn't warn you!


yes, I buy brown sugar in 25 pound bags

crumbly shortbread

press firmly into pan and don't forget to poke the crust so it doesn't puff up!

why the shortbread is baking, melt the caramel and heavy cream

ahhh, so nice and brown

get that caramel to harden!

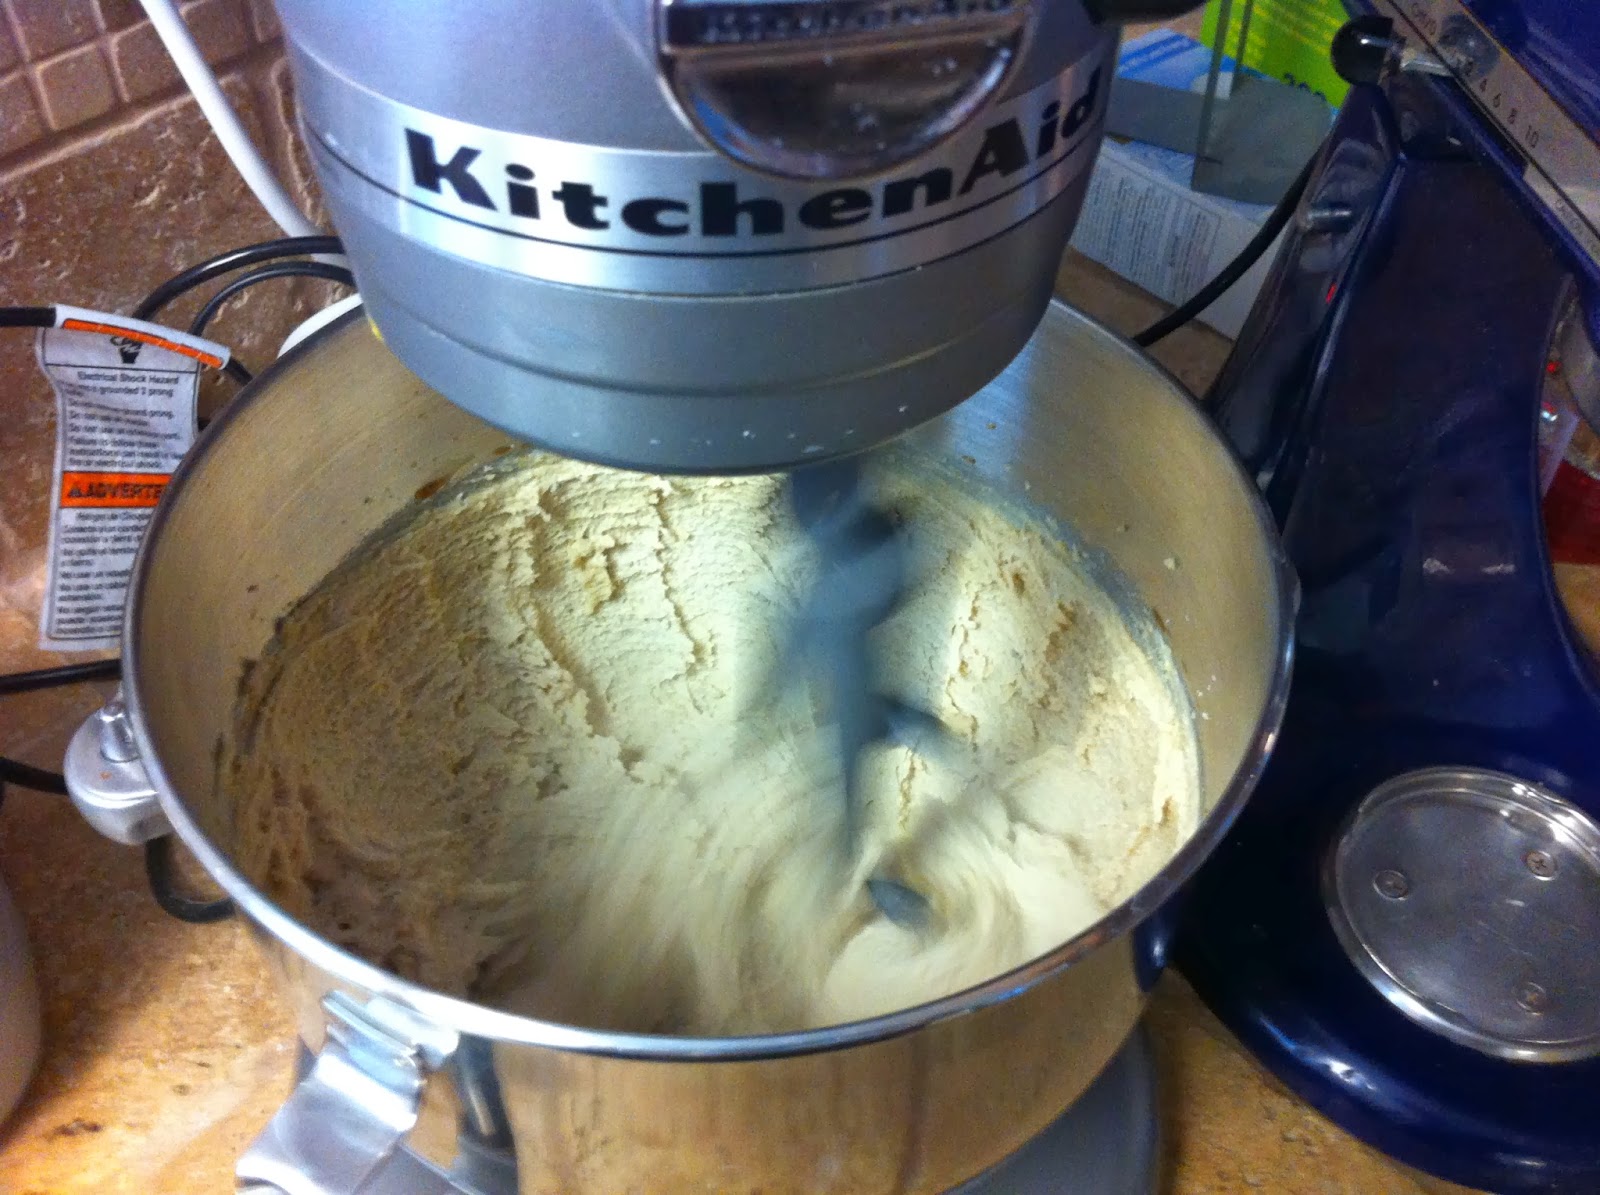
whipping up that cookie dough!

mmm

melting the chocolate

billionaire bars as far as the eye can see!
Chocolate Chip Cookie Dough Billionaire Bars (The Cookie Dough Lovers Cookbook)


For the Shortbread:
1/3 cup unsalted butter, at room temperature
1/3 cup granulated sugar
½ teaspoon vanilla extract
¼ teaspoon salt
1 cup all-purpose flour


For the Caramel:
7 ounces soft caramel candies, unwrapped
2 tablespoons heavy cream


For the Cookie Dough:
½ cup unsalted butter, at room temperature
½ cup light brown sugar
¼ cup granulated sugar
2 tablespoons heavy cream
½ teaspoon vanilla extract
¾ cup all-purpose flour
Pinch of salt
½ cup mini semisweet chocolate chips


For the Chocolate Glaze:
4 ounces semisweet or dark chocolate, chopped
1 tablespoon unsalted butter


 Preheat oven to 350 degrees F. Line an 8x8-inch square baking pan with parchment paper or nonstick foil, leaving a 1-inch overhang on two sides.

Make the Shortbread: In a mixing bowl, beat together the butter and sugar with an electric mixer on medium speed until light and fluffy, 2 to 3 minutes. Add vanilla and salt and beat until combined. Add flour and mix until incorporated (note: dough may appear slightly crumbly). Firmly press into prepared pan. Poke shallow holes into the surface of the dough with a fork. Bake the shortbread for18 to 22 minutes, or until the edges are lightly golden. Let cool on a cooling rack while you prepare the caramel layer.

Make the Caramel Layer: Place the caramel candies in a small saucepan over medium heat. Add the heavy cream and stir until completely melted (about 5-10 minutes). Pour hot caramel mixture over shortbread crust and spread into an even layer. Refrigerate until firm and set - about an hour (this may take longer, just make sure the caramel is firm before topping with the cookie dough).

Make the Cookie Dough: Combine the butter and sugars in a large mixing bowl and beat on medium speed until light and fluffy, 2 to 3 minutes. Add the heavy cream and vanilla and mix well. Add the flour and salt and mix on low speed until incorporated. Stir in the chocolate chips. Spread the cookie dough on top of the caramel layer, using a spatula to smooth the dough into an even layer. Refrigerate the pan while you prepare the chocolate glaze.

Make the Chocolate Glaze: In a small bowl, combine the chocolate and butter and microwave on 50% power in 30-second increments, stirring after each, until completely melted and smooth. Spread the glaze over the cookie dough layer and chill until set, about 30 minutes.

To remove the bars from the pan, grasp the edges of the parchment paper or nonstick foil and lift out the entire block. Place on a cutting board and use a large sharp knife to cut into 2-inch squares. Enjoy!

 This recipe can easily be doubled to serve a large crowd. Just double all the ingredients and just a 9 by 13 pan. As soon as you make these for others, they will love you more than they already do. They are that good.

Sunday, November 3, 2013

Baked Garlicky Shrimp

Before I even begin, let me first tell you that this is one of the most delicious, garlicky and totally yummy dishes I have made in a long time. Even better it's fast. Like super fast. Under 30 minutes from start to finish fast. Now that's what I am talking about. Fast, easy and super delicious. Triple win!

The captain won't eat fish, but he loves shrimp. I've tried to get him to sample salmon, but it's always a no go. In fact, I only cook fish when he's out of town. Don't tell him that though. It's our little secret. So, to spice it up from our normal chicken or crock pot meals, I decided to try out a new shrimp recipe I saw on Pinterest. I know that some recipes on Pinterest look and sound great, but then only to lead to disappointment and sadness after trying it. I know you know what I am talking about. It's definitely happened to me, but you don't want to hear my sob story. That will be for another post. Regardless, these baked garlicky shrimp looked so good I knew I had to try them. I mean come on - lemon, garlic and shrimp. They had to be good! Plus, I thought it would be good to surprise the captain with something new. He has been working so hard around the house (ie. ripping out our hallway bathroom, changing broken garbage disposals and that's just the beginning!) and dealing with me hiding in the office studying that I wanted to make him something off the regular menu. 

First, you will need shrimp. You can use fresh or frozen, but if you use the latter, make sure to defrost them by running them under cool water. If you use hot, you'll cook those little shrimps and you don't want to do that just yet. I found a killer deal on shrimp at Whole Foods this weekend so I picked up a pound of those. Costco has a great deal on frozen shrimp, so net time you are there, keep your eye out for them - they are great to keep stock in your freezer. You'll want medium or largeish shrimp, just not the popcorn style. Those are too small. You can also get the shrimp with the shells on, but keep in mind, you will have to peel and devein. Which if you ask me, is way too much work and totally nasty. That's just me though. I bought mine all ready to go, but you do as you wish. Once you have the shrimps ready to go, you are 1/3 of the way there! Once they are in the pan, you'll stir up a little bit of white wine, lemon juice and garlic (aka, the essentials). Poor that flavor all over the shrimp and then top them with a combination of panko, a little melted butter and chopped parsley. Then pop in the oven and in about 18 minutes, you will have some of the best shrimp ever. I kid you not. This got two thumbs up from the captain and if my memory serves me right, he went back for seconds. That's when you know it's good.

don't mind my messy counters

don't forget to salt and pepper those shrimps!

coated in the yummy garlic, lemon and wine

topping ready!

ready to bake

this will make your house smell so good. I promise.

Baked Garlicky Shrimp (Gimme Some Oven)

1 lb. raw shrimp, deveined and peeled
 4 cloves garlic, minced
3 tablespoons white wine
salt and pepper
1/4 cup (4 Tbsp.) melted butter
1/2 cup panko bread crumbs
2 tablespoons fresh Italian-leaf parsley, chopped
Juice of one lemon


Preheat oven to 425 degrees. 

In a bowl, combine the shrimp, garlic, and white wine. Stir to combine, then pour into a baking dish. Spread out evenly, and then season with salt and pepper. In another bowl, use a fork to mix melted butter, panko, and parsley until well combined. With your fingers, sprinkle the mixture evenly in the baking dish over the shrimp. Transfer dish to oven and bake until the shrimp are pink and opaque, about 15-18 minutes.


You can enjoy this shrimp by itself or over pasta or risotto. No matter how you have it, you will love it, guaranteed!


Sunday, October 27, 2013

Crockpot Pork Carnitas

Ever since I started grad school it's been harder and harder to find time to try out new recipes. Between work and school, resting my body and making sure I get enough sleep is my number one priority. I am not quite sure how I ever pulled all nighters or did what I did in college. Those were my younger years when I was wild and carefree. I know some of you are laughing, but it's true! I could never stay up til all hours and function on just three hours of sleep anymore. No way jose! Nevertheless, the crockpot has become one of my best friends. Well, it always has been been, but even more so nowadays. In fact, I have made a crockpot meal become part of my weekend routine. One of my favorite things to do is put something on Sunday morning or afternoon, let it do it's thing and have it ready to go for Monday night. After a long day of work and class on Monday, the last thing I want to do is come home and cook dinner - as bad as that sounds. So it's perfect to pull the meal out of the fridge all cooked the day before, heat up and eat. Plus, the captain enjoys it too. Win win.

Last weekend I knew I wanted to try something new and spice it up. Literally. I had come across a recipe for carnitas in the crockpot and for some reason, it was just calling my name. Plus, who doesn't love Mexican food, right? Even better, this recipe isn't fried like traditional carnitas is. Did you know it is traditionally fried after it's cooked? I just recently learned that and was kinda grossed out. Kinda sorta. Now the crockpot version is baked to give it that crispy fried texture, but we'll get to that later. Hang with me heref. This recipe couldn't be easier to prepare. Seriously. You'll first need to get yourself a 2-3 pound boneless pork shoulder. You shouldn't have any problem finding in your store and it should be right by the other big pieces of pork (mine was in a twine wrapping to keep it together, but you'll want to cut that off before placing in the crockpot). Once you have your pork, you'll rub it with a combination of spices (ie. cumin, oregano and chili powder) and then add the juice of one orange, one lime, a bit of red salsa and then a chopped onion, some garlic and jalapeno. Close the lid and let it look for about 8 hours and you will have the most tender and most delicious carnitas you've ever had. And just when you thought it was good, it gets better. Take pork out of the crockpot, shred it up and place it under the broiler to get those crunchy yummy edges. Let's be honest, those are the best parts.

You can serve this yummy pork in a taco, burrito or even a burrito bowl (which is my favorite way to enjoy it). Or even on a salad! No matter how serve it, I can promise you that you'll enjoy it. And in fact, it may become your favorite way to make carnitas. Even better, if you have leftovers, you can re purpose it by using the meat in homemade baked taquitos. Just roll the leftover meat into corn tortillas with a bit of cheese and onion and then either bake right away or freeze for another time. Freezer meals and the crockpot are a life saver for me these days. You should see our freezer. It's overflowing with goodness.

all seasoned up

add in the onion, garlic and jalapeno

don't forget the juices and salsa!

pulled and ready for the broiler

use that left over pork for taquitos!


 Crockpot Pork Carnitas (Handle the Heat)

2-3 pounds boneless pork shoulder
1 tablespoon olive oil
Salt and pepper
2 teaspoons dried oregano
1 teaspoon ground cumin
1/2 teaspoon chili powder
1/4 teaspoon cayenne pepper
4 cloves garlic, minced
1 onion, coarsely chopped
1 jalapeno, seeded and chopped
Juice of 1 lime
Juice of 1 orange
1/4 cup salsa


Place the pork shoulder in the slow cooker. Rub with olive oil and sprinkle with salt, pepper, oregano, cumin, chili powder, and cayenne pepper. Add the garlic, onion, and jalapeno to the slow cooker. Pour the lime juice, orange juice, and salsa into the slow cooker. Cover and cook on low for 8 hours, or until tender.

Shred the meat with two forks and return to slow cooker to combine with the leftover sauce inside. Preheat the broiler. Line a baking sheet with foil and spread the meat evenly over the sheet. Pour some of the sauce over the meat. Broil for 5 to 10 minutes, or until the edges of the pork are browned.


This recipe is also great for a crowd - how yummy would this be for a pot luck or a homemade taco bar? Delish!


Friday, October 18, 2013

Banana Chocolate Chip Baked Oatmeal Cups

Several people have asked me to blog about these. That was almost a month ago. Now, that's pretty bad. You'll have to forgive me as my masters program has really taken over my life and has left me little time to blog and sleep. Especially after a long day of work on top of it all. Just ask the captain. Poor guy. Not quite sure how he puts up with me on those days of oober stress and lack of sleep. Don't fear though, I continue to try out new recipes and will post them when I can sneak away from all that studying. Promise!

To keep my body going and keep that studying energy up, I am continuously looking for new snacks that are low in calories, but will cure that tummy growl and be super tasty. I won't eat things that don't taste good. I know you know what I am talking about. There are a lot of recipes out there that say they are healthy and taste good, but when you go to make it and try it, well, let's just say it's like evil in your mouth. I often wonder if those people lost their sense of taste or they really did think it tasted good. One will never really know.Don't worry though, I won't do that to you. That's just plain mean. So, let me get right to it. I have been trying to find the perfect granola bar recipe for the captain and although some have turned out okay (yes, just okay), I am still trying to find the perfect one. One that doesn't crumble. One that doesn't fall apart when you cut it and one that isn't loaded with sugar and butter just to hold it together. That just defeats the purpose of being a granola bar. I am sure it tastes good, but not so much on the better for you healthy side of things. Which is something I am always looking for.

When I was over visiting my parents a month or so ago, my mom told me about a recipe she saw online for baked oatmeal cups. I thought it sounded good, but wasn't so sure on the baked oatmeal part. I love oatmeal, but since I was on a kick about granola bars, I really wanted to find a recipe that would work for the captain and I. I figured I probably shouldn't dismiss these so quickly and since I had everything in the house to make them, I gave them a whirl. These oatmeal cups are super easy to make and I am sure you have everything you'll need too - bananas, oats, eggs, a little brown sugar, milk (I used unsweetened almond, but you can use any milk of your choice), baking powder, vanilla and mini chocolate chips. Go check your kitchen - I bet you have all of those. Am I right? If you don't have chocolate chips, you can leave them out and add the same amount of chopped nuts or even raisins would do. Stir everything up, fill your sprayed muffin tins and bake for about 15-18 minutes. Although these are not granola bars per say, they are totally filling and curb that afternoon sweet tooth with the little bit of chocolate chips in them. Even better, the captain loves them and I now keep them on stock in the freezer by making a double batch so he can just grab and go whenever he wants. These oatmeal cups are about 130 calories each and totally amazing. They are perfect for breakfast on the go or for that mid morning or afternoon snack. These oatmeal cups are a part of our weekly routine and I am sure they will quickly becomes yours too!

the perfect way to use up those ripe bananas!

dry ingredients

wet ingredients

combine and add the chocolate chips (I may have added too many the first time I made these - oops!)

about to go in the oven!

baked and ready to enjoy!

Banana Chocolate Chip Baked Oatmeal Cups (www.emilybites.com)

3 cups old-fashioned oats
1/2 cup packed brown sugar
2 teaspoons baking powder
1/2 teaspoon salt
2 egg whites
1 egg
1 1/4 cups unsweetened almond milk (you can use soy or skim milk if you like)
3/4 cup mashed bananas
1 teaspoon vanilla extract 

3/4 cup semi-sweet chocolate chips

Preheat the oven to 350. Lightly mist 18 cups in a muffin tin with cooking spray.

Combine the oats, brown sugar, baking powder and salt in a large bowl and stir until thoroughly mixed.  In a separate bowl, whisk together the egg whites, egg, mashed banana, milk and vanilla. Add the wet ingredients to the dry ingredients and stir until blended together. Stir in the chocolate chips.


Spoon the oatmeal mixture evenly between the prepared muffin cups. Bake uncovered for 18-22 minutes or until oatmeal is lightly browned and a toothpick inserted into the middle comes out clean.


Stay tuned for my next version of these oatmeal cups - chocolate covered cherry baked oatmeal cups! Coming soon...


Saturday, September 21, 2013

Skinny Western Omelet Stuffed Breakfast Potatoes

Potato skins for breakfast? Now we're talking! These breakfast stuffed potatoes are not only low in calorie, but they are totally amazingly delicious and you'd never know they were "skinny". Seriously. I don't joke about yummy things that taste like you are being bad. These breakfast potatoes are loaded with healthy egg whites, ham, onion, bell pepper and are covered in a low-fat cheddar cheese melted all over the top. Are you drooling yet? I am. 

These potatoes are super easy to whip up and can even be made the day before you want to cook them up and serve them. I usually make them the day or night before so all I have to do it take them out of the fridge and pop them in the oven to heat through and melt the cheese. The potatoes look fancy and hard to make, but you will fool your friends and family. That I can promise you. To make these yummy breakfast potatoes, you first need to cook the potatoes. You can cook them in the oven, but I like to give them a quick wash, a few pricks with a fork and them pop them in the microwave too cook through. That way you don't have to heat up the whole house. My microwave has a special "potato" cooking option and it cooks them just perfectly. If your microwave doesn't have a "potato" setting, cook your potatoes for five minutes and check them with a knife for doneness. If it's not done, cook on two minutes intervals until the the potatoes are done and a knife goes through the potato clean and easily. If you are cooking them in the oven, it should take about 25 minutes or so to cook them. Once they are slightly cooled, cut the potatoes in half and scoop out the flesh. Make sure to leave about a quarter inch of flesh in there so that the potato skin isn't too flimsy. You don't want all those eggs and goodies to fall out, do you? I don't think so.

Once the potatoes are ready to go, place them on a cookie sheet while you prep the filling. Cook up the onions and bell pepper until they are soft - don't burn them! Add in the ham and warm through, just a few minutes. Then add the eggs and cook until they are soft and ready to go. Once the eggs are cooked, fill each of the potato skins, making sure the eggs are evenly filled in each one. Then top with about a tablespoon of cheese and bake for 10 minutes until the cheese is melted and everything warms together. If you made these the day before, you may need about 20-25 minutes for everything to fully warm up. Check them at about 15 minutes, but they may need a bit more to heat all the way through.

Now here comes the best part and what I know you've been waiting for - these potatoes come in at two potato skins for 305 calories and over 25 grams of protein. Seriously winning! These breakfast potato skins taste like you are being bad, but you are being so so good. Nothing like a yummy, healthy and filling breakfast to keep you going strong all morning long. And these will do just that. They are not just for breakfast though - you can have them morning, noon or night. I often freeze the left over potatoes individually and pull them out for lunch or even dinner (when the captain is away). You'd never know they were frozen! Plus, who doesn't like breakfast for dinner? 

not pictured: potatoes

cooked and cut in half

eggy egg eggs

onions, peppers and hammmm

don't be like me and scoop too much out. oops.

stuffed and topped with yummy yummy cheese

don't drool all over your computer

 Skinny Western Omelet Stuffed Breakfast Potatoes (slightly adapted from Skinny Taste)
 
2 medium russet potatoes
non-stick spray
2 large eggs
3 egg whites
2 tbsp fat free milk
2 thin slices lean ham, chopped
2 tbsp chopped onion
1/2 cup bell pepper, chopped
salt and fresh pepper
4 tbsp reduced fat cheddar cheese

Preheat oven to 425 degrees. Rinse and then pierce potato with a fork a few times all around. Place in microwave and cook about 5-8 minutes per potato (or about 25 minutes in a 350 degree oven). When finished, allow to cool enough to handle. Cut potatoes in half horizontally and scoop out potatoes leaving about 1/4 inch thick wall. Place each potato skin on a cookie sheet while you prepare the filling.


In a large bowl, whisk eggs, milk, salt and pepper. Add onion, pepper and ham into a pan and cook over medium heat until soft and tender.. Spray a medium skillet with non-stick spray and add the eggs to the onion mixture, mixing often. Season each potato skin with salt and pepper and then evenly distribute the egg mixture between the potato skins. Bake for 10 minutes until the cheese is melted and everything is warmed through.


These are perfect for an everyday breakfast or something special to serve for a holiday breakfast. No matter when you make them, you must make them!


Friday, September 13, 2013

Where Have You Been Lately?

Life has been extra very busy the last couple of months. Too busy to blog busy and that's never a good thing.  I figured I owed all my loyal readers and explanation as to why I've been MIA. That's the least I could do. Hopefully you haven't been too worried. I have plenty of recipes to share and catch you up on, but that's for another post. Let me tell you what's been going on the wild wild world of Christina. Are you ready? Buckle up and hold on.

Let's start with the most exciting news first. That only seems fair, right? Well, about two months or so ago the captain and I became homeowners. Yes, you heard me right - homeowners! We looked and looked and looked for month and put in offer after offer only to get rejected one house after another. It was a very stressful and after the third or fourth house, we started to get a little depressed. Okay, maybe it was just me, but we were both rather sad. The captain and I knew that when the time is right it would happen, but it seemed like it never would. One one of our last offers was accepted only to be turned back to us asking for more money. The Sacramento market is on fire and all the houses are going for at least 10% over asking price - there was no way we could give them more money. Nevertheless, that one came and went too. After a couple more offers and a sketchy seller later, we finally changed real estate agents and fell in love with the first house we saw with our new agent. The house needed some work (something I was kinda against before), but there was something special about this house. Maybe it was the big hydrangeas in the front yard. I love love love hydrangeas! It had beautiful brickwork, hardwood floors and it had four rooms instead of three! With the way houses were flying off the market like hot cakes, we thought about it for an hour or two and then put an offer in. The next day, the owners came back accepting our offer! We couldn't believe it - at least I couldn't. With everything we went through with our last agent (I won't even go into details there, just trust me, it wasn't good), it seemed like a dream. After a little negotiation (the roof was old and needed to be replaced), the owners accepted all our suggestions and even helped us cover some of the closing costs! Can you believe it? It was just meant to be. As cheesy as that sounds, it really was. 20 days after we completed all our inspections and signed all the papers (I've never signed my name so much!), the house was ours and the keys were in our hands. We were homeowners!


homeowners!

During the time in which we were buying our first home, I also started my MBA program. I made the crazy decision a year ago that going back to school to get my Masters degree would be a good idea. Maybe I should have thought it through a little bit more. Working full time and going to school is a little crazy and very exhausting, but I know I can do it. This summer, I decided it would be a good idea to start taking classes and get a head jump and a semester ahead of the game. Why not, right? Well, maybe that wasn't the best idea. Between buying a home, class and my sister's wedding (yes, my sister got married this summer too!), I was beyond busy and rather stressed. Too stressed.  I don't think the captain was happy with me. Poor guy puts up a lot with my being a big worry wart, but I couldn't have made it through my first MBA class or my sister's wedding without him. Seriously. No joke. He's really the best boyfriend a girl could ask for. Always there to calm me down. Always there to make me laugh. And most of all, always there to support me in all I do. I know getting through the next 2-3 years of my MBA program won't be easy, but knowing that I have him here by my side makes me that much stronger. Yes, I'm sappy. Sorry. Needless to say, I made it through my first class and am now in the fall semester and taking two more classes. Working full time and going to school is definitely not easy, but I know it will be worth it. Here is what my normal schedule looks like:

Wake up at 5am
Study from 5-6am
Get ready for work and be at the office by 7am
Work until 4:30pm
Head to class and get home around 8pm
Grab a bite to eat and study until 9:30pm
Shower, go to bed and repeat

My hectic schedule doesn't leave me much time to cook, let alone blog, but I promise to try to get in a couple recipes a month. That's the least I can do. You should see my phone  - it's FULL of recipes. Overflowing to be exact. Plus, when the captain and I moved into our house, he came to find out that I own a lot of cookbooks. Apparently too many. So, the captain provided me with a challenge - no more cookbooks until I cook three things from each cookbook. It seemed a bit daunting, but I accepted. It's definitely going to take me longer to get through it than I though, but it's been kinda fun. Don't tell him I said that. The hard part has been avoiding all the new cookbooks out. I have to practically run past the cookbook section at Costco. I'm the crazy lady you see running with my cart. You know you've seen me.

my typical morning before work - a text book and a cup of coffee

With getting our home and starting school, we've also been working on our home. If we didn't' have enough to do already. The house needs a little bit of work and the first thing we did is get a new roof. Who knew they were so expensive! Before our new roof, our house actually had three layers of roof! Yes, three layers! The men who tore it off, did so in just a couple of hours - so fast! For the next week after that our roofers baked in the 100 degree weather (poor guys!) and banged, nailed and stapled our new roof on. It looks great and will keep us dry and safe for the next 30 years. Not that we will be in the house for that long, but you never know.  After the roof went on, we decided it was time to knock down a wall in the living room. It must have been the thing back in 1960's to have a wall that went 3/4 the way across the room. We figured it needed to come out to open the room, so with some help from my Dad, the captain and I went at it with a sledgehammer. The wall took a good day or so worth of work, but it came down. All the way down. It was a little scary with the electrical wire and all those long old nails sticking out, but we knocked that baby down! Then came the nasty stained old carped and the hundreds of staples in the floor under the carpet. My hands hurt so bad from pulling out all those staples. So many! We've taken a break for awhile due to my sister's wedding and traveling for work, but we will be back at it soon. The captain is working on painting our office and getting it ready so I have a better place to study than the kitchen table. I kinda do hog the whole table and don't let the captain watch TV when I need to read. I don't think he likes that so much.

I forgot to tell you that we also ripped out all these old nasty cabinets from the garage!

before and after of the wall!

here is the captain caulking our closet before we painted the whole room. I swear the closet took longer to paint than the whole room.

the roofers are here!

my little sister got married!

we had to add a little DMB to our room. it's a necessity. You don't even want to know how many Dave posters we have.

So between weddings, work, school and working on our house, I've been busier than busy. At least it's all good news though, right? Right! As I said, I promise to not leave you hanging for months again without an update or a great new recipe. Promise! 


Ps. You'll be glad to know I just survived one of hardest midterms I've taken in awhile and got a 94%. Maybe I am made out for this MBA thing after all!


Monday, July 29, 2013

Mint Chocolate Brownie Bites

This will tell you how far behind I am in my posts for you all - I first made these mint chocolate brownie bites back last year during the holidays. I told you it was awhile go, but these mint brownies are well worth the wait. That I can promise you. A chewy slightly minty brownie bite coated in chocolate and crushed Andes candies. Ya, my whole mouth just filled up with saliva. And not to forget, they are great any time of the year - not just the holidays. Just putting that out there. Let's be honest, who can say no to a minty brownie. Not me and I am sure I am not alone here. At least I hope not.

After making oodles and oodles of my salted caramel chocolate chip cookie bars during the holidays, I wanted to switch it up and try something new. When I saw this recipe for mint chocolate brownie bites on one of Pioneer Woman's Saturday airings, I knew I had to make these. For one, I had never made brownie bites and two, brownies with Andes candies? I just had to make them them! There is just something about those minty chocolate little candies that are so so good. Please tell me you've had them before? I sure hope so! If you haven't, the best place to find Andes candies will probably be at your local drug store or Target (don't even get me started on Target - it's a slight addiction!). They are usually readily available and you shouldn't have too hard of a time finding them (they come in a box and you will probably need two of them!). If you do, just ask someone at the store and they should be able to direct you to them or tell you where you can find them. Just try not to eat them all on the way home or before you make the brownies. Those little things are addicting. Just a little warning. And no, I did not eat a whole box on the way home. Okay, maybe half a box. Just kidding. Well, maybe. You'll never know.

These brownie bites are so simple to make that you'll wonder why you never made them before. Seriously. You just throw together butter, sugar, eggs, flour, unsweetened chocolate and a few other minty goodness ingredients and that's it. See, I told you it wasn't all that complicated. The minty flavor of the brownie comes from melted Andes candies and a splash of mint extract. Just be careful when using the extract - a little goes a long way and one trip and extra spill and your brownies could turn into toothpaste brownies. That doesn't sound too good. Once the batter is all made up, you scoop a little bit of dough into a well sprayed mini cupcake pan and bake until they are just cooked. You don't want a dry brownie here! Just when you thought the brownies were done and yummy, we take them to a whole new level - coat and dunk them in bittersweet chocolate. Oh ya, you had me at dunk. If you thought that was good, you then sprinkle them with chopped Andes candies. Just because dunking them wasn't enough. Yes, I so went there and I am totally not sorry. Not in the least bit. These brownies are a little bit minty, a whole lot chocolatey and just the right size. Make them for the holidays or make them just because you want something a little extra special. Just promise me you'll try these. I promise you'll love them!


Christina, please don't eat all the candies before you make the brownies.

where all good things happen - creaming the butter and sugar!

adding in the melted chocolate and candies!

minty brownie batter all ready to go

scooped and ready for baking

cooling brownie bites (and apparently an action shot too)

dunking station

almost to pretty to eat - almost!

Mint Chocolate Brownie Bites (slightly adapted from Pioneer Woman)

50 whole Andes Mints
1 stick 1/2 cup butter, Softened
1 cup sugar
2 ounces, weight unsweetened chocolate
2 eggs
3/4 cups flour
1/4 teaspoon mint extract
1 Tablespoon butter
1 ounce, weight bittersweet chocolate, chopped 


Preheat oven to 325 degrees. Spray mini muffin pan generously with baking spray (don't skip this step or you'll be sorry when they stick all over the pan!)

Melt unsweetened chocolate in a bowl in the microwave. Remove from microwave and stir in 8 Andes mints until all melted. Let cool slightly. In a mixer with the paddle attachment, cream 1 stick of butter and sugar. Beat in eggs one at a time. With the mixer on low, drizzle in the cooled chocolate mixture slowly, mixing until it's combined. Add flour and mix thoroughly. Scrape the sides of the bowl with a rubber spatula, add mint extract, then mix again.  Using a tablespoon or cookie scoop, scoop batter into mini muffin tins. Bake until done, about 13 to 15 minutes. Turn upside down out of pan and allow to cool.

Combine 25 unwrapped Andes mints in a bowl with the tablespoon of butter and chopped bittersweet chocolate. Microwave and stir until melted and smooth. Dip the brownie bites in the chocolate, concentrating on the top "cone" part. Allow to set for a few minutes. Chop the remaining Andes mints and sprinkle them on the top. Set in the freezer for 10 minutes if you need them to set right away. Enjoy!


Just when you thought brownies couldn't get any better.