Sunday, July 31, 2011

Strawberry + Champange = Happy Birthday Cynthia

Cupcakes seem to be all the rage this year, don't they? I mean, who wouldn't love them - they come in any and all flavors and they are just so dang cute. And you can have two and not feel like you ate a big 'ol piece of cake - at least that's what I tell myself. Needless to say, I love making cupcakes. They always seem to make people smile and they are just as fun to eat as they are to make. I'm trying to remember when I first started making them, but I honestly can't remember. I think it must have been this year, or at least this year is really when I broke out of my cupcake shell and started producing them in the masses. I made them for mother's day, wedding showers, BBQ's, Ryan's graduation party, father's day, and the list goes on and on. So, when Cynthia's birthday came around I thought what better to make then cupcakes! Strawberry cupcakes to be exact. I've never made a strawberry cupcake and searching for the right one definitely took some time. Some of them had fresh strawberries (which I know if you don't coat them right, will sink to the bottom and no one likes soggy cupcakes), some of them had strawberry jello (seriously ew), and some even used strawberry boxed cake mix (oh no no no!). After an hour or so of searching endless blogs and cooking websites, I found the perfect one - strawberries & champagne! What could be better? And the cupcake itself is actually vegan, score! I've been wanting to try out a vegan cupcake for awhile and this was the perfect opportunity (although, the frosting is not vegan. I'll have to attempt a vegan frosting another day). The recipe looked slightly labor intensive, but not overly difficult.  After making the strawberry puree and reducing the champagne, I knew this one would be a winner.  Even my #1 taste tester approved of them, and so did the birthday girl! If you're looking for a summery cupcake that has a unique and fresh frosting, you've got to try this one. I've even had a special request to make these again in a couple of weeks. They must be good then, right?

The lineup - can you guess the ingredient that makes this cupcake vegan? Coconut milk instead of eggs!     


First Step - Strawberry Puree

2 1/2 cups strawberries + 1/4 cup sugar + 2 tablespoons fresh lemon juice and blend until smooth

Straining the puree to remove all those pesky strawberry seeds


Step Two - Cupcakes (the best part!)

Champagne reducing for the frosting!

The essential tools for this recipe - if you don't have a large ice cream scoop, get one. You'll have perfectly even cupcakes every time! Note - these liners are awesome. I ordered them from a cupcake shop online and they are perfect for baking. They do not absorb oil or soak through like most other liners would. That and the price wasn't bad either - 350 of them for $15.

Cupcakes pre-bake! Nice and rosy pink.

Strawberry cupcakes post-bake. Not sure what happened to the color, but don't let that scare you.


Frosting Ingredients!

Reduced champagne butter cream frosting. Are you drooling yet? I could seriously eat this by the spoonful. And no, I'm not ashamed to admit that.


Get ready for my top secret icing technique.....


Ziploc bag! You can fill it up, cut off the tip and pipe away. The best part, you don't have to clean a pastry bag and you can just throw it away. LOVE easy clean up.


Cupcakes frosted and topped with clear sprinkles. Be careful to not spill them on the floor - major slipping hazard!

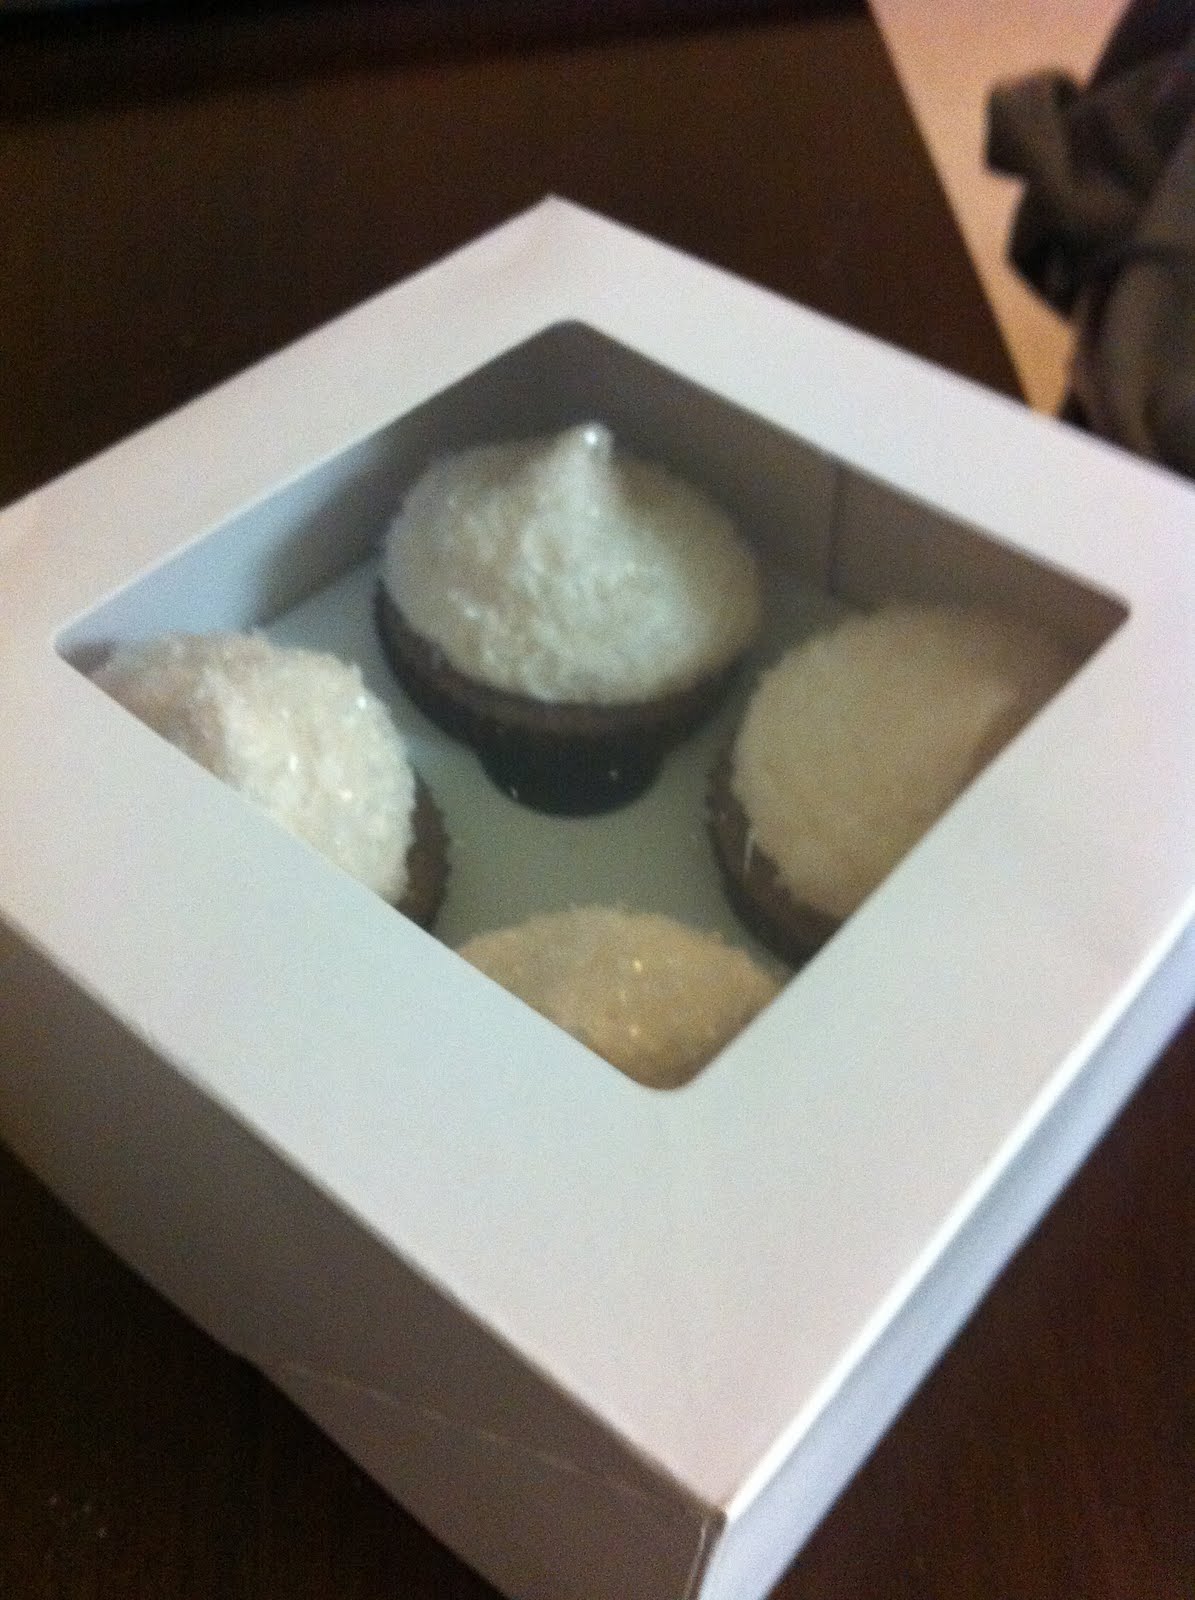
Boxed up and ready for delivery to the birthday girl. Ps. I found these boxes at target for $1! If you see them at your local target, swoop them up while you can. You can use them for just about anything.

A bow makes everything better.


Strawberry Champagne Cupcakes (adapted from loveandoliveoil.com)

Makes 12 cupcakes

Ingredients:

1 1/4 cup flour
1/2 teaspoon salt
1/2 teaspoon baking powder
1/2 teaspoon baking soda
1/3 cup coconut milk
1/3 cup champagne/sparkling white wine
1/2 cup strawberry puree
3/4 cup sugar
1/3 cup vegetable oil
1/2 teaspoon vanilla


For Frosting:
2 cups champagne (reduced until about 4 tablespoons)
1 cup (2 sticks) unsalted butter, room temperature

5 cups powdered sugar
2-3 tablespoons milk or cream, as needed


Directions:
Preheat oven to 350 degrees F. Line a muffin pan with paper liners.

In a large bowl, sift together flour, baking powder, baking soda, and salt.

In a separate bowl, whisk together coconut milk, champagne, strawberry puree, sugar, vanilla, and oil. Make a well in the center of the dry ingredients and pour in the wet ingredients. Mix until relatively smooth. Fill cupcake liners with a scant 1/4 cup of batter (cups should be just under 2/3 of the way full). Bake for 18-22 minutes or until set, and toothpick inserted in the center comes out clean. Transfer to cooling rack and allow to cool completely.

Bring champagne to a simmer in a small saucepan. Continue to boil gently until only 4 tablespoons of liquid remain. Remove from heat and set aside to cool.

For frosting, cream butter in electric mixer for 1-2 minutes until fluffy. Slowly add 1 cup sugar and beat until smooth. Add 2 tablespoons reduced champagne and mix. Continue to add confectioners’ sugar, 1/2 cup at a time, and beat until light and fluffy. Add cream or more sugar as necessary to achieve proper consistency. Pipe or spread onto cooled cupcakes.


Don't those sound scrumptious? If they all don't get eaten right away, make sure to keep the extras in the fridge. When you are ready to have another, just take it out for 30 minutes or so to get the chill off of them. Or you can eat it cold. Shoot, I licked the frosting bowl, so who am I to judge.


Wednesday, July 27, 2011

Cannellini & Garlic Dip

I'm going to keep this one short and sweet because I also have something sweet and special in the oven that I must keep my eye on. This dip is a great snack and I'd be willing to bet it would be a great party pleaser too! I love it so much, that I think I'm going to have this dip for dinner. It's a little bit spicy, totally garlicky and a whole lot of deliciousness. I'm going to scoop this dip with homemade pita chips (see below) and some carrot sticks, but you can scoop away with whatever your favorite bread or veggies are.  Or you can just eat it by the spoonful - at least I did for the first few bites. Fair warning - the recipe calls for 1 teaspoon crushed red pepper flakes and if you don't like to feel that heat on the back of your tongue, I'd recommended starting with 1/4 teaspoon and working you way up to 1/2 a teaspoon. That's what I'll probably do next time, it's just a bit too spicy for my taste. If you are like me and add too much heat, you can calm it down with some more lemon juice. Once you try this dip, you'll be addicted. That and you'll be keeping away the vampires when you eat it. Can you smell my garlic breath from where you are?


Ingredients and the essential tool of the recipe - mini food processor (which I forgot I had. It was buried in the pantry, oops).

Pre blend


creamy dip to be enjoyed with homemade pita chips and carrot sticks. YUM!


Cannellini & Garlic Bean Dip (adapted from sugarcrafter.net)

1 can (15 ounces) cannellini beans, drained and rinsed
1/4 cup olive oil
1/4 cup lemon juice
2 cloves garlic, minced
1/4 tsp salt
1/4 tsp fresh ground pepper
1 tsp crushed red pepper flakes

Combine all the ingredients in your food processor and blend until smooth and creamy.


Super easy and super delicious. Now, I bet you are wondering about those pita chips. Of course you can buy them at the store (Trader Joes has a fab pita chip selection), but if you have pitas in the house, this is the way to go (I really need to try to make my own pitas!). All you need to do is preheat your oven to 450 degrees and spray a baking sheet with non-stick cooking spray. Then, cut your pitas into 8 pieces (you can do as many pitas and make as many chips as you want). Place them on the cookie sheet (like below) and spray the tops with non-stick cooking spray. This will help them get brown and crunchy. Bake the chips for about 5 minutes, but you may need to go longer pending how crunchy you like them. Just don't walk away and forget to set the timer because you'll have burnt pitas!


I'm off to curl up with my tivo and dig into this yumminess. I might even lick the bowl.

Tuesday, July 26, 2011

Breakfast Edition - Hot Apple Quinoa

I love breakfast. If I had to choose one meal to eat all day everyday, it would be breakfast. It can be sweet. It can be savory. It is just delicious. The rule in my house is that you have have breakfast for dinner at least once a week. If you try it, I bet it will become your rule too. Seriously, who doesn't love breakfast?!

As much as I love breakfast, my only problem is that during the week, I don't have time for something other than a protein bar for breakfast. In fact, I eat at least two (sometime three) throughout the day. Although it's loaded with protein and keeps me fueled through the day and my post work workout, it's still probably not good to eat that many (Ryan says it's all about balance. I should probably start listening to him. He's a smart cookie!). Plus, they are a little high in sugar. Thus, here were are - what else can I have for breakfast that is low in sugar, but has a decent protein level and will keep my stomach from growling like a freight train until lunch time? Quinoa! Are you wondering how to say it? Say it with me - keen wah! I promise it's just as fun to eat as it is to say. If you have not tried this magic grain, you need to. Just as breakfast can be savory or sweet, so can quinoa. I've used quinoa before (these cakes were fabulous - http://nutmegnotebook.com/2011/02/cheesy-quinoa-burgers-weight-watchers-pointsplus-3/), but never for breakfast. Let me tell you, it was delicious (more so then I thought it would be!) and it kept me full until lunchtime. Just what I needed and a great switch up from my normal protein bar or oatmeal morning routine. If you try it, you'll like it too. Guaranteed!


It was too early and forgot to pull the nutmeg out of the pantry. Just close your eyes and imagine it's here too.

Everybody into the pool!

Fluffy and cinnamony quinoa! This made the house smell like Christmas!

Packed up and ready to take to work!


Hot Apple Quinoa Breakfast Bowl (slightly varied from nutmegnotebook.com)
 
Yield: 2  Servings

1/2 cup Quinoa (rinse with water if not pre-washed)
1 cup unsweetened vanilla almond milk (you may substitute your choice of milk, fat free, soy etc.)
1/2 cup water
1 apple, cored and diced (leave the peel on)
3/4 teaspoon ground cinnamon (or to taste, I like a lot of cinnamon)
freshly ground nutmeg (a dash or two)
1/2 teaspoon vanilla extract 
Optional Toppings: brown sugar, nuts, coconut, nut butter, pumpkin butter, apple butter, honey, Agave, or maple syrup (I used 1 tablespoon pecans and 1 teaspoon honey!)


If your quinoa is not pre washed, place it in a fine mesh sieve and run cold water through it until the water runs clear.

In a medium size sauce pan combine the quinoa, almond milk,water, apple, cinnamon and nutmeg, bring it to a boil, turn down heat and simmer for 15-20 minutes or until quinoa is cooked and tender. Remove from heat, divide into two serving dishes. Top with your favorite toppings such as brown sugar, nuts, coconut, nut butter, pumpkin butter, apple butter, honey or maple syrup


Best news of all - this breakfast treat come in just shy of 300 calories, score! It makes two 1 cup servings, but you can always double it up if you'd like to make a large batch for your family or if you're like me, several days worth of breakfast made and ready to grab as you head out the door. And if you have not checked out nutmegnotebook.com, you definitely need to. There are some great recipes and all the recipes have a calorie count and weight watcher points too, double score! 


Monday, July 25, 2011

Take Me Out to the Ballgame!

This past weekend, Ryan and I took an adventure out to San Francisco for a short weekend getaway to go to go cheer on the Giants! When I think of AT&T park, I think garlic fries, hot dogs and beer. As much as I love those things (and baseball too), I wanted to make us a snack that screamed "play ball!" and was something that I have never made before - homemade cracker jacks! Snacks are a must anytime we go on an adventure. I always make sure to bring them with me whether it be crackers, cookies or prunes. I must admit this now - I carry prunes in my purse. And no I'm not 80. I just like prunes. Now that I think about it, I should probably come up with a recipe to use prunes. But, we'll get to that later. Needless to say, it's always a good idea to keep the captain and co-pilot fueled and ready to go during an adventure. Here's some San Francisco love from this weekend!


Hello from our seats at AT&T Park!

Hello Stamos! (Don't worry my heart still lies with Posey. Come back soon, we miss you!)


Post breakfast walk along Chrissy Field. Ps. Best breakfast I've had in a long time. If you have not been to Perry's in SF, you must go. The eggs blackstone were to DIE FOR delicious!
Ok, back to caramel corn. That's what you came here for right? After searching through what seemed like 50 different recipes, I finally found one that sounded perfect and one I had most of the ingredients for. And who doesn't love cracker jacks?! They're sweet, salty and they come with a prize (the best part if you ask me). My only issue with the outcome of this delicious snack is that the peanuts did not stick. I am not sure if this is due the fact that they had natural oils on them or if the caramel sauce I made was not sugary enough. One will never know. Although, this is one recipe I will make again, most likely during the holidays (hello moose munch!) now that I know the trick to not making the popcorn soggy. Now that I've mentioned the trick, you're probably wondering what it is, right? Okay, okay, I'll spill the beans - keeping the popped popcorn in the oven at low heat while you are making the sticky sweet topping is a must. It keeps the popcorn warm, but dries the kernels out just enough so that the caramel will adhere without soaking in and making it all soggy. No one likes soggy popcorn! Warning - this recipe make A TON of popcorn and you will want to eat it all. Trust me, it's delicious and extremely addicting. I brought the leftovers into work today, and they were gobbled up in a flash!

Ingredients!
Pre Pop and Shake
Post Pop - SO much popcorn!

Boiling Caramel. Don't lick the spoon after making this. Just trust me on this one.


Caramel and Popcorn together at last


.
Caramel Corn ready to eat!

Caramel Corn (from allrecipes.com)
 
4 quarts popped popcorn (about 16 cups)
1 cup brown sugar
1/2 cup light corn syrup
1/2 cup butter 
1/2 teaspoon salt
1/2 teaspoon baking soda
1 teaspoon vanilla extract

Directions

  1. Spray large shallow roasting pan with cooking spray. Add popcorn and place in preheated 250 degrees F oven while preparing caramel.
  2. Mix brown sugar, corn syrup, butter and salt in a heavy 2-quart saucepan. Stirring constantly, bring to a boil over medium heat.
  3. Boil 5 minutes without stirring. Remove from heat. Stir in baking soda and vanilla; mix well.
  4. Pour syrup over warm popcorn, stirring to coat evenly.
  5. Bake for 45 minutes, stirring occasionally (about every 15 minutes). Remove from oven and spread on foil that has been sprayed with cooking spray.
  6. Cool; break apart. Store in tightly covered container. 
 
 
Although these "cracker jacks" didn't come with a prize, they did come with a giants win on Satuday night! Couldn't have asked for a better weekend of baseball, San Francisco and a slightly detoured road trip with my big sugar (if you get this giants reference, you rock).


Here are a couple of tips that make this recipe even better - If you can, use a disposable roasting pan. It makes clean up a snap and you don't have to worry about cleaning up stuck on popcorn and burnt sugar from cooking your caramel corn in the oven. Once you add the baking soda to the caramel mixture, pour it over the popcorn right away. If you let it sit, it won't pour as well over your popcorn. Also, make sure you stir the popcorn every 15 minutes or so during baking. If you don't you might get burnt popcorn. And no body likes burnt popcorn. Well, except my mom. 
 

Thursday, July 21, 2011

Green Pizza

Perhaps "green pizza" might not be the best way to describe the pizza I made last night (kinda sounds like it's moldy pizza, which is not the case!), but boy was it good.  It was so good, I even made one this morning to take to work for lunch. Last night I had to think of a quick recipe I could make using the seriously garlicy and seriously delicious pesto I had just made using herbs from my patio garden. And who doesn't love pizza? You can add what you like, and take off what you don't like. Plus, it has cheese. Ooey gooey cheese. Can you tell I like cheese?

I haven't had real pizza in FOREVER (like how the boy on "The Sandlot" says it - foooorrreeeevverrrrr. Please tell me you know what I am talking about and that I don't sound like a crazy lady), so I have been trying to figure out how I can still enjoy pizza but not have it go all straight to my rear end (honestly, who can just have one slice? If you can, I am jealous). During lunch this week at work, one of my coworkers mentioned she was going to try to make a hawaiian pizza with pita bread - what a fabulous idea! I have heard of that before, but it has been so long since I've tried to make a pizza, I must have totally forgot.  I was going to attempt to make a grilled pizza with whole wheat dough from Trader Joes, but I like the pita bread idea way better (grilled pizza to be attempted later!). It's personal size and I could eat the whole pizza and not feel guilty!

Then began the digging in the fridge to see what toppings I had for my pizza - soy hot dogs, corn and strawberries. Now those ingredients would make an awful pizza. So off to Trader Joes I went to get some real pizza toppings - mushrooms, cheese and tomatoes. They did not have whole wheat pita bread, so I bought whole wheat middle eastern flatbread. Looks just like a pita, but no pocket. They also had some whole wheat nann bread that looked like it would make a great crust too. Doesn't all of that sound delicious? I have been trying to get in more vegetables in any way I can, so I did not add any meat to this (prosciutto or some turkey Italian sausage would be delicious on this too), but like I said, pizza is a blank canvas - add what you like, don't add what you don't like. Just don't forget - if you make fresh pesto, you have to try making a green pizza!


Green Pizza
Ingredients

1 whole wheat pita bread (or equivalent)
1 tablespoon pesto
1/4 cup shredded low fat mozzarella cheese
1/4 cup sliced mushrooms
1/4 cup sliced tomato
Non-stick cooking spray

Directions

Preheat oven to 425 degrees. Spray baking sheet with non-stick cooking spray and place pita on the sheet. Top with pesto, cheese and toppings. Bake for about 8-10 minutes, or until cheese is hot and bubbly.


Super easy and super delicious. Not to mention I did a calorie count on this bad boy and it comes out to be just around 300 calories - not bad for a delicious personal pizza. Although I just had the pizza by itself, pairing it with a nice salad and glass of vino does not sound too bad either. Mmm, vino and pizza. That is a combination hard to say no to.

Wednesday, July 20, 2011

Pesto - It's the Besto!

About a month ago, my sister and I were at the Davis farmers market when we came across a woman selling herbs for $1 each. It was too good of a deal to pass up, so we swooped up a bunch of different herbs (basil, parsley, dill and chives) and away we planted. I also have a couple of other plants on my patio too keep the herbs company - a dwarf lemon tree and eggplant. Too bad my tomato plant died though. That thing thrived in the cold, rainy weather, but shriveled up and hated the hot weather. So strange.


A few weeks later, the herbs grew like weeds and what do you do with too much basil? Make pesto of course! Now, all of the pesto I find in the store either is way too oily or just doesn't have enough garlic. So, I wanted to find a recipe and add my own twist to make it how I like it. If you know me well enough, you know I love garlic. No, really, I LOVE garlic. I will roast a bulb of garlic in the oven until its golden sweet and gobble it up. Some people will mash it up and put it on bread, some people add it to other recipes, but I just eat it like so. I especially love it when it gets crunchy - it's like candy. My mom says I must be a true Sicilian girl since it's like candy to me. But I digress. 

I must say my first pesto making experience was a success. It took a little bit to get the blender to not sound like a revving engine, but once it did, it was like liquid green yumminess. The only difference you might see in my pesto compared to other recipes is that I used toasted walnuts. Most recipes call for pine nuts, but you can really use any nut you have in your house (maybe not peanuts though - that doesn't sound good). Oh, and make sure you buy a chunk of good parmesan cheese and grate it yourself (if you get the kind with the rind, save it. You can add it to soup and add a TON of flavor from something you might think to throw away). Just promise me you will not use that powdered stuff in the can. Trust me, the cheese makes all the difference. Plus, you can nibble on it while you are making the pesto. Although, you won't have much time to nibble. This recipe is fast and you can use it for just about anything - marinade, on pasta, in hummus, on pizza, as a dip, and the list goes on and on. See, pesto is really the besto!

Note - You can freeze this pesto too. If you do, make sure to put it in an airtight container and put a small layer of olive oil on top (I put mine in canning jars). The basil will turn brown if you don't. If you only need a tablespoon or two at a time, you can even freeze the pesto like you would ice cubes and pop them out as you need them!


 Pesto (slightly recreated from allrecipies.com)

Ingredients
3 cups packed fresh basil leaves
5 -7 cloves garlic
1 cup grated Parmesan cheese
1/2 cup olive oil
1/4 cup toasted walnuts (or pine nuts)
Salt to taste

Directions

Combine basil, garlic, Parmesan cheese, olive oil, and nuts in the bowl of a food processor or blender. Blend to a smooth paste.

Note: You may need to add a little more olive oil depending on how thick you like it. I had to add about 1/4 cup more then the recipe stated.


See. I told you it was easy.


Tuesday, July 19, 2011

What's Better Than a Bowl of Gelato?

I don't know about you, but doesn't a big bowl of gelato sound delicious? I think so. Then again, you might ask, why is the lactose intolerant girl wanting to make gelato? Say hello to my new ice cream machine! 


I must admit, my first ice cream attempt was not pretty. My sister and I "tried" to make vanilla ice cream with bananas, walnuts and chocolate chunks (what I like to call, our verison of Ben & Jerry's Chunky Monkey, mmm). The instructions noted that the base needed to be frozen for at least 18 hours prior to use. Seriously? We want ice cream now! So, we proceeded to freeze the base for a few hours and see what would happen. Yep, that didn't work. So, I put the base back in the freezer (this time for 6 hours since the instructions did say it could take 6 - 12 hours to fully freeze depending on the freezer) and attempted to try again later that evening. The good news is that the ice cream got all creamy and delicious, but once I put in the mixings, the ice cream turned back into a melty mess. Dang. Guess the instrustions were right - you really do need to freeze the base for at least 18 hours.

After ice cream attempt #1 failed, I thought what better way to start my cooking blog then to make what it was named after, stracciatella. No, this is not the Italian egg drop soup (that recipe will come later), it's the gelato! It's a delicious vanilla bean custard base with ribbony flecks of bittersweet chocolate. Kind of like chocolate chip ice cream, but way better. If you have an ice cream maker, you have to try this. It's custardy sweet, but not too sweet. It's even better if the chocolate didn't flake all the way and you get big chocolate chunks in every other spoon full. Even if you don't have an ice cream maker, you can follow David Lebovitz's steps on how to make ice cream without an ice cream maker - http://www.davidlebovitz.com/2007/07/making-ice-crea-1/

Note: I did buy a candy thermometer for this recipe, but I don't think you really need one. As long as the eggs are cooked for 5 - 7 minutes and they are nice and thick, and coat the back of a spoon, you should be fine. Just make sure to keep whisking and don't walk away - not even for a second. Otherwise you will have scrambled eggs. Trust me, scrambled eggs is not a gelato flavor you want to try.


Stracciatella Gelato (courtesy of http://www.epicurious.com)

Yield: Makes 6 servings
Active Time: 30 minutes
Total Time: 3 hours (includes chilling and freezing time)

Ingredients

2 cups whole milk
1 vanilla bean, split lengthwise

3/4 cup sugar

5 large egg yolks

Pinch of kosher salt

1/2 cup chilled heavy whipping cream

1/3 cup bittersweet chocolate chips

2 teaspoons vegetable oil
 
Preparation

Place milk in a medium saucepan. Scrape in seeds from vanilla bean; add bean. Bring to a simmer, whisking often. Whisk sugar, yolks, and salt in a medium bowl until well blended, about 1 minute. Gradually whisk hot milk mixture into yolk mixture. Return to saucepan; stir over medium-low heat until custard thickens and a thermometer registers 170°F-175°F, about 5 minutes (do not boil). Strain into a medium bowl. Stir in cream. Chill custard until cold, at least 2 hours.
Stir chocolate and oil in a small sauce-pan over low heat until melted; let cool.
Process custard in an ice cream maker according to manufacturer's instructions. Slowly add all but 1 tsp. melted chocolate during the last 30 seconds of churning (chocolate will form small chips). Transfer to a bowl. Drizzle remaining chocolate over gelato in zigzag lines. Serve immediately. 

Note: My ice cream machine made this deliciousness in about 20 minutes. You can eat this right from the machine (if you like it in more of a soft serve consistency), or you can place in an airtight container in the freezer to harden up for a couple of hours. Both ways taste delicious, but there is nothing better then taking a big bite of homemade gelato right from the machine. Yes, I did do that. I'm not even going to lie. It was delicious!