Thursday, December 29, 2011

Egg Nog Breakfast Bread

Every Christmas for as long as I can remember, my family always had something a little extra special for breakfast. It was one of those things you always remember. You wake up early, open gifts, have cup of cocoa or coffee and then have a warm and delicious breakfast. This year, we did things different - we had breakfast before all the other fun stuff. It was rather nice because after opening gifts and relaxing, who wants to make breakfast. 

One of the other blogs I follow closely posted a recipe for egg nog waffles. Yum, right? They were so good. We served them with parmesan and chive eggs as well as the totally and fabulous chicken breakfast sausage from Trader Joes. Those sausages are great - there are 130 calories for three links and they taste even better than regular breakfast sausage. At least I think so. If you like them, swoop them up while you can and put them in your freezer. I don't see them all the time and when they are out, they go like hot cakes.


Okay, back to what we are here for. Egg nog bread. There is just something out the flavor of egg nog that wins me over. Maybe it's the nutmeg. Since I can't have real egg nog (hello lactose intolerance), I always buy Silk soy egg nog. It tastes just the same and doesn't give me all that tummy trouble. I went to the store to get some to make this fantastic bread and of course they were all out! Since I knew I would not be drinking this, I decided to buy the organic low fat version. You can you use soy, the real deal or any kind of egg nog that you store has.

Since I knew my family would be having something eggnoggy and special for Christmas breakfast, I wanted to make something for Ryan and his mom (she was in town for the holidays - hiiii Kris!) to nibble on when they woke up in the morning. Plus, this was the perfect time to try out a new holiday recipe and switch it up from the plain old banana bread.  Even better, this one has an egg nog glaze that you pour over the top as it's cooling. Who doesn't love a gooey glaze? I know I do.

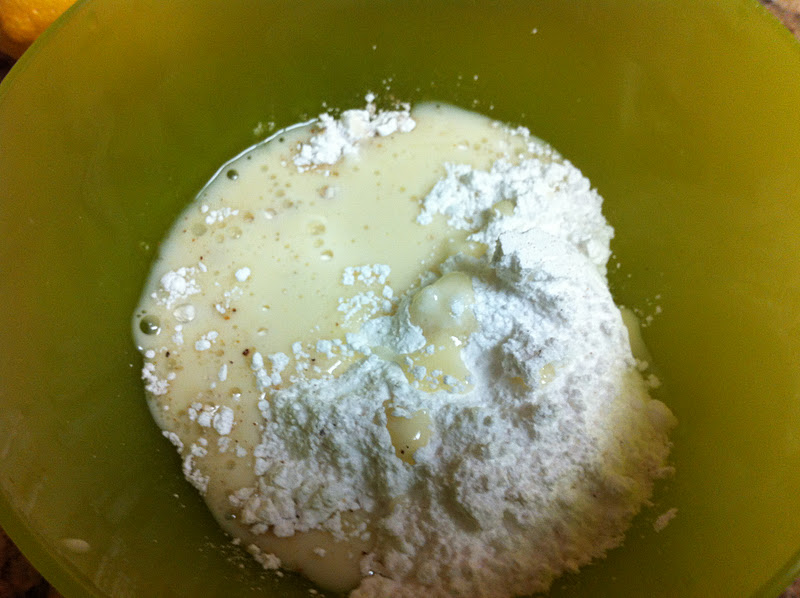
ingredients - wheaties do not go in the batter :)

dry ingredients

wet ingredients

whip that batter!

before going in the oven

pow sugar + vanilla + egg nog for glaze

cooling and glaze dripping

Egg Nog Breakfast Bread (slighty adapted from http://www.recipegirl.com)
 
2 1/4 cups all-purpose flour
2 teaspoons baking powder
1/2 teaspoon salt
1/4 teaspoon nutmeg
2 large eggs
1 cup granulated white sugar
1 cup eggnog
1/2 cup butter, melted
1 teaspoon vanilla 

Glaze:
1/2 cup powdered sugar
1/4 teaspoon vanilla extract
Dash nutmeg
2 to 3 teaspoons eggnog

1. Preheat the oven to 350 degrees F. Grease the bottom and 1/2 inch up the sides of a 9-by-5-by-3-inch loaf pan.

2. In a large bowl, whisk together flour, baking powder, salt, and nutmeg. Make a well in the center of the flour mixture and set aside.

3. In a medium bowl, combine the eggs, sugar, eggnog, melted butter, and vanilla. Add egg mixture to the flour mixture and stir just until moistened (batter will be lumpy).

4. Spoon batter into the prepared pan. Bake for about 45 to 50 minutes. Check for done-ness by inserting a toothpick into the center of the loaf -- it should come out clean. Cool in the pan on a wire rack for 10 minutes. Remove from pan and cool completely on a rack.

5. For the icing, combine sugar, vanilla, and nutmeg. Stir in enough eggnog to reach drizzling consistency. Drizzle cooled loaf with icing. Grate a little bit of fresh nutmeg over the icing, then let icing set completely before wrapping loaf.


Like I said, I did not try this bread, but Ryan said he ate two pieces on Christmas morning. Couldn't have been that bad, right? Also, if you want to use up your extra holiday egg nog and freeze this bread for another time, follow all the steps, but do not glaze the bread. Once you make and defrost the loaf, then glaze the bread.


Chocolate Bourbon Pecan Pie

A couple of weeks ago, Ryan thought it would be fun to have a pie-off for the Porter's holiday party. I was kind of nervous since Ryan makes some of the best desserts I've had (his cheesecake is AMAZING), but I was up for the challenge! I searched high and low for a recipe that I could use and came up empty handed on my first hunt. The next day I narrowed it down to an apple cranberry pie with a crumb topping or a chocolate bourbon pecan pie. Tough choice, right? Apples are a great fall fruit and great in pie, but I wanted to kick it in to high gear and go with the chocolate bourbon pecan pie.

I made my first pecan pie EVER about a month ago. Ryan was over and after dinner he asked what was for dessert. I didn't make anything that night, but pulled out a couple of cookbooks to see what I could throw together. I had everything for some cookies and even ingredients for brownies, but I always make cookies and brownies. I had a couple of pie crusts in the freezer and thought, let's make a pie! I had just enough pecans and corn syrup, so I whipped up a pecan pie. It was quick and easy and best of all delicious. We didn't let it cool enough before we sliced in to it, but come to find out hot pecan pie is still just as good as cooled pecan pie. Yummy. Just don't burn your tongue.

So, I was more than excited to try a pumped up pecan pie with bourbon and chocolate. How good does that sound? The bourbon cuts through the sweetness of the corn syrup so it's not as sweet, but you still get that boozy tingle on the back of your tongue. That's right, I said boozy tingle. The chocolate adds this brownie like flavor that is, well, you just have to try it to know. So yummy and so good. Even better, it's super easy to make. Next time you need a great holiday pie, you can whip this one up in no time and you will be a superstar. That I can promise you.


pie ingredients. not featured - the pie crust

melting the butter and chocolate

whipping the eggs and sugar

want to know how to get the sticky corn syrup out of the measuring up easily? spray with non-stick spray first!

the corn syrup sunk to the bottom of the egg mixture

pie crust ready to go - and leaves!

look at that leafy crust. my sister bought me that leaf cookie cutter at goodwill so I finally got to use it. Then I took a paring knife (don't worry, I was careful) and made the veins in the leaves. All you need to use is water to made the leaves adhere to the crust!

pre-bake

all baked and cooling! YUM!


 Chocolate Bourbon Pecan Pie (recipe courtesy of Tyler Florence)

1 pre-made pie crust (2 if you want to do a crust design such as leaves or a braid)
1/2 stick unsalted butter
2 ounces unsweetened chocolate
3 large eggs
1 cup sugar
3/4 cup dark corn syrup
1/2 teaspoon pure vanilla extract
3 tablespoons bourbon (I used Jim Beam, but you can use whiskey or even spiced rum, if you have it)
1/4 teaspoon salt
11/2 cups pecan halves

Preheat the oven to 350 degrees F. 

Press the dough into the pan so it fits tightly and trim the excess around the rim. Place the pie pan on a sturdy cookie sheet so it will be easy to move in and out of the oven.

To make the filling, melt the butter and chocolate in a small saucepan over medium heat. Once melted and combined, remove from heat and let cool. Beat the eggs in a large mixing bowl until frothy and then blend in the sugar. Stir in the syrup, vanilla, bourbon, salt, and the melted butter mixture until well blended. Arrange the pecans on the bottom of the pie crust and carefully pour the egg mixture over them. Bake until the filling is set and slightly puffed, about 45 minutes. Test for doneness by sticking a thin knife in the center of the pie, if it comes out pretty clean, you're good to go. Transfer the pie to rack and cool completely before cutting.


See, pecan pie is super easy to make! Of course I decided to use a refrigerated pie crust from the grocery store, but feel free to use homemade. Sometimes when I am in a pinch, I love to use the ones from the store, because they are already done for you so all you have to do is take the chill off of it, and place it in the pan. This pie got so many great reviews, I decided to make it again for Christmas dinner dessert. Even better, it freezes great so you can save a whole pie or just a piece!


Tuesday, December 27, 2011

Sexy Scar

For those who want to see the super sexy scar, here you go. It's a little gross, but not that bad. It's not like I'm showing you the inside of my thumb. I already crossed that off my bucket list, so I don't think you want to cross it off yours!

My sister took lots of photos from the beginning stitch to the end. She even took a video of me being a big 'ol baby when I had the dressing removed and stitches cleaned for the first time. Ya, I won't be showing you that. HA.


I am still healing, but doing much better. The part I tried to cut off has healed back just fine. The doctors originally thought it might not - yikes. The only benefit of it not healing and having that part removed would have been starting a life of crime. The ER doctor told me that it would grow back, but would have no thumbprint. That would have been cool. Kinda. Good thing it was fine and we don't have to go down that path, right? Right! Getting the stitches out today was definitely not painless, but I survived. I'm just glad it's over. Even better, I hope to be back on my normal blogging schedule shortly. I have TONS of recipes to catch you up on!


Craft Project Gone Wrong!

Hi all. As you may have noticed, I have been away from the blogging scene for a couple of weeks. Why you may ask? Well, I had a little thumb v. knife incident that sent me to the emergency room. Even better, I wasn't even cooking - I was crafting for holiday gifts. There was probably my first problem. Here's the story.

I was looking on Pinterest after Thanksgiving for crafty holiday ideas when I came across this idea to make a jewelry holder from old wine corks and picture frames.  Super cute idea, right? I thought so. So, after Thanksgiving, my sister and I went to Goodwill (they have 50% off the whole store the day after a holiday!) and I bought some old picture frames that would be perfect for this project. Then I cleaned the glass and wood and sprayed it with some spray paint ( I picked a hammered copper color). Since it wasn't too warm outside, I took awhile to dry - about a day. Then, I was ready to start placing the corks to fill it up. I filled up the whole thing, but realized there was one spot left where I needed half of a cork. So, I got out a long serrated bread knife and started slow. I got about half way when things turned red and bloody. The cork slipped and the knife took a good part of my thumb with it - the thumbprint part of my thumb. It was a good flap of thumb, but good thing it was still attached. I will spare you any more gross details. They will make you go "ewwww". At least that's what Ryan says.

Are you grossed out yet? Since my parents live not too far from me, I called them right away and they took me to the ER. Four hours and ten stitches later, I was good as new - well, kinda. It was really painful, but at least I didn't cut off my thumb.  Here are some pictures of the incident, but don't worry, no pictures of the wound itself. Promise!

after triage and waiting for them to bring me back to an ER bed for shots and stitches. My mom took this picture and that's when I realized my sweater had blood on it. Gross.

After all was said and done. Wrapped and protected so I would not bang it on anything. Eating the hamburger with with the other hand, not so easy. Holding a fork. Not easy. Washing hair. Not easy. Buttoning pants for work. Not easy.

Here is the finished craft project. See, pretty!


I didn't think I was going to finish the cork jewelry hangers in time for Christmas since doing things with one good hand isn't so easy, but I did. I made one for my mom and my sister - all made with a note on the back saying "made with love and blood". I thought it was cute.

Good news is that it has been ten days since my epic slice and dice and I am headed back to my doctor to get the stitches out this afternoon. I hope that it won't hurt. Ryan says it will just tickle, so I hope he is right. Once all the stitches are out I will take a picture so you can see my sexy scar. Ya, I said sexy.

Lesson of December - be very VERY careful with sharp knives!
 

Tuesday, December 13, 2011

Green Monster Smoothie

After all those holiday treats, I bet you are looking for something light, refreshing and green! At least I know I am. I have a goal this year to not gain any weight over the holidays (even trying to lose!) and this smoothie has been a lifesaver. It's simple to make and you can whip it up in minutes. All you need is a banana, a bit of peanut butter, ground flax seed, agave nectar (or honey), ice and spinach. That's it. Whip it up in a blender and you have a smoothie that is loaded with vitamins and is super healthy.

I promise you that you can't really taste the spinach. I know that's what you are totally thinking about. Spinach in a smoothie? Gross. No, don't think that. It's really good. You do get a small hint of spinach, but if you didn't know better, you'd never know it was in there. The banana and peanut butter really shine through. If you really want to up the bonus factor, add in a scoop or two of your favorite protein powder. I use soy vanilla protein powder from Trader Joes. You've probably seen the huge container of it in most of my ingredients photos. I really don't have a good place for it so it kind of just sits on my counter or wherever I have room for it that day. I need a bigger kitchen. I keep telling Ryan I need a bigger kitchen, but he keeps telling me I have to buy him an airplane first. Fair trade? Hmmm.

yummy ingredients

pre-blend

swirling spinach

delicious and healthy shake!

Green Monster Smoothie (recommended by my friend Lauren, also from ohsheglows.com)
1 cup milk of choice (I used unsweetened vanilla) almond milk
1 ripe banana, chopped
2 handfuls  spinach
1 teaspoon ground flax seed (you can always leave this out if you can't find it, but use it if you can!)
1 tbsp nut butter (here I used organic peanut butter)
3 ice cubes

Starting with the liquid, add in 1 cup of milk of your choice. Now add in the chia or flax and nut butter. Next, add in the spinach followed by the banana on top. Blend until smooth. Add in your ice cubes and blend some more. Serves 1- about 2 cups.

I know I still probably haven't convinced you to try this, but I am sure you have most of these ingredients in your fridge. Can you at least promise me that you will think about making this? I have yet to try it with other fruit, but I can promise you that I will be trying other fruit combination's to see how well I can hide that spinach!

Monday, December 12, 2011

Dark Red Velvet Shortbread Cookies - The Great Food Blogger Cookie Swap

As many of you may or may not know, this year I decided to participate in the first ever great food blogger cookie swap! I know you all might be thinking this sounds a little strange, especially the whole getting cookies from strangers thing, but it was really a lot of fun. Here is how it works. First and foremost, you must have a blog to participate in the cookie fun. Then, you sign up and get the names and address of three other bloggers. You then make and bake your cookies, package up one dozen and send them off and hope they don't arrive as cookie crumbs. In return, you will receive one dozen cookies from three other bloggers. So many cookies and so much fun! I decided to have my cookies shipped to my office so I would not be tempted to woof three dozen cookies at home by myself (not that I am sure I could do that anyways) and so I could share them with my co-workers. Good idea, right? Don't worry, I made sure to save my #1 taste tester some samples. Guess I should have asked him which one was his favorite. That may not have been a fair question considering he almost got week old cookies. Sorry dear.

My first batch of cookies came in last week on Tuesday. They were a wonderful Norwegian Delicacy from a blogger in Texas. They reminded me of big Swedish cookies, but with coconut. Crunchy and so buttery. 

almost too pretty to eat!

mmm cookies!
 That same day I got another box delivered. Two boxes of cookies in one day? Heck yes! These cookies were called cowboy cookies and came from a blogger in Tennessee. They were chock full of oatmeal, chocolate chips, pecans and cinnamon. Not to mention, they were perfect for dunking in coffee or hot cocoa. 

giddy up!
 My third batch arrived later in the week and they were from a blogger in Seattle, Washington. If I had to pick my favorite cookie of the three, this would be them. They were a twix cookie bar. So delicious. They had a shortbread cookie bottom, a gooey caramel middle and a chocolate topping. Just like twix, but bigger and better. 

look at those layers!

All of these ladies made fantastic cookies and their blogs are full of great recipes. I somehow misplaced the inserts they put in the shipments with all their blog information, so I will post the links to their blogs soon so you can check them out!

Now, on to the cookies I decided to make. One of the rules of this swap was that it had to be a cookie that you had not previously blogged on. Darn, there went my idea to use my crack cookies! I did a lot of research and even started to come up with my own recipe when my mom mentioned that she saw a great recipe in one of her holiday magazines - red velvet shortbread cookies. How delicious, right? I'm more of a chocolate chip cookie girl than a shortbread girl, so I was slightly hesitant when I read this recipe. They sounded fabulous, but I just wasn't sure if they'd be the right cookie to send out. Especially, since I never made shortbread cookies before. I didn't want to give some of my fellow bloggers the wrong idea about my cookie making abilities. Come to find out, all the ladies I sent my cookies to loved them! They are crunchy, chocolaty and super easy to make. My only recommendation is to be very careful with the red food coloring. If you spill it or even get some of the dough on your nice white carpet (like I did), it will stain. Just don't fling the dough all over like I did. You'd think I was trying to make a pizza or something. Wild woman over here!


just a few ingredients to make these.

dark chocolate cocoa powder. you can use regular if you have it.

look at that dough - yum!

hummus and pickles do not go in these cookies. chilling the two logs of dough. I was originally going to just slice the logs and bake, but the cookies were too small. Got to have big cookies!
rolling out the dough. I did not have a cookie cutter, so I just improvised and used the top of a canning jar lid. Perfect size!

baked and ready for the swim in the white chocolate.


dipped and covered in gold sprinkles.

packaged up and ready to ship off to my fellow bloggers!


Dark Red Velvet Shortbread Cookies (slightly adapted from my mom's holiday magazine, recipe also located on www.bhg.com)

1 1/4 cup flour
1/3 cup sugar
2 tablespoons unsweetened dark cocoa powder (you can use regular cocoa powder if you have it)
1/4 teaspoon salt
1/2 unsalted butter, cut up into pea size chunks
1 tablespoon red food coloring
3 ounces white chocolate, cut up (I used white chocolate chips)
1 1/2 teaspoon shortening
Sprinkles or nuts for decoration
 
Directions

Preheat oven to 325 degrees F. In a stand mixer combine flour, sugar, cocoa powder, and salt. Add butter and red food coloring and mix until the mixture resembles fine crumbs. Continue mixing until mixture just forms a ball. 

Wrap and place dough in the fridge to firm up for about 15-20 minutes. Once chilled, on a lightly roll or pat dough to a 1/2-inch thickness. Using a floured 1-1/2-inch round cutter, cut out dough. Place cutouts 1 inch apart on an ungreased cookie sheet. Press scraps together, reroll and cut out. Bake in the preheated oven for 20 to 25 minutes or until centers are set. Transfer cookies to a wire rack and let cool.

In a heavy small saucepan, melt white chocolate and shortening over low heat, stirring constantly. Dip half of each cookie into melted chocolate. If desired, sprinkle with pistachios or nonpareils. Let stand on waxed paper until set.

How badly do you want to get in your kitchen and make these? These cookies are great to make to bring to the office or to package up as a holiday treat for family and friends. Other ideas for decorating these fabulous cookies are to use other cookie cutter shapes, use dark chocolate instead of white for dipping, use red or green sprinkles or even pistachios!

Wednesday, December 7, 2011

Zuppa Toscana - An Olive Garden Remake

I don't go to Olive Garden very often, but when I do, I always seem to order soup. You might ask why, considering all the other things they have on their menu, but I just love the soup. Soup. Salad. Breadsticks. What could be better? My bestest girlfriend Andrea and I go here every so often to catch up, have girl talk and have our favorite soup - chicken gnocchi. I always get this soup, but the last time we went, I decided to step out of my comfort zone and try the zuppa toscana. This soup was different, but so delicious. It had Italian sausage, kale and potatoes. There was a light broth with a splash of cream and a kick of hot flavor from red pepper flakes. Doesn't that sound fantastic? 

This soup is super flavorful and is super quick to make - about 30 minutes! This recipe called for one pound of Italian sausage, but I decided to try to cut back the fat and calories and use Sicilian chicken sausage from Trader Joes (it's SO good). You can of course use turkey Italian sausage, or the real thing. Whatever you have or whatever sounds good that day. Picking out which type of sausage to use might be the hardest part of making this soup. All you do is brown the sausage (casings removed), then the onion, then the garlic and pepper flakes. Add the wine, broth and then everything else back into the pot and simmer until the potatoes are fork tender. That easy and quick. Perfect for a quick dinner after a long day at work or a quick dinner on the weekend. It does have a spicy kick to it, so if you or someone you are making this for isn't a fan of that tingle on your tounge, use half of the amount or just a sprinkle to start. You can always add more, but you can't take the heat away!


yes, that is my glass of wine. the cook always has a glass of wine while cooking!

browned sausage

onion, garlic and red pepper flakes. what a heavenly smell.

adding the wine - steam shot!

adding the kale. always looking for more ways to use kale!

simmer simmer boil boil

served with homemade croutons!

Zuppa Toscana (slightly adapted from annies-eats.net)

1 lb. Italian sausage (or half regular, half turkey sausage)
1 large onion, chopped
3-4 cloves garlic, minced
½ cup white wine to deglaze the pan
½ tsp. red pepper flakes
2 russett potatoes, peeled and cut into ½-inch chunks
2 cups fresh kale, chopped
3 cups chicken broth
2.5 cups water
1/2 cup heavy cream (or more if you like)
Salt and pepper
 
Place a large pot on the stove over medium heat.  Crumble the sausage into the pan and cook until well browned.  Remove the cooked sausage from the pot with a slotted spoon and transfer to a bowl; set aside.  Add the chopped onion to the pan and sauté until tender, about 5-7 minutes.  Add the garlic and red pepper flakes to the pan and cook for a minute more, just until fragrant.  Add the wine to the pot and stir, scraping the bottom of the pan to loosen any browned bits.  Add the potatoes, kale, chicken broth and water to the pot.   Return the sausage to the pot.  Increase the heat to medium-high, bring to a boil, and then reduce to a simmer on medium-low.  Cover and let simmer for about 20 minutes, or until the potatoes are fork-tender and cooked through.  Stir in the heavy cream and season with salt and pepper to taste.  Serve immediately.


This soup is great by itself, but even better with homemade croutons to absorb all that yummy liquid! That and a glass (or two!) of pinot grigo and you are set.

Tuesday, December 6, 2011

Homemade Croutons

This recipe is inspired by Barb's totally amazing homemade croutons. When Ryan and I were last up in Oregon, she pulled out these deliciously crunchy croutons for our dinner salad. How genius of her to make her own croutons. I never thought to make my own, which seems strange seeing as how I have a mild crouton addiction. Wait, no. Correction. I have a HUGE crouton addiction. I will seriously skip the salad part (bad, I know) and just eat the croutons straight from the bag. I have not done this in a long, long time, but I have been known to just eat croutons for dinner. They are just so crunchy and delicious! When you make them yourself, you can use any flavor you want. Even better, you know that there are no preservative and you can watch the sodium too (store bought ones are loaded with salt!).

So, after making the crusty Italian bread that was a little too crusty for me, I knew it would be the perfect time to try the croutons. Since the loaf was so large, I cut up the whole thing into about one inch chunks (of course you can make yours smaller or bigger if you want to) and put half of them in a ziploc for the freezer and then used the other half for croutons. Of course you could use the other half for homemade bread crumbs, but that's for another day and another post. We're all about croutons today!

These crunchy and crusty bites are the perfect amount of garlic and parmesan cheese. All you need is olive oil, bread, garlic, parmesan cheese (not the stuff in the green can) and salt and pepper. That's it! The most important part is to let the garlic infuse the oil at room temperature for an hour or two. This will get that oil nice and garlicky, which we all know I love. Again, another obsession - garlic. If you have a loaf of crusty bread that you just don't know what to do with, make these bad boys. They are great on salad, soup or just to eat by themselves. Once you try one, you will have a hard time putting them down. Don't say I didn't warn you.


mmm, croutons


garlic and olive oil getting all delicious

look at that garlic!

garlic oil and bread

mountain of cheese

almost ready to bake

after the first 15 minutes of baking

ready to eat!


Homemade Croutons
4 cups cubed day old bread
1/3 cup olive oil
3/4 cup freshly grated parmesan cheese
3 cloves garlic, finely chopped
Salt and Pepper, to taste

Preheat oven to 300 degrees.

In a small bowl, place olive oil and garlic. Let sit at room temperature for at least one hour. Add your cubed bread into a large bowl - large enough to toss everything together. Once the garlic and oil are ready, strain the oil over the top of the bread and mix to coat. Then, add 1/2 cup of the grated parmesan cheese. Toss to coat and add salt and pepper.

Lay out the coated croutons on a baking sheet in a single layer. Bake for 15 minutes and give them a toss. Bake for another 15 minutes. Then, take them out and sprinkle over the remaining 1/4 cup of grated parmesan cheese. Bake for another 10-15 minutes, or until browned and cooked. Let cool completely on baking sheet before storing.


This recipe is great because it is so simple and you can really switch up the flavors to whatever you like. If you like it with a kick of heat - sprinkle on some cayenne pepper. If you are not a garlic lover, you could always just do olive oil and some salt and pepper. The bread is a blank canvas, so have fun and make some croutons!