Monday, May 21, 2012

Crock Pot Refried Beans

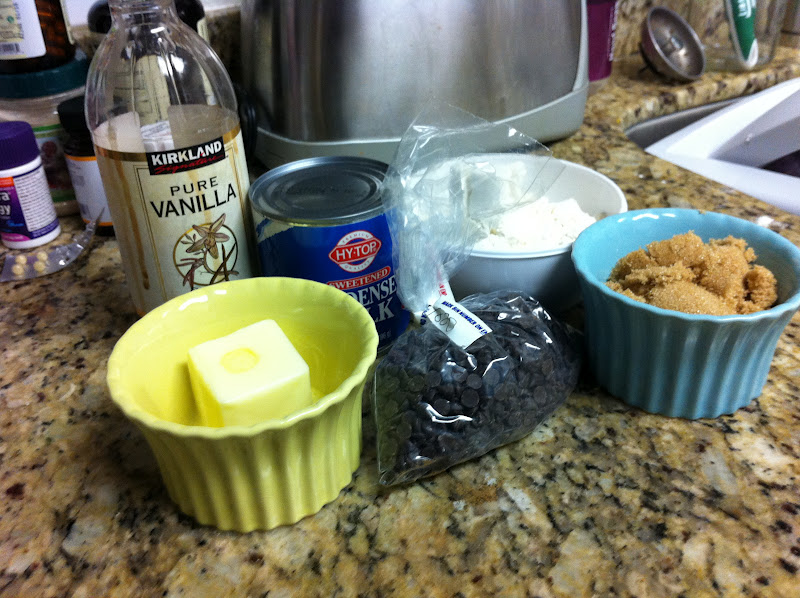
I am not sure why I never thought to make my own refried beans - probably because it's so easy just to pick up a can at the grocery store. Open, plop into a pan and heat. While that is easy, it may not be the best option. Canned foods are loaded with salt and who knows what else is in that metal can. Don't get me wrong, canned refried beans aren't bad, I just think these are better.  So much better because you can control the thickness and you can control what goes in it (aka. salt and seasonings).

Not only do they taste better, but they are so cheap and super easy to make. So easy, you can do it with one hand tied behind your back. Okay, don't try that, but you know what I mean. Dried beans are seriously one of the cheapest things in the market and if you get them in the bulk section of your grocery store, they are even cheaper! The bulk section is your best friend. At least it's my best friend for lots of recipes. These homemade refried beans are loaded with protein, are low-fat and best of all, vegetarian! This recipe makes a ton of beans, but the best part is that you can freeze the leftovers in zipoc bags. That's what I did. Just pull out of the freezer, defrost and heat them up! These beans are perfect for nachos, burritos or are the perfect side to tacos or enchiladas. Ole ole!

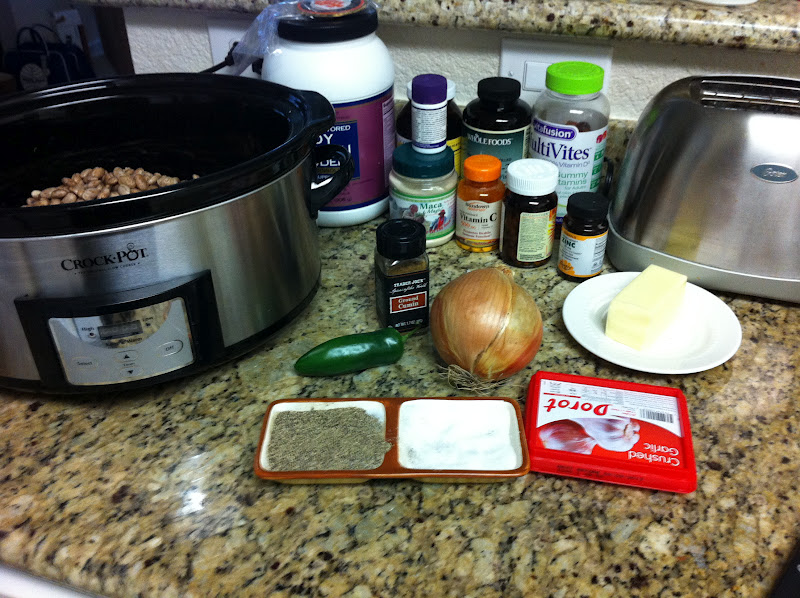
beans + onion + garlic + jalapeno + cumin
soak beans overnight
beans after cooking all day

you can mash or blend your beans

all smooooooth

Crock Pot Refried Beans (www.allrecipes.com)

1 onion, peeled and halved
3 cups dry pinto beans, soaked & rinsed
1/2 fresh jalapeno pepper, seeded and chopped
2 tablespoons minced garlic
3-5 teaspoons salt
1 3/4 teaspoons fresh ground black pepper
1/8 teaspoon ground cumin, optional
enough water to cover the beans

Place the dried beans in a large bowl and cover with water, giving a inch or two of extra water. Soak overnight

Once the beans are soaked, drain and rinse. Place the onion, rinsed beans, jalapeno, garlic, salt, pepper, and cumin into a slow cooker. Pour in enough water to cover the beans and stir to combine. Cook on low for about 8 hours.

Once the beans have cooked, strain them (removing the onion), and reserve the liquid. Mash the beans with a potato masher or blender, adding the reserved water as needed to attain desired consistency. Use beans within the week or freeze for later use.

If using a blender to puree the beans, please be careful. Make sure to fill the blender no more than half way to ensure that the blender lid won't fly off and that there is room for the heat to escape. When blending warm liquids, leave the lid part on and part off (leaving room for air), covering with a kitchen towel (just to be safe) and you should have no problems! Hot liquids splattering
 all over from a blender is a no no. Plus, it kinda hurts.


Sunday, May 20, 2012

The Perfect Pie Crust

This is seriously the perfect pie crust. I wouldn't lie to you about something like this.

For as long as I can remember, I have been using pre-made pie crust. I know, I know. You are probably thinking, she uses store bought crust?! Yes, I admit it, I do. They are so quick and easy - just grab, let soften a bit and then form to your pan. It takes all of the hard work out of making crust and they are honestly just as good. If you've had anything I've made, you probably thought I made my own anyways. Sorry I fooled you. Please don't cry.

Why I decided to make my own crust, I don't know, but I figured it was time to step out of the box and give it a whirl. The first time I tried this, I failed. Epically failed. One of my coworkers gave me her no-fail pie crust recipe and well, you know what happened. I made it a day ahead thinking I could just take it out and let it come to room temperature before rolling it out. I never got soft and was hard as a rock. I don't know if it was the shortening or what, but it did not work. I was a sad puppy. I was not going to give up though. I took me about another year to attempt my own crust again and boy am I glad I did. In my recent obsession with my Pioneer Woman cookbooks, I decided to try out a recipe she had for pie crust that one of her friends taught her. Super simple - flour, sugar, butter, salt, cold water. How could I mess that up, right? Right! I so did not mess this up and it worked beautifully! Even better, it was SO easy. Keep in mind, Miss Ree (Pioneer Woman), makes this crust with a food processor. I don't have one of those, so I used a trusty bowl and pastry blender. Pastry blender = $5. Food processor = $200. Plus, I don't have room for one in my tiny kitchen (hint - captain, please buy me a bigger kitchen. thanks. xoxo.).

This dough works great the day you make it, but the best part is that it's great to keep in the fridge for a week or if you don't plan to use it right away, you can even freeze the dough for up to six months! When you are ready to use, just let it soften a bit (not too much though - you don't want it to be too squishy to roll out) and you are ready to go. It's light. It's flaky. It's buttery. It's everything you want in a pie crust. If I can do it, you can do it. That I can promise you.


ingredients.

cut butter into small cubes before working in with the pastry blender (or before using your food processor)

work until the butter is small

after water is worked in and formed into a dough

separate dough into two balls and form into disks

wrap in plastic wrap and chill for 30 minutes to and hour and then use (or keep in the fridge for a week or the freezer for up to six months!)

when ready to roll out, place softened disk on parchment paper dusted with flour (to prevent sticking)

roll out to about the size of your pan. roll out a little bigger so you can form the crust

crimpy crusts. my mom taught me how to do this. to me, this is the only way to form a crust!

The Perfect Pie Crust (The Pioneer Woman)

 2 1/2 cups all-purpose flour
1 teaspoon salt
1 tablespoon sugar
1 cups (2 sticks) cold butter, cut into chunks
1/4 cup cold water

Lightly mix 2 cups of the flour, the salt and the sugar in a mixing bowl or in the bowl of a food processor. Cut the butter into the flour using a pastry cutter or by pulsing the food processor. The mixture should look like large crumbs and being to cling together in clumps. Add the remaining 1/2 cup flour and mix lightly or pulse the processor 2 or 3 times. Do not overmix this flour. It should coat the clumps.

Sprinkle the cold water over the dough with your hands or a wooden spoon, mix it in until the dough holds together, then shape the dough into 2 discs. At this point, you may wrap the dough in plastic wrap for storage; it will keep up to a week in the fridge or up to 6 months in the freezer.

When you are ready to roll the dough, have ready 2 sheets of parchment paper (or one if you are just using one crust at a time) that are each at least 12-inches square. Place 1 disc of dough between them. If the dough is sticky for any reason, don't worry. Just sprinkle some flour on the parchment to get started. You shouldn't have to add much for it to stop sticking. Starting at the center, roll the pin out to the edge. Turn the dough and parchment as necessary and continue rolling, always from the center to the outer edge. After a couple of rolls, lift the parchment paper away from the dough to loosen and replace the parchment. Flip the whole thing and loosen the other paper sheet. Continue rolling until the dough is large enough for your pie pan.

Fill and bake or bake unfilled, as desired.

Makes 1 (9-inch, 2-crust pie)

Now what are you waiting for - get in the kitchen and make some pie! Or just make this and keep in the freezer for when you are ready to make pie. No more store bought crust for you with this awesome pie crust in your freezer!
 

Saturday, May 19, 2012

Chocolate Chip Cookie Dough Cupcakes


As you know, last weekend was Mother's day and I wanted to do something extra special to celebrate my mom. My mom is awesome and probably better than yours. Just saying. Plus, I wanted to surprise her. Usually I send her flowers the Friday before mom's day, but this year I wanted to put together my own bouquet for her and hand deliver it to her office. She's only 10 minutes up the road from my office so it would be the perfect lunch time stop. I knew I couldn't just deliver her flowers though - there had to be a sweet treat too! And if her office is anything like mine, I couldn't just bring in one cupcake. I had to bring in enough for everyone. I knew my mom would be mad for me bringing in treats (she is trying to be good, but I knew she couldn't resist this cupcake), but I decided not to listen to her. I usually don't anyways. Just kidding. Well, kind of. Loooove you mom!

The inspiration for this cupcake came from two sources - my mom's love of cookie dough and a huge batch of chocolate chip cookies the captain made a couple of weeks ago. In fact, he sent me home with about 10 cookies and guess how long it took me to finish them all? Let's just say they were all gone in a couple of days.  Darn him! I even put them in the back of the freezer to help myself forget about them, but guess what? They are just as good frozen. Darn it! They were so good and totally worth the week long of workouts I had to do to burn them all off. I love a good chocolate chip cookie. There is just something about it. I think I may have acquired my love of chocolate chip cookies from my mother. Ya, I'll blame her. Again, looooove you mom.

If you are a cookie dough lover, these cupcakes are for you. Cookie dough + cupcake. How can you say no! Pure cookie dough flavor from the cupcake to the filling to the frosting. Simply irresistible. There are a lot steps (not hard though!) to this cupcake, but I promise it will be worth the wait. Super dooper promise. If you want, you can even make the filling ahead of time (the day before) if you want. I did and had no issues with flavor or texture - just take it out about 30 minutes before you want to use it so it can soften a bit. That will make it easier to scoop and put in the cupcake.

cookie dough filling. tastes just like cookie dough. scary.

adding in the mini chips to the filling.

totally forgot to take a picture of the cupcake ingredients. oops. this is brown sugar, butter and eggs.

the best part - adding in the chocolate chips!

bowl is clean! I think the captain's grandma would be proud.

ready to bake!

whipping up a brown sugar, cookie dough frosting! Don't worry, the frosting is suppose to be gritty just like cookie dough!

ready to eat - topped with a mini choc chip cookie and mini chips. YUM!

bonus shot: momma's flowers


bonus shot: the captain's mountain of chocolate chip cookies. Don't you just want to eat them all? I do. I may have a problem.

Chocolate Chip Cookie Dough Cupcakes (www.annies-eats.com)

Monday, May 14, 2012

Kate's Smoothie

Let me first say that this post is dedicate to the one and only Kate. Kate and I went to high school together (Doesn't it seem like so long ago? It's almost been 10 years. It seems like just yesterday though!) and this year she has achieved something that not many people can say they have - she has lost over 110 pounds (and still going!) and has run a half marathon. In fact, she has turned into quite the running fiend. If only someday I will be able to run with her - a girl can dream, right? In fact, she has recently inspired me to step up my workouts and start training to actually run a full 5k without stopping.  Maybe someday I'll be able to do a half. Someday. She is truly an inspiration and I am so proud of her! Losing over 100 pounds is not an easy feat and I speak from experience. I lost about the same amount during my first year of college and let me say, life has not been the same. In a good way of course. It's not easy by any means, but boy does it feel good. I bet Kate would totally agree. Girl, you are simply amazing!

Now, onto the smoothie! That's what you came here for, right? This smoothie is a Kate original. She posted this on Facebook a few weeks ago and I could not stop thinking about it. I am always looking for ways to get more veggies and fruit into my diet and let me just say, this smoothie does just that. It's loaded with tons of fruit and a whole bag of spinach. I know what you are thinking - spinach in a smoothie? Yes. I am serious and it is seriously delish. I wouldn't lie to you. I promise. Plus, you won't even really know it's in there. You taste all the sweet fruit, but get the added vitamins and fiber from the spinach. Just promise me you'll try it. At least it's not as green as the green monster!

Of course you can switch up the flavors, but Kate's includes blueberries (sorry Dean and Ryan!), peaches, strawberries, peaches, banana, juice of a lemon, juice of an orange, a whole bag of spinach and if you wish, protein powder. How good does that sound? This combination of fruit is super yummy and it makes about 5 or 6 servings. My blender was so full and working so hard to mix everything up that at one point, I thought it might start smoking. There is so much goodness in this smoothie! As per Kate's advice, I had a serving (about 1 cup) for dinner and then put the rest in tupperware and placed in the freezer for later in the week. The perfect grab and go breakfast or lunch (once it defrosted of course!). I used vanilla soy protein powder from Trader Joes and with that addition and dividing the smoothie five ways, it came about to about 250 calories a serving. Great calorie count for all that delicious fruit and spinach that will keep you full and totally satisfied!


you can use soy or whey pro pow and fresh or frozen fruit. I liked a combo of both fresh and frozen fruit!

just enough room for the fruit!

my blender needed a few stops to mix things up so that it would blend properly. hopefully your blender is better than mine.

adding in the spinach and and pro pow! look how full the blender is.

bonus photo - my new running shoes. pink shoes make me run faster. it's been proven.

Kate's Smoothie 

1.5 cups blueberries
2 cups strawberries, halved or quartered
2 cups peaches, sliced
1 banana, sliced
4 scoops protein (optional, but if you have it use it. Great to keep you full and going all morning or afternoon)
Juice from 1 large lemon
Juice from 1 large orange
Almost an entire bag of fresh spinach 

Blend all ingredients until smooth (this may take a few stops to mix things up if you blender is having a hard time). 

Makes 5-6 meals. Drink right away and/or or divide it evenly amongst tupperware and put it in the freezer. 


Kate's Tip - Take one out in the am, bring it to work, keep it refrigerated, and by lunch time, it's ready to eat! Usually with a spoon, as if it's sorbet! 
 

Friday, May 4, 2012

Italian Cowgirl Lasagna

This recipe is coming to you from 33,000 feet in the air. I am returning home from a business trip from Texas and my American Airlines flight has wifi! Since we've passed the weather and it's now smooth, I thought it would the perfect time to get this out. And to pass the time- there is still two hours left on the flight. I am already itching to get out and walk around.

Okay, on to lasagna. Being an Italian girl, I you'd think I would make more pasta dishes, but I really don't. Well, not unless there are people coming over or the captain requests it. As for lasagna, I only use two recipes, my momma's and grandmas. You can find a combination of both here. It's super simple and the most important part is to let the sauce simmer. Sauce + noodles + ricotta and mozzarella cheese + meat mixture. Layer, bake and it's super delicious. How can you not love a good lasagna. You can make them vegetarian or loaded with meat for the meat lover in your family. You can even add your own twist to them too - add olives, veggies and red pepper flakes to the sauce. You can add pork and ground beef to the sauce or you can even use ground turkey. The options and combinations are endless!

When I received my new Pioneer Woman cookbook last month, I put a sticky note on the page with her "best lasagna ever". I guess the sticky note meant I wanted to try it? Guess that means I have a lot of things to try then- I pretty much sticky noted the whole darn cookbook! The two things that drew me to this recipe was - 1. It said it was the best ever and 2. it was made with cottage cheese instead of ricotta. Cottage cheese in lasagna grosses me out, but I wanted to roll with it and try it. I've never never had cottage cheese in place of ricotta, but apparently, it's pretty popular. In fact, some people prefer it. When I asked my mom about this new ingredient, she said that's how she used to make it for my Dad before I was around. Guess I had to try it to see how it really was and face my cottage cheese fear.

Let me tell you, this lasagna was fantastic. I am not so sure about best ever ever, but it was pretty darn good. Even better, you'd never know there was cottage cheese in there. Seriously. In fact, I think it may be better than with ricotta. I can't believe I just said that, but I wouldn't tell you that if I didn't mean it. This lasagna is homey, delicious and something everyone will love. The original recipe called for ground beef and hot jimmy dean sausage (this would make it extra cowgirly), but I just couldn't do the jimmy dean. I'm not sure why, but I just couldn't. So, I went with a hot Italian sausage (hence the Italian cowgirl factor). You can use the jimmy dean if you want though. Don't let me stop you. Just promise you will try this one once - I swear you'll be a believer in the cottage cheese madness too!

the line up. not included = red wine. Oops.

browning meat + garlic

cheesy mixture.

tomatoes added to the pool

I added about 1/2 up of red wine. This is optional, but does add a great "all day" cooked flavor.

after 45 minutes add in the fresh herbs

make sure to add olive oil to your water when boiling the noodles. this helps them not stick together. If they stick, it's a pain to get them all unstuck.

see, just a little meat and liquid. This is so the noodles don't stick to the bottom of the pan.

layers & layers

before...

after!

served with home made onion foccicial and salad. yum!

 Italian Cowgirl Lasagna (adapted from Pioneer Woman)

1-1/2 pound Ground Beef
1 pound Hot Italian Sausage
6 cloves Garlic, Minced
2 cans (14.5 Ounce) Whole Tomatoes
2 cans (6 Ounce) Tomato Paste
2 Tablespoons Dried Parsley
2 Tablespoons Dried Basil
1 teaspoon Salt
3 cups Lowfat Cottage Cheese
2 whole Beaten Eggs
1/2 red wine (use what you'd drink!)
1/2 cup Parmesan Cheese
2 Tablespoons Fresh Parsley
1 teaspoon Salt
1 pound Mozzarella Cheese (shredded or sliced)
12 Lasagna Noodles (for a three layer lasagna)
1/2 cup cooked pasta water (optional)
(add 1/2 Teaspoon Salt And 1 Tablespoon Olive Oil To Pasta Water)


Bring a large pot of water to a boil.

Meanwhile, in a large skillet or saucepan, combine ground beef, sausage, and garlic. Cook over medium-high heat until browned. Drain fat, keep some if you’re feeling naughty. Add tomatoes, tomato paste, 2 tablespoons parsley, basil, wine and salt. After adding the tomatoes, the sauce mixture should simmer for 45 minutes while you are working on the other steps.

In a medium bowl, mix cottage cheese, beaten eggs, grated Parmesan, 2 more tablespoons parsley, and 1 more teaspoon salt. Stir together well. Set aside. Cook lasagna until “al dente” (not overly cooked).

To assemble:
Pour 1/4 cup plus 1/4 cooking water and mix on the bottom of a large baking dish, Then, arrange 4 cooked lasagna noodles in the bottom of a baking pan, overlapping if necessary. Spoon half the cottage cheese mixture over the noodles. Spread evenly. Cover cottage cheese with a layer of mozzarella cheese. Spoon a little less than half the meat/sauce mixture over the top.

Repeat, ending with meat/sauce mixture. Sprinkle top generously with extra Parmesan.
Either freeze, refrigerate for up to two days, or bake immediately: 350-degree oven for 20 to 30 minutes, or until top is hot and bubbly.

Don't forget, this is a great make ahead meal. you can make it up to two days in advance, then just pop in the oven until warm and bubbly. You can also freeze this (uncooked) and just pop in the oven when you want a warm and noodly dinner.