Friday, August 10, 2012

Hand & Body Scrubs

This post is a little something different. I need to spice it up once in awhile to keep you on your toes and to keep you guessing about what's coming next. Just don't try to eat these scrubs, okay? Not that any of you will, but I just have to put it out there. 

These scrubs are great. One is a salt body scrub made with almond oil and citrus zest. The other is a sugar scrub made with brown sugar, almond oil, almond meal and oatmeal. See, I told you they sound good enough to eat! These scrubs are both excellent for exfoliation and are great moisturizers for your body. Plus, it's even amazing to use on your hands and feet (hello mani/pedi!). Just be careful to not use them on your face. For one, there is almond oil in them and I can't imagine that would be good if you are trying to avoid breakouts. Secondly, the scrub might be just a little rough on your sensitive face skin. 

Keep a jar of scrub in your shower or even by your kitchen sink. After few days of washing dishes, your hands will thank you for this! Even better, these scrubs take minutes to put together and they make great homemade gifts too. What person wouldn't like a homemade body scrub? I know I would!

almond oil + salt + zest

if you don't have a microplane, get one.

all mixed together and ready for a jar!


Citrus Salt Scrub (a Paula Deen recipe)

1/2 cup sea salt
1/2 cup sweet almond oil (can substitute light olive oil or vegetable oil)
1/2 teaspoon lemon zest
1/2 teaspoon orange zest


In a medium dry bowl, combine all ingredients making sure to not let any water touch them as it will dissolve the salt. Pour mixture into an airtight container and store in a cool dry place. 

To use: Just before showering, swirl ingredients together with your fingertips to mix. Clean body completely and just before exiting shower, apply Citrus Salt Body Scrub to body in a firm circular scrubbing motion with hands or a soft washcloth. Rinse off the mixture and pat body dry with a clean towel.


If you can't find almond meal, just grind up some almonds until they are almost powder like.

grind up the oats

that looks about right

mix everything together. see, I told you this was easy.

use any jars you have to store them. I like mason jars!


Brown Sugar Body Scrub (www.chsugar.com)

1/2 cup ground almonds
1/2 cup ground oatmeal
1/2 cup brown sugar, packed
1/4 cup almond oil
1 tsp. vanilla extract
Small containers with lids

Combine all ingredients using a spatula in a large bowl until well blended. Mix should have a paste like texture. If it is too dry add more oil a few drops at a time. Conversely, if it is too oily add more dry ingredients until you reach the desired consistency. Keep stored in tightly sealed jars. May need to mix before use if ingredients settle.


To use, apply to wet skin in a circular motion concentrating on dry patches and rough areas of your skin. Avoid using the scrub on sensitive areas, in cuts or on skin that is irritated or sunburned. Thoroughly rinse with warm water.
 

 Bet you didn't know it was that easy to make a homemade scrub, now did you?


Thursday, August 9, 2012

Skinny Sausage Stuffed Zucchini

I know what you are thinking - how can something be called skinny if it's 1. stuffed and 2. stuffed with sausage. You are right. Most things you think of that are stuffed with sausage are usually loaded with calories and fat, but this recipe will knock that theory out of the park. Let me tell you why. Are you ready? Let's go!

With all the summer produce available this time of the year, it's hard to not want to make something fresh, with veggies and make it taste totally delicious. I ran across this recipe a couple of weeks ago and knew it was something I just had to make - sausage stuffed zucchini coated in fresh tomato sauce and ooey gooey cheese. Is your mouth watering yet? Mine is. As good as they sound, want to guess how many calories are in one fully loaded zucchini boat? Just guess. Bet you will be way wrong. Waaaaay wrong. Did you guess yet? 175! Can you believe it? I sure couldn't, especially after I tasted them. They are so ooberly delicious. I don't use ooberly that often, so you know it must be good.

The two things that make this skinny dish "skinny" and out of this world delicious is Italian chicken sausage and not using rice as filler and using the scooped out zucchini as part of the filling instead! How did I never think of finding a way to use the scooped out zucchini? Seems like such a waste to throw it away, doesn't it? Plus, you get all the added vegetable goodness right in the middle (and no one will ever know!). Fresh zucchini + lean Italian chicken sausage + covered in marinara sauce & cheese. How can you go wrong?

ps. you can even make this a day or two ahead of time. Just prep everything and then cover and place in the fridge until you are ready to bake. It couldn't get easier to have an amazingly delicious and healthy meal on your table!


delicious ingredients

my mom's tip - scoring zucchini like in the picture makes it much easier to scoop (you don't scoop too much!)

scooped zuchs

browning the sausage and waiting for the water to boil

filling!

don't forget to add in the zucchini innards!

stuffed zucchini

cover with sauce and cheese!

ooey gooey

dinner is served

Skinny Sausage Stuffed Zucchini (slightly adapted www.skinnytaste.com)

2 cups marinara sauce (I used the kind from Trader Joes in a big can -see ingredient picture above)
4 medium zucchini
1 tsp oil
1/2 small onion, finely diced
3 cloves garlic, crushed
1/2 cup diced red bell pepper
1/4 teaspoon crushed red pepper flakes
14 oz lean Italian chicken sausage, removed from casing (I used the chicken sausage from Trader Joes)
1/2 cup part skim shredded mozzarella
8 tsp grated Parmesan cheese

Directions:

Bring a large pot of water to boil. Preheat oven to 400°. Cut zucchini in half lengthwise and using a spoon or melon baller, scoop out flesh, leaving 1/4" thick. Chop the scooped out flesh of the zucchini in small pieces and set aside.


Drop zucchini halves in boiling water and cook 1 minute. Remove from water. Place 1/4 cup of sauce in the bottom of a 9 x 12" baking dish, and place zucchini halves cut side up.


In a large saute pan, brown sausage, breaking up as it cooks into smaller pieces until browned; set aside. Heat oil and add onion, garlic and bell pepper. Cook on a medium-low heat for about 2-3 minutes, until onions are translucent. Add chopped zucchini, season with salt, pepper and red pepper flakes and cook about 2-3 minutes. Combine with sausage and cook a few more minutes. Using a spoon, fill each hollowed zucchini with 1/3 cup cooked sausage, pressing firmly. Cover all of the zucchini with the remaining sauce, shredded mozzarella cheese and parmesan cheese. Cover with foil and bake 35 minutes until cheese is melted and zucchini is cooked through. 


Serving suggestion - one stuffed zucchini (175 calories) , 1/2 cup brown rice (100 calories)  and a small side salad!


Monday, August 6, 2012

Tomato & Avocado Salad

This salad is simple, fresh and is a great use of homegrown or farm fresh tomatoes. My mom and I were craving a fresh and healthy dinner a couple of weeks ago and this was just something that came to mind at the last minute. I am glad it did though. It was the perfect side dish to accompany our light crab cakes from Whole Foods. Have you ever had them? If not, you are missing out. They are a bit pricy (I think they even went up a bit since I last bought them), but totally worth the $7 a crab cake. Bonus  - they are about 300 calories each and cooking them at home limits the oil that most restaurants use to fry them in! Check them out.

Enough about crabby cakes. Back to tomato and avocado. I found the best local tomatoes at a little farm stand on the way to Davis, CA and have been obsessed with them ever since. They come in a pack of three or four for under $2. Total bargain and if you ask me, they are almost as good as the muy expensive heirlooms at Whole Foods. Sorry Whole Foods. These farm stand tomatoes actually taste like tomatoes! You know how some tomatoes don't taste like anything? Ya, those are not very good. Every time I drive by the little fruit and veggie stand, I have to stop and get some. They are good in salad, good for sandwiches, and good straight up with a little salt and pepper. With a few of these sitting on the counter and with avocados staring at me in the face, I knew I had to make something. I first thought caprese salad (tomato, mozzarella cheese and basil), but that wouldn't work. I wanted avocado too. Then I though, why not a layered salad with salt and pepper and fresh lemon.  Sounds delish, right? Then, I rummaged through the fridge and found some fresh crumbled goat cheese and said, why not. I put goat cheese on my normal salads, why not this one. If you don't like it, you can leave it off. You should really try it though. It just adds that little something something.


so fresh, so delicious!
Tomato & Avocado Salad 

Feeds about 3 people

2 medium tomatoes, sliced
1 avocado (ripe), slice
Salt & Pepper to taste
2 teaspoons lemon juice
2 tablespoons crumbled goat cheese

Slice tomato and avocado in about the same thickness. Layer tomato, avocado, tomato, and avocado until no slices remain. Top with lemon juice and then salt and pepper to taste. Add goat cheese on top and enjoy!


If you are really anti goat cheese, try some fresh grated parmesan. I bet that would be great too!

Sunday, August 5, 2012

Toasted Almond & Candied Cherry Ice Cream

Candied cherries + toasted almonds + cream = the most addictive ice cream ever.  I am not going to lie, this ice cream does take some work, but it's not hard. The only bad thing is that it just means it will take a little longer for you to enjoy. But, don't let that scare you away from trying this, okay? It's so worth the wait and the flavor is unlike anything you've ever had. You can do everything in steps, so it won't be overwhelming. That's what I did and it was a piece of cake. Or a scoop of ice cream. That was a bad joke. Sorry.

Let me tell you how to do this step by step.

Step One - Candy cherries. Take fresh or frozen cherries (if fresh, make sure to pit them!) and boil them in a lemon, water and sugar mixture for about 25 minutes. Stir a few times to make sure it's not sticking ensuring that once they are done, the syrup is like maple syrup -sticky and thick. Once they are ready, drain the cherries for an hour and then chop and place in the fridge until ready to use. You can do this up to a few days before (even up to a week or so!). See that wasn't so bad. Just don't try to taste the candied cherries right out of the pan. You will burn your mouth. I don't speak from experience, but I know someone out there won't be willing to resist trying them. I don't want you to go to the ER. I've been there, it's not fun. Not for a burn tongue though.

Step Two - Make the almond milk. Combine milk, sugar, cream and chopped almonds and bring to a medium heat. Turn off the heat and then let steep for an hour. After an hour, strain the milk and squeeze the almonds to get out as much of that flavor as you can. I know it sounds strange, but make sure you don't forget to squeeze them! You can do this ahead too. Just make sure to keep in the fridge after.

Step Three - Make the custard. Warm up the almond milk and place the remaining cream in a bowl (this is where the custard mixture will go to cool). While you are warming up the milk, whisk together the eggs and then slowly add them to the milk, making sure you continue to stir. You do not want scrambled egg ice cream. Keep whisking until the mixture is nice and thick - about 10 minutes give or take. Once cool, strain over the cream (if there are scrambled eggs in there, this will get rid of them). Add in the extract and amaretto (optional, but I think it's a must and it's my special ingredient!) and then let cool in fridge overnight. You can do this ahead a day or two too. 

All of that wasn't so bad, right? I know there are a lot of steps, but stay with me here. We are almost there. Promise!

Step Four - Make the ice cream! Freeze ice cream in an ice cream maker until nice and thick (about 8-10 minutes, but keep an eye on it, every ice cream machine is a bit different). During the last few minutes, add in the additional chopped almonds. Once the ice cream is ready, take out of the machine and fold in the chopped cherries. Place in a freezer-safe container and freeze overnight or for at least six hours.

Phew, that was a lot of steps, but like I said earlier, this ice cream is SO worth it. The cherries give it this sweet and tangy bite, the almonds give it great crunch and the almond extract and amaretto give it this sweet and nutty flavor that just can not be beat. You must try it. It's the perfect summer scoop.

yummy ingredients

candying the cherries

heating up the almond milk

ready to add in the yolks to the warmed milk

straining the custard into the cream

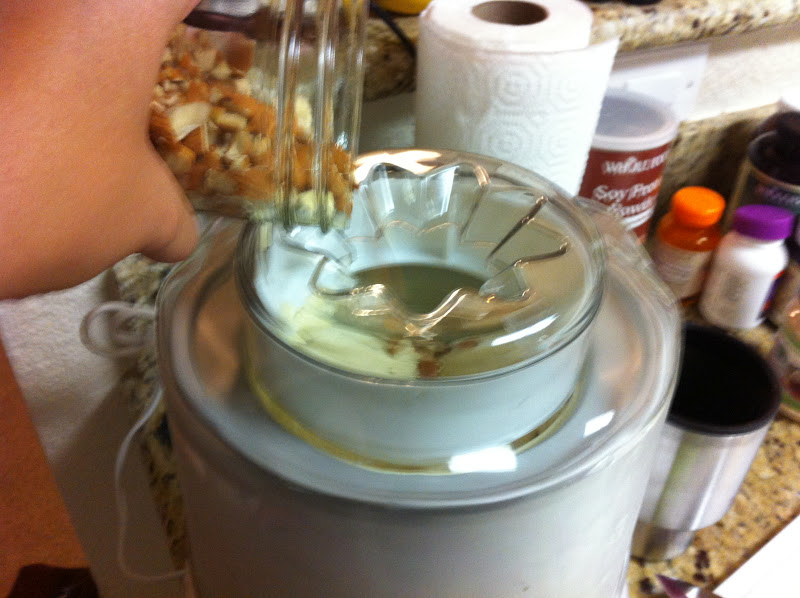
churning ice cream

adding in the almonds

folding in the cherries!

we had our ice cream with berry cornbread cobbler. YUM.

Toasted Almond and Candied Cherry Ice Cream (slightly adapted from www.browneyedbaker.com)

Yield: 1½ quarts
1 cup whole milk
¾ cup granulated sugar
Pinch of salt
2 cups heavy cream, divided
2 cups whole almonds, toasted and coarsely chopped, divided
5 large egg yolks
¼ teaspoon almond extract
2 tablespoons to 1/4 cup amaretto, optional. (I used 1/4 cup, but you can use as little or as much as you want. Just not too much or the mixture will not freeze properly).
1 cup Candied Cherries (recipe follows), coarsely chopped

Warm the milk, sugar, salt and 1 cup of the cream in a medium saucepan. Finely chop 1 cup of the almonds and add them to the warm milk. Cover, remove from the heat, and let steep at room temperature for 1 hour. 

Strain the almond-infused milk into a separate medium saucepan. Press with a spatula or squeeze with your hands to extract as much flavor from the almonds as possible. Discard the almonds. Rewarm the almond-infused milk. Pour the remaining 1 cup cream into a large bowl and set a mesh strainer on top. In a separate medium bowl, whisk together the egg yolks. Slowly pour the warm mixture into the egg yolks, whisking constantly, then scrape the warmed egg yolks back into the saucepan. Stir the mixture constantly over medium heat with a heatproof spatula, scraping the bottom as you stir, until the mixture thickens and coats the spatula. Pour the custard through the strainer and stir it into the cream. Stir in the almond extract and amaretto and cool in fridge overnight or until fully chilled. Once completely cooled, freeze it in your ice cream maker according to the manufacturer’s instructions. During the last few minutes of churning, add the remaining 1 cup chopped almonds. When you remove the ice cream from the machine, fold in the chopped cherries.

Candied Cherries
1 pound cherries, fresh or frozen
1½ cups water
1 cup granulated sugar
1 tablespoon lemon juice
1 drop almond extract

Remove the stems and pit the cherries. Heat the cherries, water, sugar and lemon juice in a large, nonreactive saucepan or skillet until the liquid starts to boil. Turn down the heat to a low boil and cook the cherries for 25 minutes, stirring frequently during the last 10 minutes of cooking to make sure they are cooking evenly and not sticking. Once the syrup is reduced to the consistency of maple syrup, remove the pan from the heat, add the almond extract, and let the cherries cool in their syrup. Drain the cherries in a strainer for about 1 hour. Coarsely chop the drained cherries and fold them into the ice cream as you remove it from the machine. 

Warning - this ice cream may be addictive. My mom tried one bite and then immediately asked for more. I am not saying how much she ate, but let's just say, she loved it. There is something about cherries and almonds together.


Saturday, August 4, 2012

Chai Tea & Pistachio Muffins

These muffin taste just like you are drinking a cup of chai tea, but better. If you've never had chai tea, let me try to explain it to you -if that's even possible. Chai tea is sweet, spicy (not hot, just lots of spices like cinnamon, cloves, and cardamom), warm and soooo delicious. It's typically served with some sugar or honey and then a splash of cream or milk to give it that bit of richness. The perfect cup of warmth on a chilly fall or winter day. Or really just because. If you've never had it, you are truly missing out. Go buy some and try it!

I found this muffin recipe in one of my Cooking Light magazines. I had it tagged to make for a just over a year, but never got it. Honestly, I totally forgot about it until I saw a photo of the recipe in my phone. Often times I take photos of recipes I want to try and let me just say that you should see how many I have on my phone. It's scary. It's really bad. Nevertheless, it was time to finally make these bad boys. These muffins are super easy to whip up and they are great for breakfast, a snack or even dessert. The muffins are light, full of chai flavor and topped with chopped pistachios and a light and simple sugar glaze for a touch of sweetness. Simply delicious. Oh and don't let me forget tell you the best part. What was I thinking? Clearly I wasn't. Each muffin is less than 200 calories! 192 to be exact. That's pretty darn good for a muffin these days. Even better for a ooberly delicious one.


delicious ingredients

mixing mixing

pouring in the chai tea

adding the dry to the wet

scooped

topped with chopped pistachios

baked

topped with delicious icing.


Chai Tea & Pistachio Muffins (Cooking Light, May 2011)

1 3/4 cups all-purpose flour 
1/2 cup
packed brown sugar
1 teaspoon
baking powder
1 teaspoon
baking soda
1/4 teaspoon
salt
2
chai blend tea bags, opened (I used Tazo Decaf Chai)
1 cup
low-fat buttermilk
1/4 cup
butter, melted
1 1/2 teaspoons
vanilla extract, divided
1
large egg, lightly beaten 
Cooking spray

1/3 cup
shelled dry-roasted pistachios, chopped
1/2 cup
powdered sugar
1 tablespoon
water


Preheat oven to 375°.


Lightly spoon flour into dry measuring cups; level with a knife. Combine flour and next 4 ingredients (through salt) in a large bowl, stirring with a whisk. Cut open tea bags; add tea to flour mixture, stirring well. Make a well in center of mixture. Combine buttermilk, butter, 1 teaspoon vanilla, and egg in a bowl, stirring well with a whisk. Add buttermilk mixture to flour mixture, stirring just until moist. Place 12 muffin-cup liners in muffin cups; coat liners with cooking spray. Divide batter evenly among prepared muffin cups. Sprinkle nuts evenly over batter. Bake at 375° for 15 minutes or until a wooden pick inserted in center comes out clean. Cool for 5 minutes in pan on a wire rack.  Combine remaining 1/2 teaspoon vanilla, powdered sugar, and 1 tablespoon water, stirring until smooth. Drizzle evenly over muffins.

 
If you are not ready to try a warm cup of this tea, you should try these muffins out. Baby steps people. Although, once you try these you may fall in love with the flavor. Just warning.

Thursday, August 2, 2012

Upside Down Key Lime Pie Cupcakes

Upside down key lime pie cupcakes. Yes, you heard me right. And no, this is not a key lime pie turned upside down and cut to the size of a cupcake. I know that sounds strange, but I seriously had someone say that when I tried to describe this cupcake. Strange, I know.

I have only done a couple of fruity cupcakes (I really need to get more of these into my cupcake menu) and wanted to do something special and tangy for summertime. In fact, I made these especially for 4th of July! Nothing screams summer holiday than a fresh and fruity pie. At least that's how I feel. Now, let me warn you, I have never eaten key lime pie before. Shocking, I know. It's one of those things that really hasn't come up or been on a menu in quite sometime. I've always wanted to try it, just never got around to it. Another reason why I just had to make these bad boys. Pie + cupcake + frosting = total amazingness.

The first and most important ingredient to this cupcake is key lime juice. Don't go thinking that you need to squeeze 1,000 tiny key limes to get all the juice you need. You don't. I guess you could, but then you'd be crazy. Plus, they might be kind of hard to find. I was not able to find them anywhere in town! Can you believe it? So, the next best thing was key lime juice, already squeezed. I really like to use fresh squeezed whenever I can, but that was really not an option here. Not knowing where to find it (have you ever seen it at the store, I haven't. But then again, it's not like I buy key lime juice on a regular basis), I went to three different stores before a really nice lady who was shopping told me to go to BevMo. Seriously? She was right - they have a huge bottle for just a few bucks. I guess it makes sense seeing as how it's used in cocktails. Who knew BevMo would be the magical place for key lime juice. Now I know and now you know.

These cupcakes are a total must make. The key lime cupcake is dense, moist, sweet and so key limey. To make it even better it's topped with a graham cracker cream cheese frosting. See where the upside down concept comes into play now? These were a total hit at the 4th of July party the captain and I went to and these will definitely be on my cupcake menu someday. Everyone needs a little pucker in their life. Don't you agree?

ingredients

adding the key lime juice in

pre-bake

perfectly baked!

did you know you can get crumbs like this? I didn't! If you can't find these (they are usually in the baking isle), you can just ground up regular graham crackers.

look at that delicious frosting

how cute are these cupcakes?!

Upside Down Key Lime Pie Cupcakes (http://www.cupcakeproject.com)

Makes about 12-18 cupcakes

1 1/2  cups cake flour
2 teaspoon baking powder
pinch of salt
1/2 cup unsalted butter, room temperature
1 cup sugar
3 large eggs
1/2 cup sweetened condensed milk
3/4 cup key lime juice

In a small bowl, whisk together flour, baking powder, and salt.  Set aside. Using a mixer (hand or stand) cream the butter and sugar together until light and fluffy - about five minutes. Mix eggs into butter/sugar, one at a time. Mix in sweetened condensed milk and key lime juice into wet ingredients.
Mix dry ingredients into wet ingredients until just combined. Divide evenly between cupcake liners.  Note:  The batter will be very liquidy.  This is ok. 

Bake at 350 F for 30 minutes or until cupcakes bounce back when touched lightly. Begin to check the cupcakes for doneness at about 20 minutes.  The center will still be wet.  It solidifies as it cools.

Graham Cracker Frosting Recipe

1/4 cup unsalted butter, room temperature
8 oz cream cheese, room temperature
2 cup powdered sugar
2 teaspoon vanilla extract
1 1/3 cups finely crushed graham crackers

In a large mixing bowl, mix butter and cream cheese until light and fluffy. Mix in the powdered sugar a little bit at a time.  Note: You can add more if you prefer a stiffer consistency. Mix in vanilla extract. and fold in graham crackers. Pipe or spread onto cooled cupcakes.

The perfect summer cupcake - a little sweet, a little tangy, and best of all, totally delicious.


Wednesday, August 1, 2012

The Moistest Banana Bread Ever!

This is seriously the moistest banana bread ever. No joke. My sister actually found this recipe and we decided to give it a whirl. In fact, I also tried to give her a guest spot on my blog and have her write this post, but she said noooo. Why? I don't know. She's weird. She's probably one of the best, if not, the best writer I know. Definitely better than me, that's for sure. Maybe I'll be able to convince her to do a guest spot some day (you can't run forever, Jess!). Side note - now that I think about it, I don't think I ever showed you a picture of us. I've showed you the captain, but not my sister. Oops, my bad. Here is some sisterly love from the Giants game this past weekend. We're total gamerbabes.

sister love.

Back to moist and delicious banana bread. The two ingredients that make this the best banana bread you ever put in your mouth is coconut oil and cream cheese.  This bread is definitely not low-fat or low calorie, but it's super addicting and seriously so moist. Don't you just hate when you get a dry and crumbly piece of banana bread? I do and so does my sister. Hence the search for the best banana bread in town. We love our normal go to banana bread (from Better Homes and Garden) with a crumbly brown sugar topping, but we needed something new to spice it up. This bread is dense, moist and deadly delicious. And by deadly delicious, I mean you will eat the whole loaf. Or half of a loaf. Okay, a whole loaf. Who am I kidding here.

Now, you might be wondering what the heck coconut oil is. I am willing to bet this is not next to the canola or olive oil in your panty. Am I right? Coconut oil has become very popular in the cooking world recently. And to be honest, this is the first time I've ever used it. No joke. What exactly is it? Coconut oil is edible oil that is made from the meat of the coconut. It has a slightly nutty taste and although it used to get a bad wrap for being high in saturated fat, it actually has a lot of health benefits. You can use it in baking, for cooking, for medicinal purposes (it's a natural antibiotic!) and you can even fry with it (it can withstand very high heat). I've also heard it's a great skin moisturizer. I don't think I'll test that one out though. Sorry. I'll stick to my lotion. For further information on coconut oil and it's benefits, check this article in the New York Times.


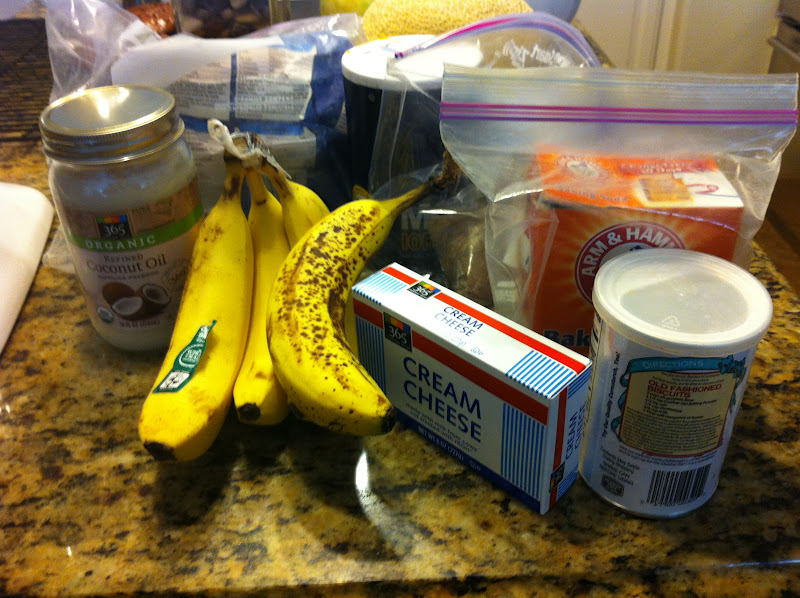
ingredients

whipping the cream cheese & coconut oil

adding in the brown sugar

peeling bananas

a dash of nutmeg

before

after!

Super Moist Banana Bread (slightly adapted from http://chezus.com)

1/2 cup virgin coconut oil
1 cup cream cheese, softened
1 cup brown sugar
1 egg
2 bananas, medium to large sized ones
1 1/2 cups flour
1 teaspoon soda
1 teaspoon baking powder
1 teaspoon cinnamon
a dash of nutmeg
pinch of salt
 
Heat oven to 350.  Line a loaf pan, with parchment paper.  Sift the dry ingredients together in a large mixing bowl and set aside.  In a mixing bowl, beat the coconut oil on medium speed, until soft, about 7 minutes.  Add the cream cheese, and continue beating on medium speed, for 3 minutes.  Add the sugar, and beat on medium speed, until fluffy, about 5 minutes.  Add the egg and bananas, mix until combined.  Add the dry ingredients, mix on medium speed, until combined,  about 3 minutes.  Pour into the loaf pan.  Bake for 45 – 55 minutes.  Each oven is different, start checking at 45 minutes.  You want the bread to be golden brown, and a knife will come out clean, when you slide stick it into the middle of the loaf.  Serve.  Eat.


The original recipe called for no spices, but banana bread must have cinnamon! If you are not a cinnamon fan, feel free to remove it and the nutmeg. Trust me though, you'll want to leave it in. It makes this banana bread that much better. YUM!